Wharton's classrooms are equipped with a wide range of technologies to support various teaching needs. If you don't find the option you're looking for, let us know.
The Classroom Setup

Walking into all classrooms you'll see two displays on top of the classroom lectern: the Preview Monitor and the Room Control Panel. In tiered classrooms you'll see the Confidence Monitor on the floor.
Each monitor serves a particular purpose:
- The Preview Monitor is attached to the classroom computer. Logging into this computer starts the Classroom System, and you can then present from the classroom computer if you like.
- The Preview Monitor can be tapped to change the size of selected displays to show one or two image previews.
- The classroom computer is running Windows 11.
- The Room Control Panel (RCP) is a touch panel used to control the physical elements of the Classroom System. You'll use this panel to choose where your content is being displayed, arrange the position of the screens, and more.
- The Confidence Monitor lets you see important information as you teach. You can set this monitor up to display whatever you're projecting in front of the class (the default), see your presentation notes, and many more options. Tiered classrooms are all equipped with Confidence Monitors.
Starting the System
To start the classroom system:
- Tap the Preview Monitor on the lectern, tap the Room Control Panel to Touch to Begin, or press any key on the keyboard.
- Log into the classroom computer using your PennKey credentials (all PennKey credentials should work, regardless of Wharton/school affiliation).
Once you're logged in, the Preview Monitor will display a familiar Windows desktop. The Room Control Panel (RCP) displays the Classroom Interface, where you can control the physical classroom environment.
Using Guest Mode
If you don't have a PennKey login, tap the Guest Access button on the Room Control Panel to access the Classroom Interface.
Using the Classroom Interface
Once activated, either by logging into the classroom computer or using Guest Access, the Room Control Panel (RCP) displays a default classroom layout:
- Sources (things you want to display from) on the left of the RCP.
- Displays (things you want to display on) on the right.
- Volume at the far right.
- Basic controls at the bottom.

To select a Source and Display on the RCP:
- Choose the Source. Tap the appropriate Source button on the left side of the RCP:
- PC Main - Displays whatever is showing on the classroom computer's main display (the Preview Monitor).
- PC Extended - Select this source to show the contents of the extended display (classroom computers are all set up to use an Extended Display) .
- Laptop/Wireless - Use this option to either:
- Connect a device to the HDMI cable at the lectern to display that device on the Display you pick in the next step.
- Allow people in the classroom to share their devices wirelessly using AirServer. Instructions to connect will be shown on the Display you pick in the next step.
NOTE: You cannot use both the Wireless and Laptop (HDMI) at the same time.
- Wall Plate Rear - Each classroom includes a rear wall plate that allows you to hook up a device for presenting. If you're using that plate, press the Wall Plate Rear button.
- None - Audio and video will be cleared from the projector and speakers and nothing will be displayed.
- Choose the Display. Once you have selected a Source, tap one of the Displays section buttons to tell the system where to display that source:
- Sides - The left and right screens will lower and display the selected source; the center whiteboard is available in this setup.
- Center - The center screen is lowered and displays the selected source.
- All - All screens are lowered and display the selected source.
- Whiteboards - All the screens are raised and no video is displayed. This is a quick way to write on the whiteboards.
The selected screens will lower and the projectors will turn on as soon as you tap your desired Displays button. To display more than one source at a time, see Advanced Options.
Advanced Options
The Advanced Options allow you to send a mixture of sources to a variety of displays. For example, you could display the PC Main (aka the classroom computer) on the left screen in the front of the class and use the right screen to display Wireless. This would allow students in the room to display their content onto the right screen while you use the left.
To access Advanced Options and route the displays:
- Tap the Advanced toggle at the lower left of the Room Control Panel (RCP).

- The Advanced Options are now displayed on the RCP. You'll notice that all available Displays are on top and all available Sources are in the gray bar below. Swipe on the bar to scroll through the Sources.

- Tap the Source you want to display. In our above example we'd tap on Wireless.
- Tap the source Display you want; continuing the example we'd tap on Stage Left.
- Repeat until all your desired sources are displayed.


The Sources are sent to the displays as you tap.
Recording
Check the status of a recording from the Room Control Panel (RCP):
- Tap on the ellipsis button (...) at the bottom of the RCP.
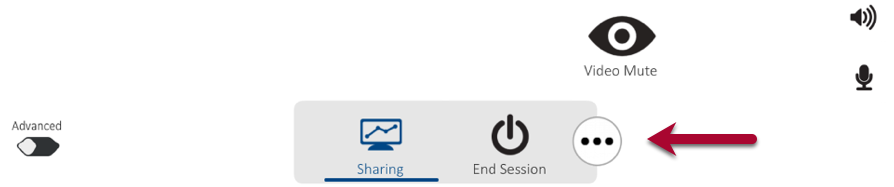
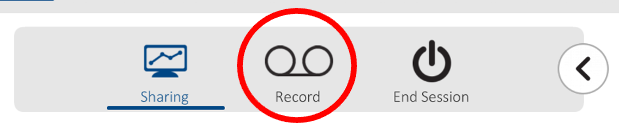
- Tap on the Record button that is now displayed.
- The length of the recording, and when the next is scheduled to begin are shown.
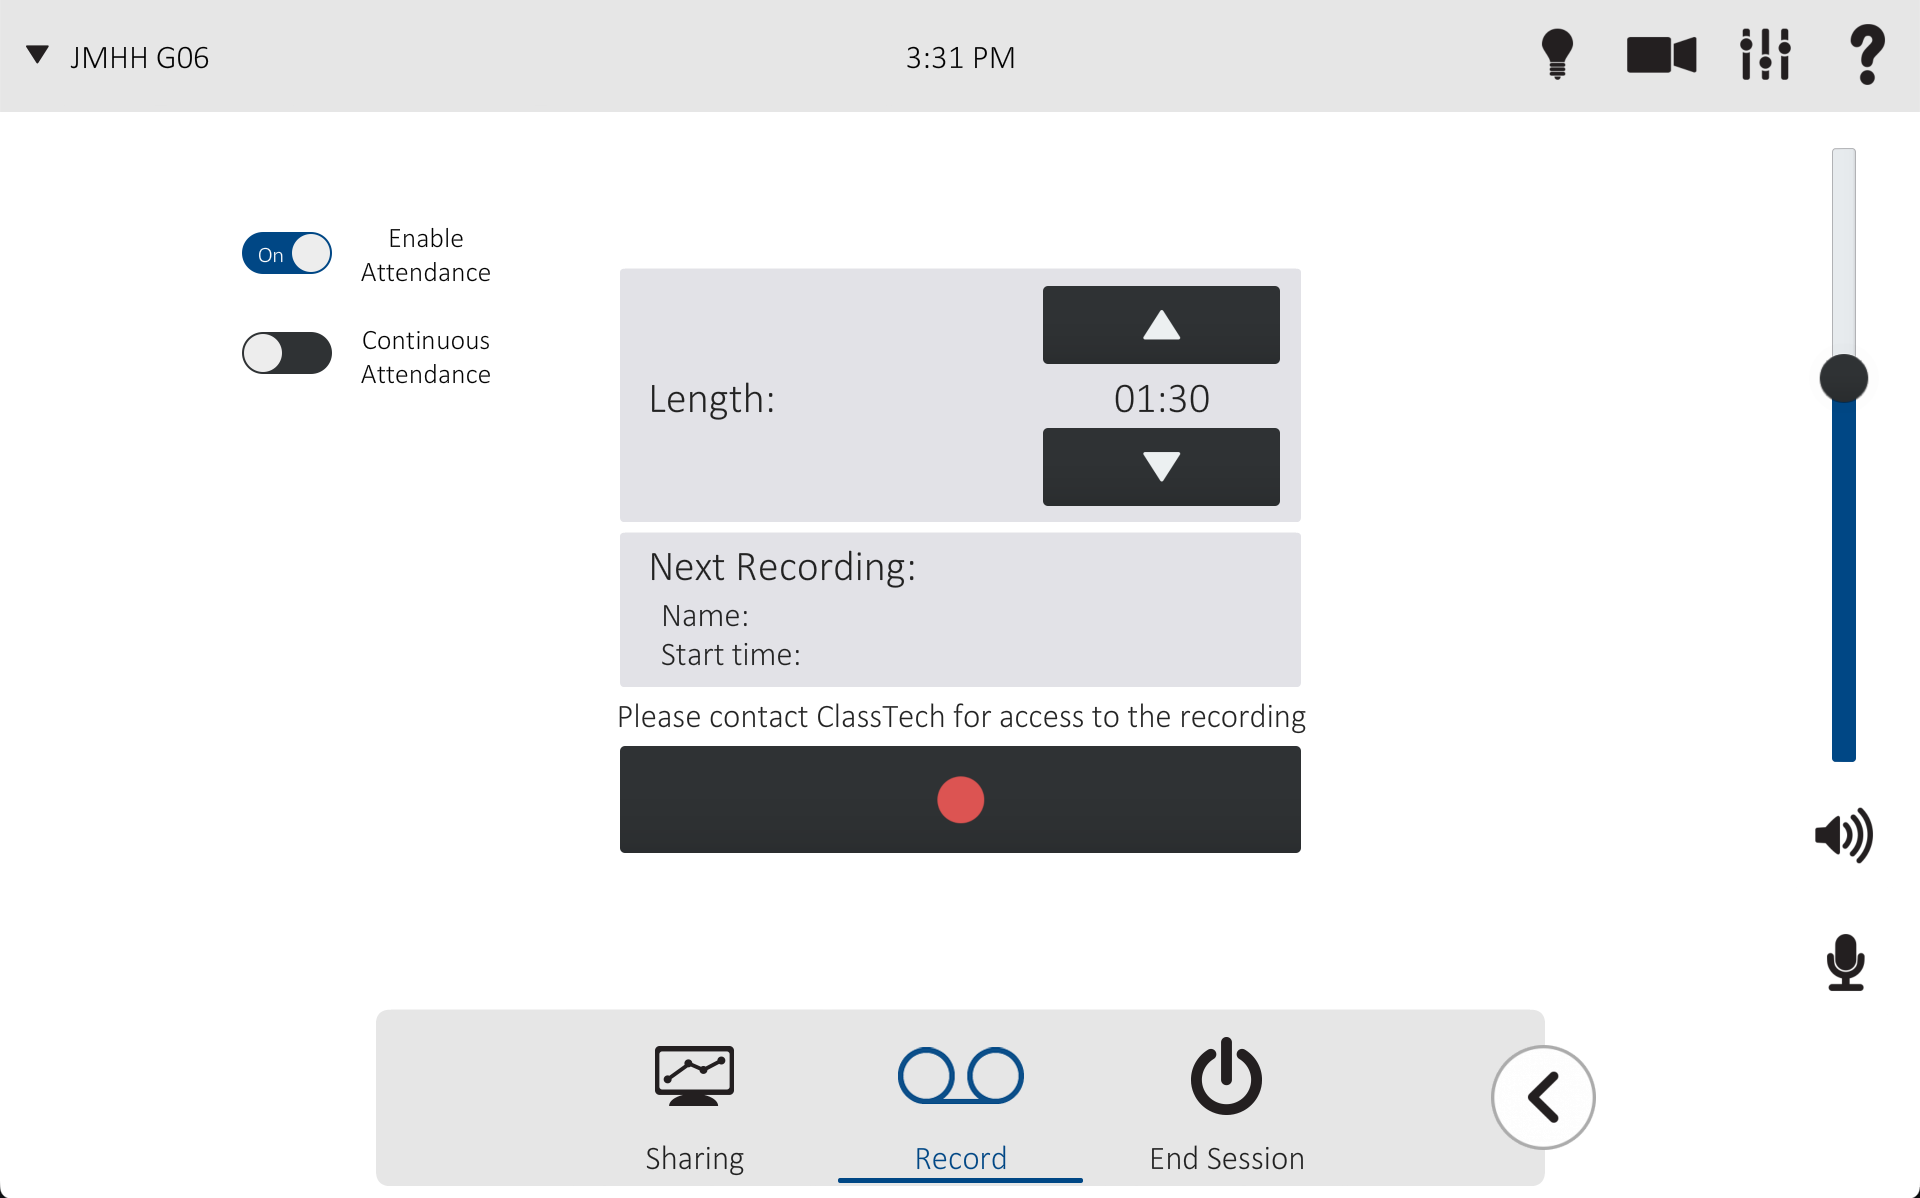
- To be sure that your recording is working properly, confirm that you can see the red recording line:


You can also initiate a recording from this screen, but you should schedule recordings ahead of time. This allows Wharton Computing to manage the process and permissions in a more timely way. If you aren't able to schedule ahead of time, be sure to alert a classroom technician that you'd like to record, call us from the classroom phone, or let us know after your session has ended to help us get your recording to you.
Location Validation
Location validation is a feature that adds an automated camera sweep of the seats in the classroom. This feature is enabled by default on first login.

When Location Validation is enabled, 15 minutes into the recording the system will switch the image on the recording to each camera (rear, then left, then right) and hold for 10 seconds. After the sweep is complete it will revert to the last camera angle, typically the view from the back of the classroom on the instructor.
There are two modes for Location Validation:
- Enable Attendance: This feature turns the Location Validation feature ON and will add the camera sweep to the recording 15 minutes after the start of the recording/after the start of class.
- Continuous Attendance: When enabled, this will add the camera sweep every 15 minutes for the entire recording. Note: Enable Attendance must be toggled on to use this feature.

Adjusting the camera
Each classroom has cameras that move to a default position when a recording starts. You can change the position of the cameras, if you like, using the Room Control Panel (RCP).
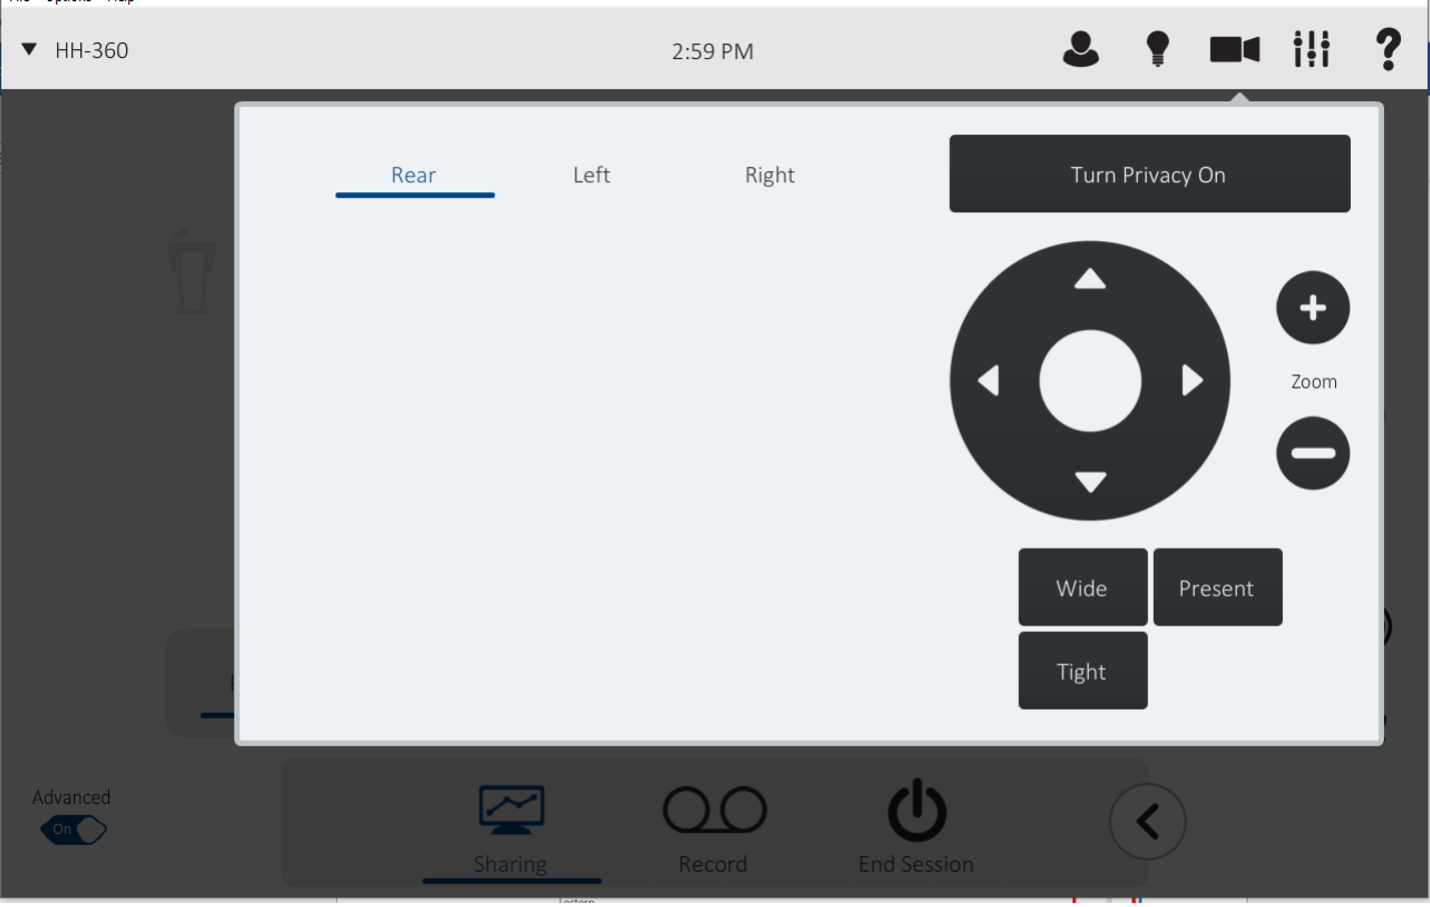
- Once you have access to the Room Control Panel, tap the camera icon on the upper right hand corner of the RCP.

- Camera controls appear on the RCP, and a camera preview displays on the preview monitor (not populated in the screenshot below, but it will show a preview of what the selected camera sees).
 Each camera in the room can be adjusted individually.
- At the top of the camera controls is a list of the available cameras in the room (Rear, Left, and Right in the screenshot above). Tap on the name to switch the preview and control to each camera individually.
- Tap on the directional wheel to change the camera position.
- You can adjust the zoom manually by tapping the + or - buttons, or tap on the Wide, Present, and Tight buttons to cycle through those available zoom presets.


Audio Controls
Volume and microphone mute for the entire classroom can be controlled from the Room Control Panel (RCP). On the right side of the screen you'll find the volume slider (1) and the mute button for the microphones (2).
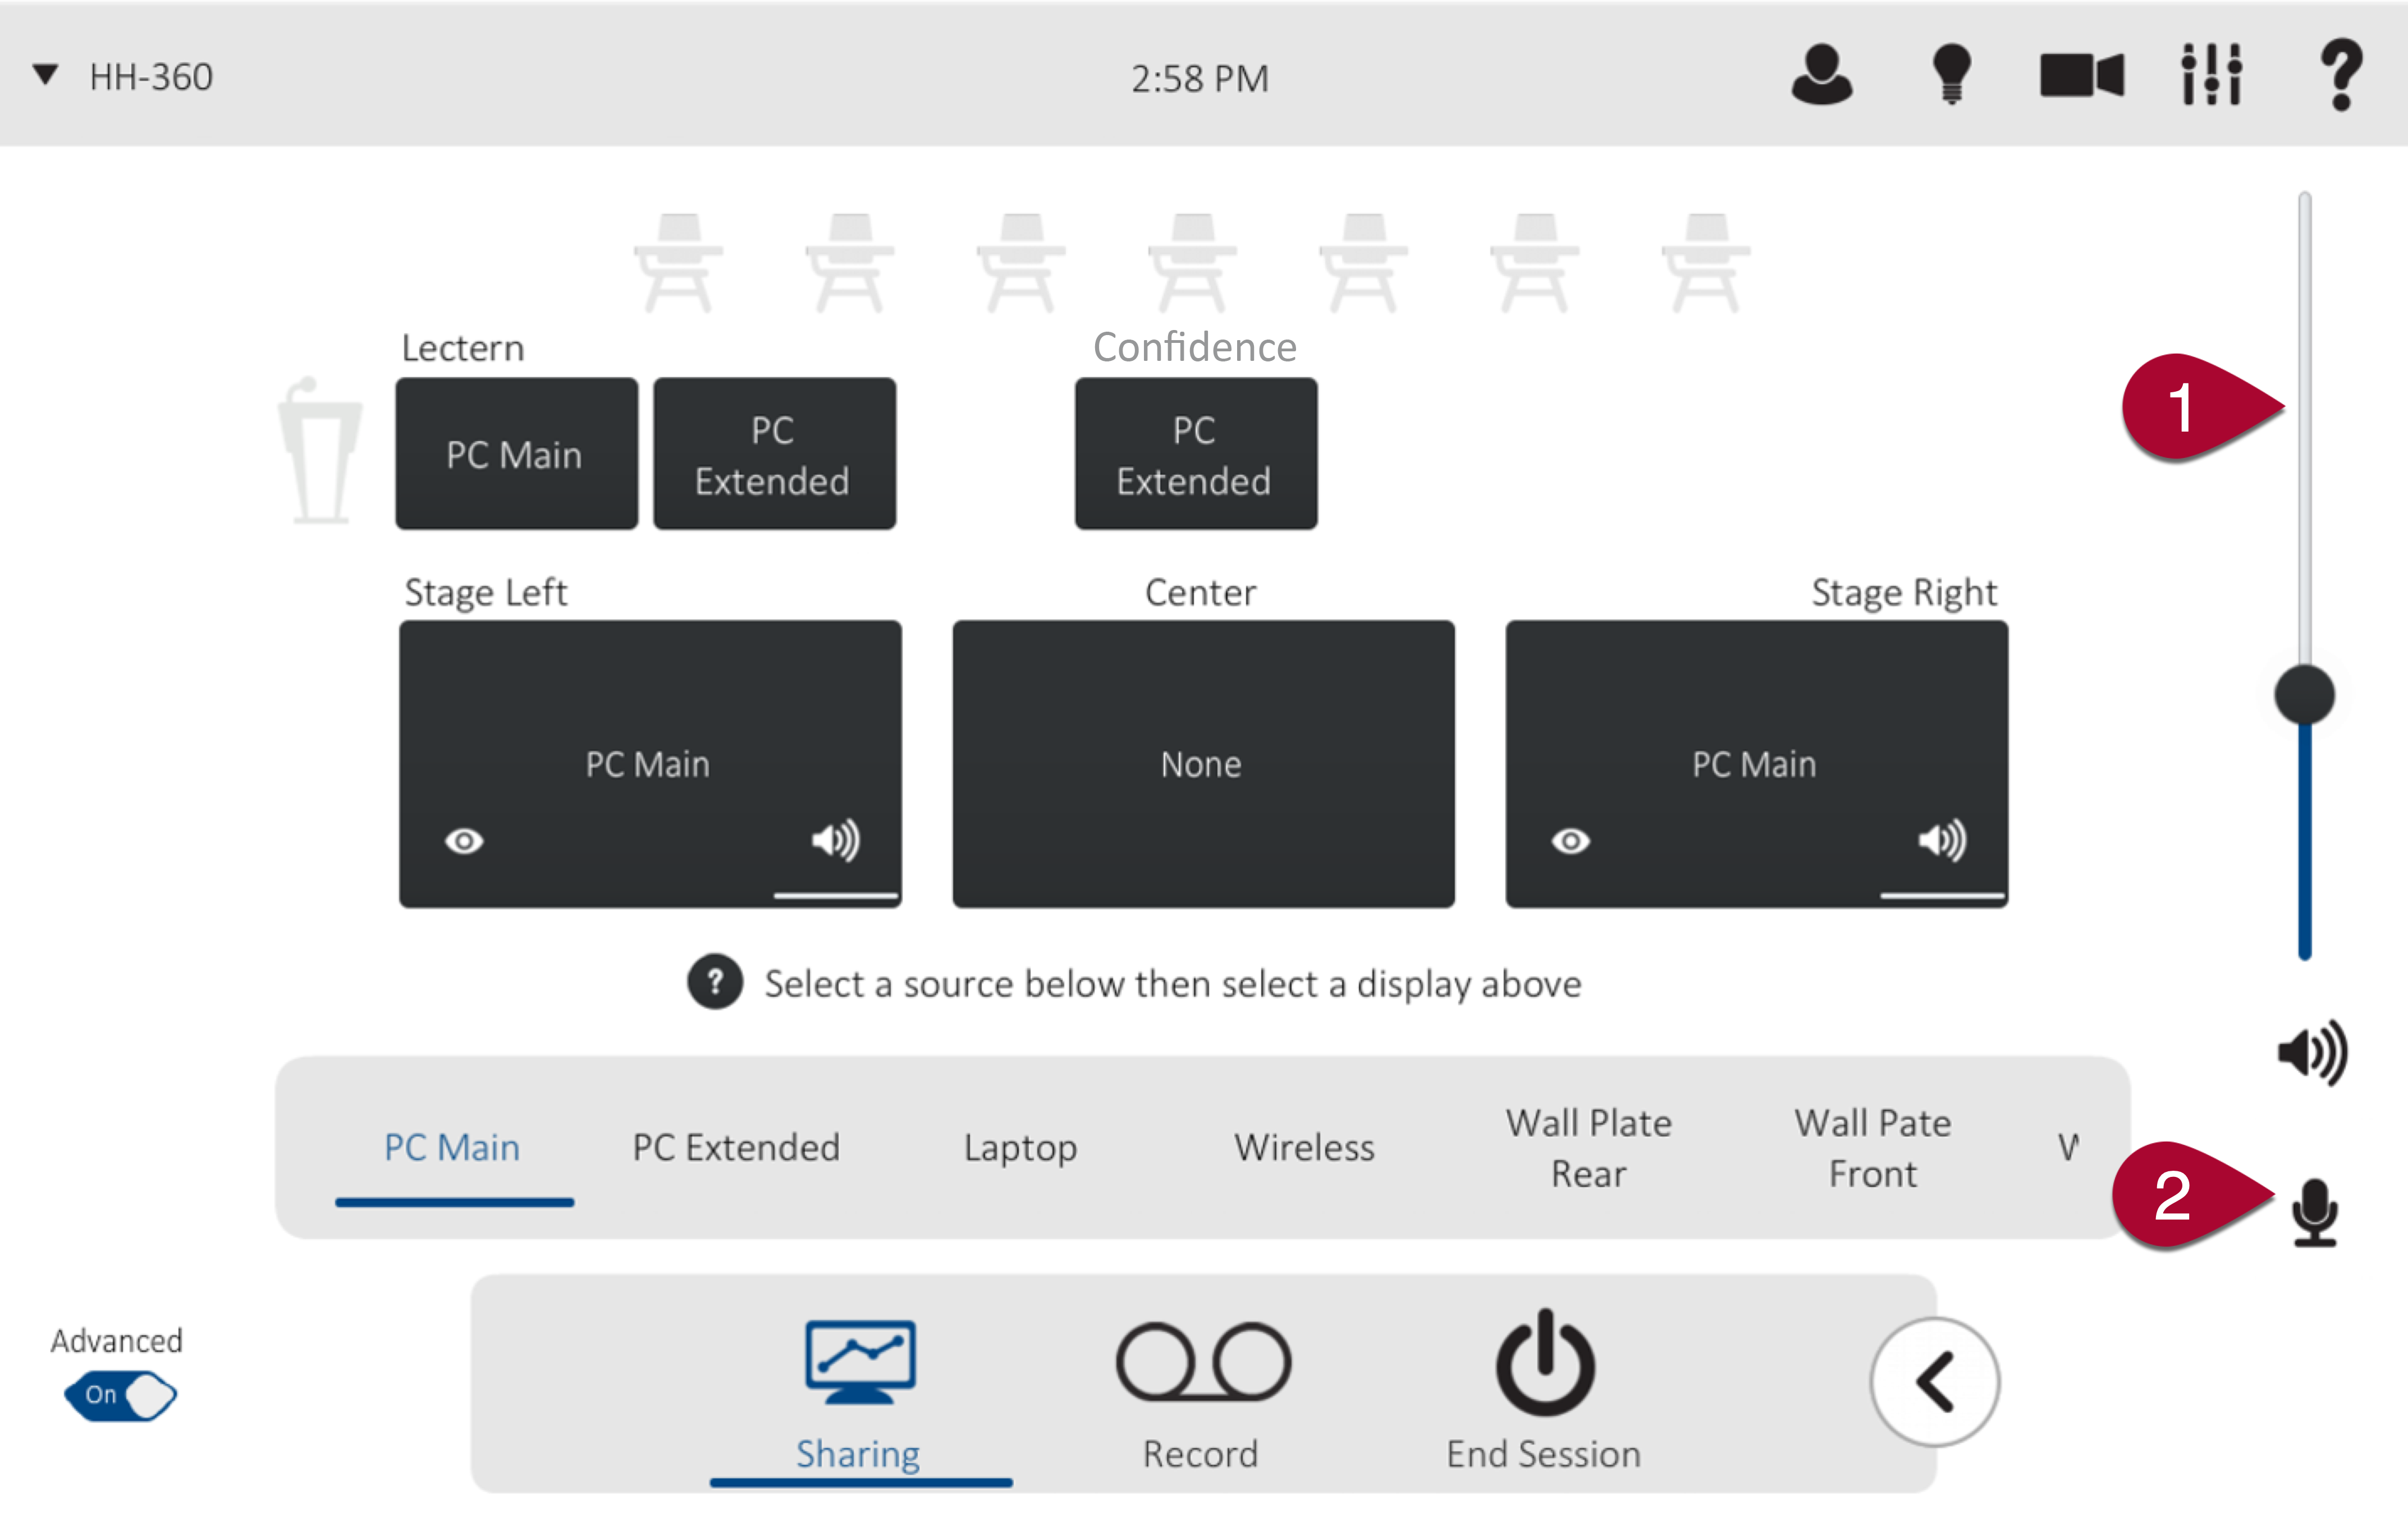
- Volume - Slide the volume slider up to increase the level of audio in the classroom, and down to lower.
- Microphone mute - Tap to mute the microphones in the room so that the remote audience can't hear you, though the mics will still be audible in the room.
Detailed Audio Controls
The volume slider on the main screen of the Classroom interface controls all of the volume levels in the room at once. To adjust individual microphone levels:
- Tap the audio controls button in the upper right corner:

- Move the slider up or down to adjust the volume individually:
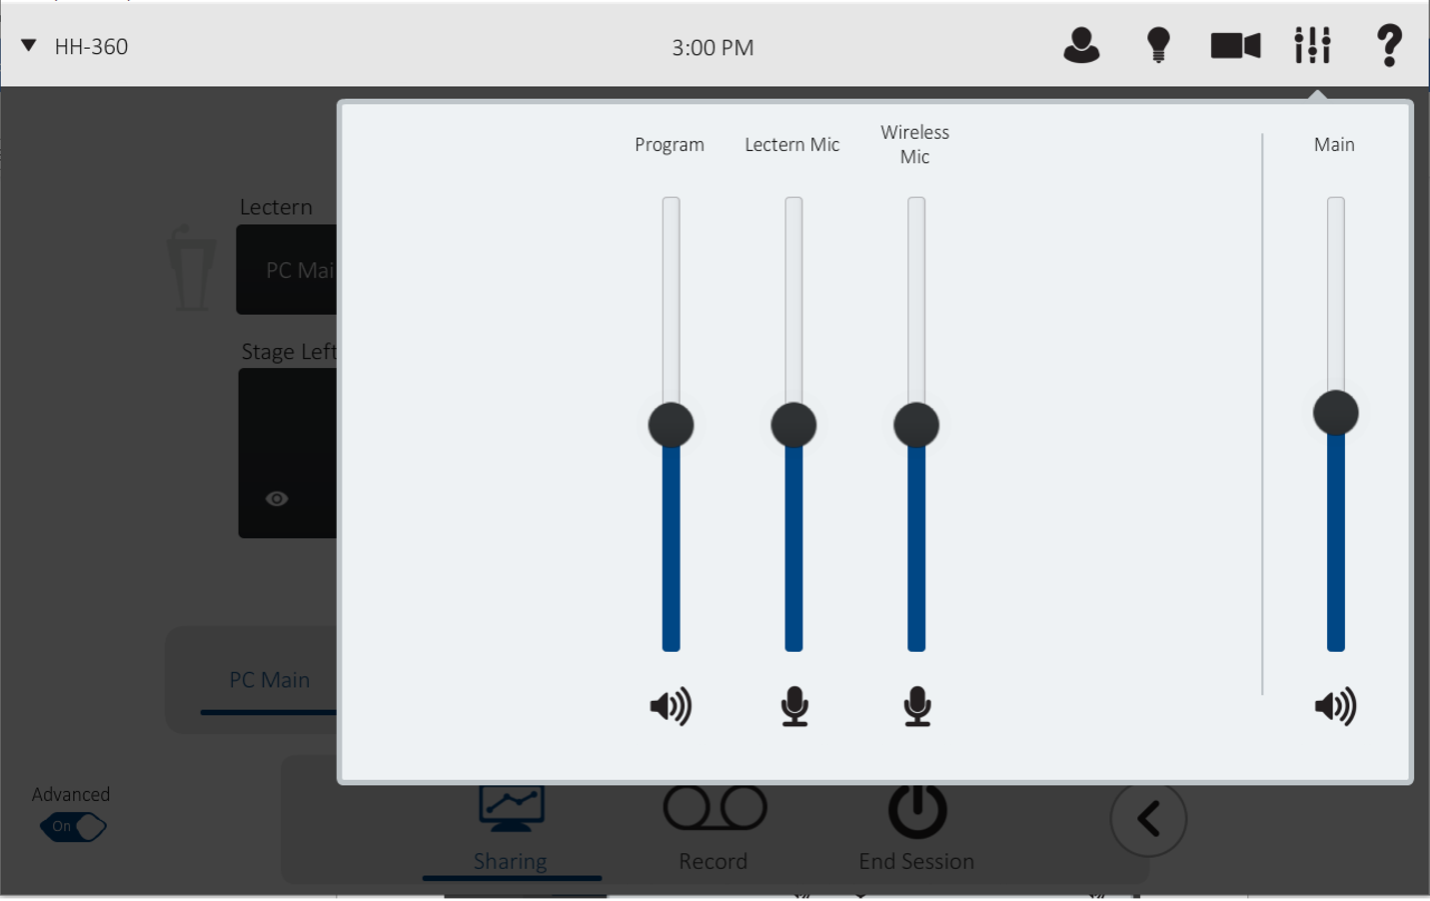
- Main controls the overall audio in the classroom.
- Program controls the classroom PC audio.
- Lectern Mic controls the lectern mic audio.
- Wireless Mic controls the wireless mic audio.


Privacy Mode
Privacy Mode turns off all the cameras and microphones in the classroom.
Note that with Privacy Mode turned on:
- Default Recordings continue, but no audio is recorded and the cameras are turned to the wall.
- Scheduled recordings will not start as long as Privacy Mode is on in the classroom.
To turn Privacy Mode on/off:
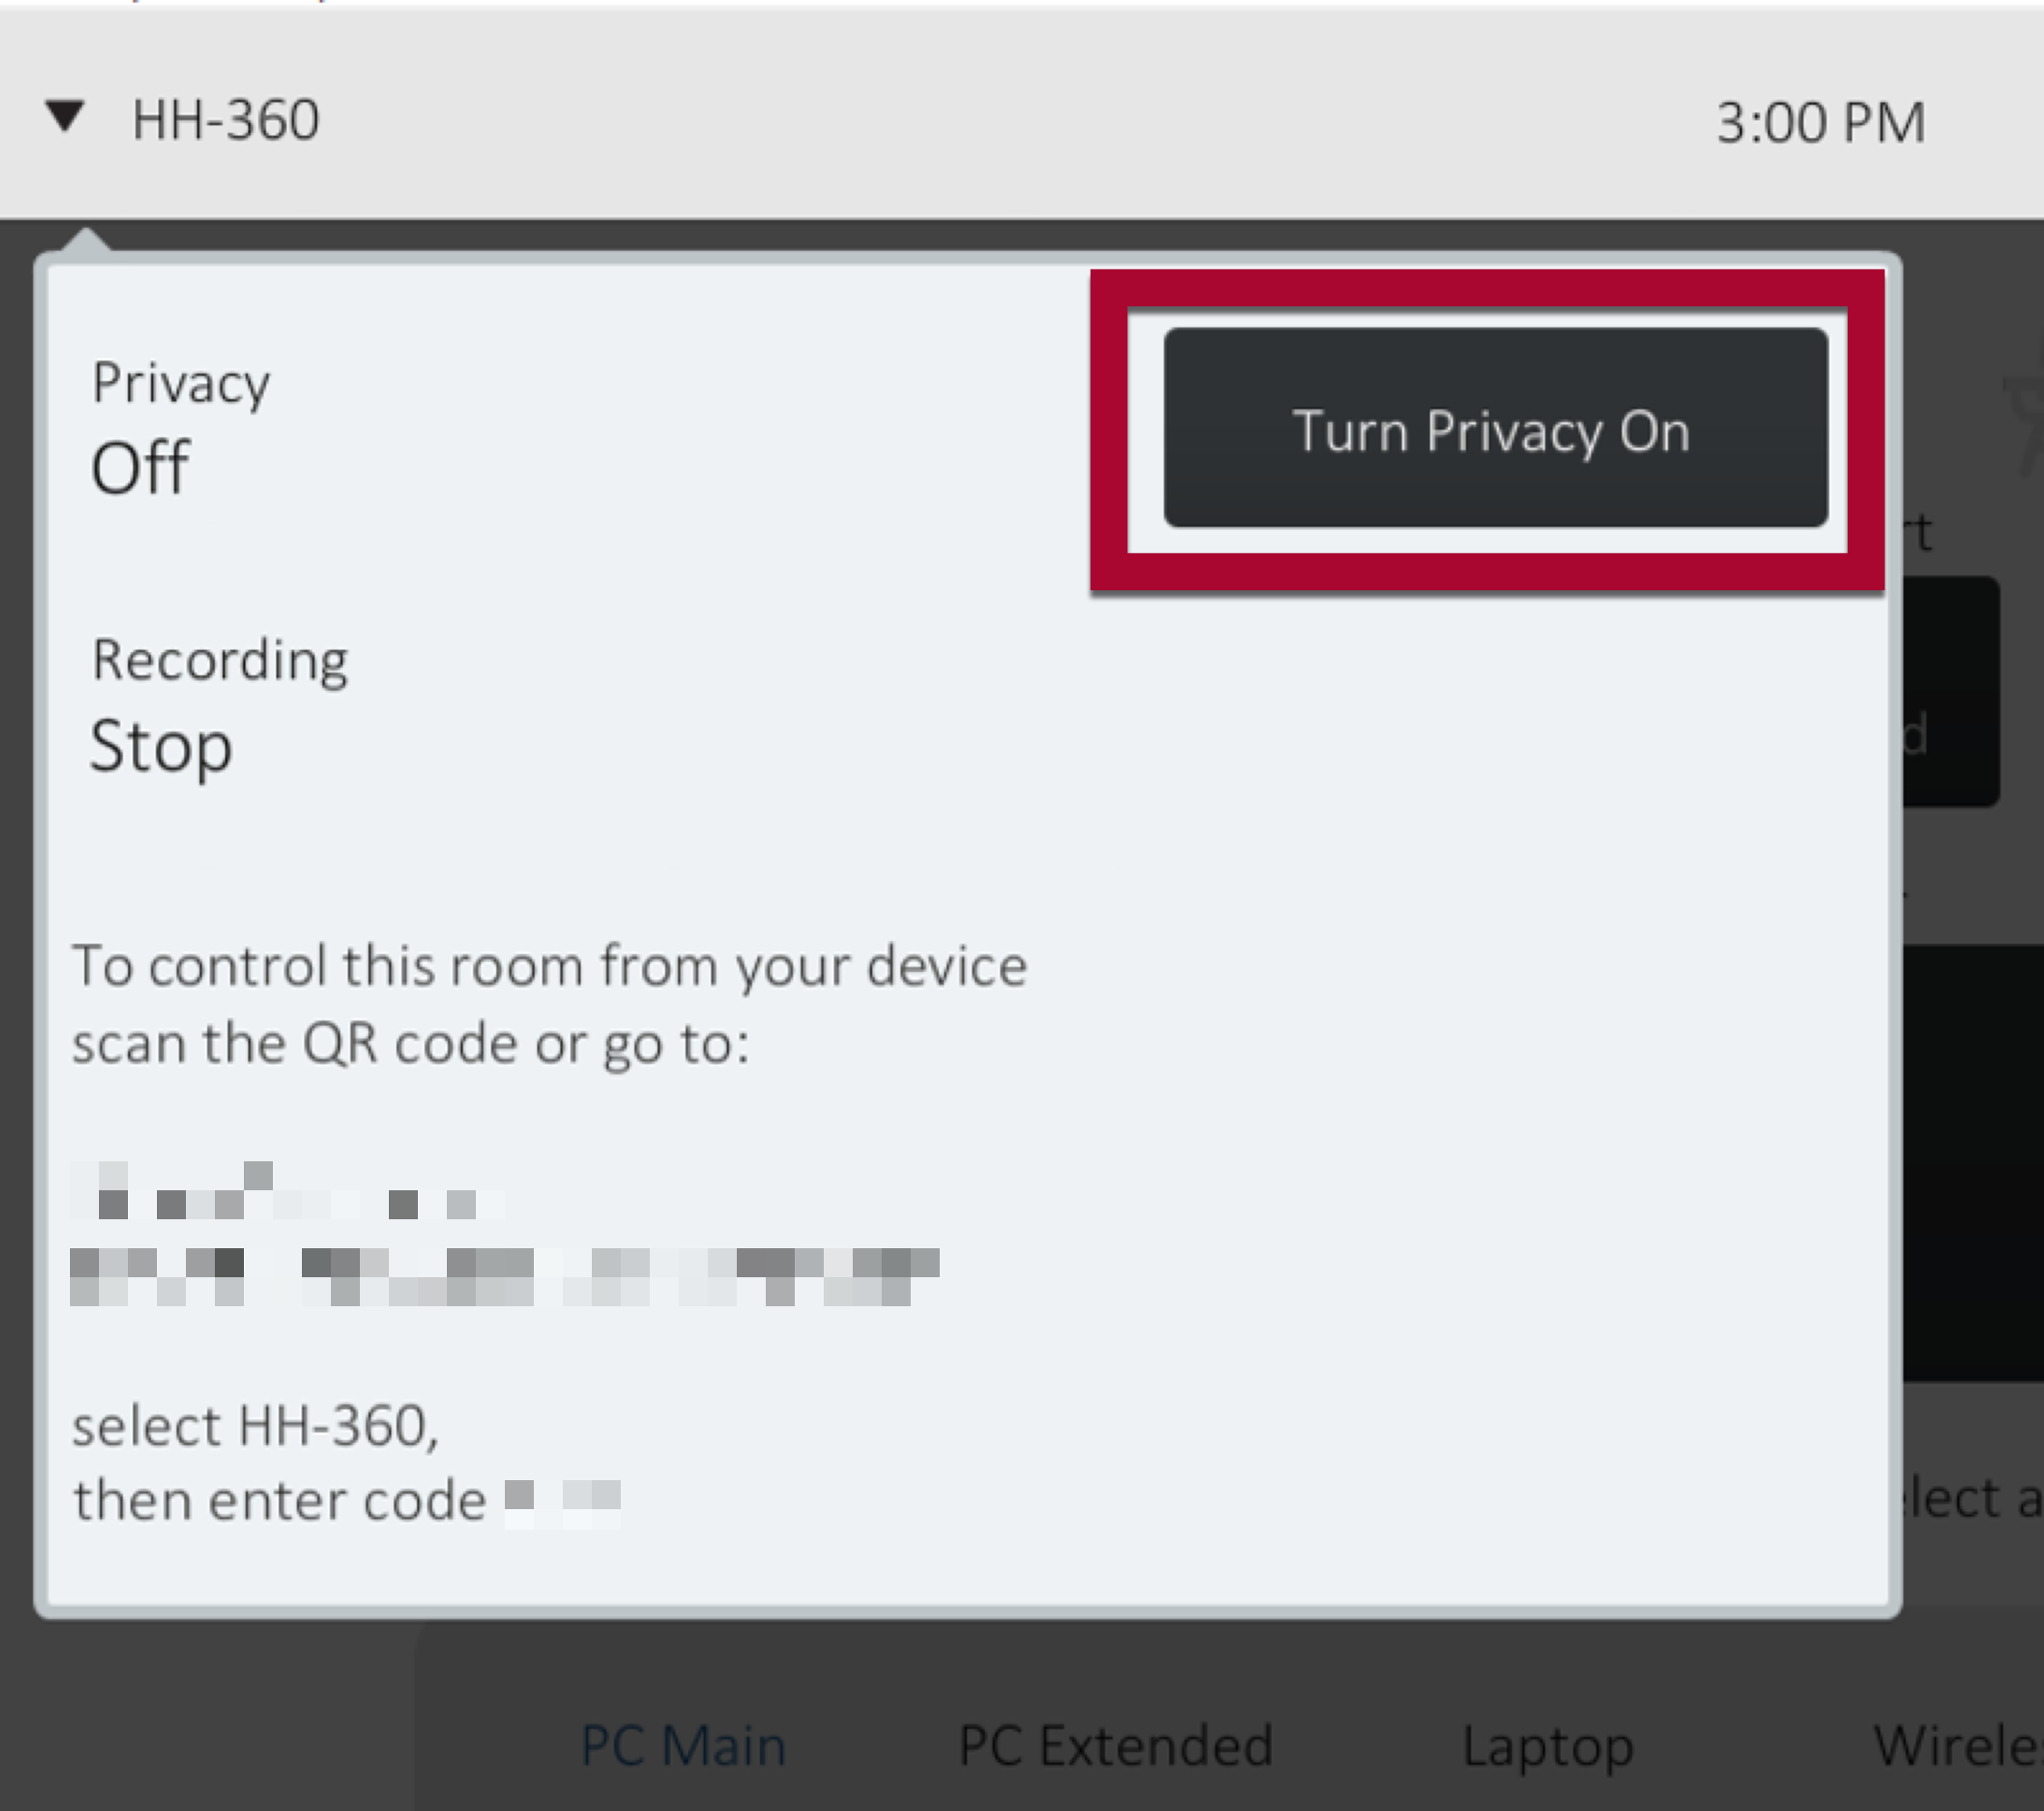
- Tap the room number in the top left corner of the Room Control Panel (RCP).

- Tap the Turn Privacy On button.
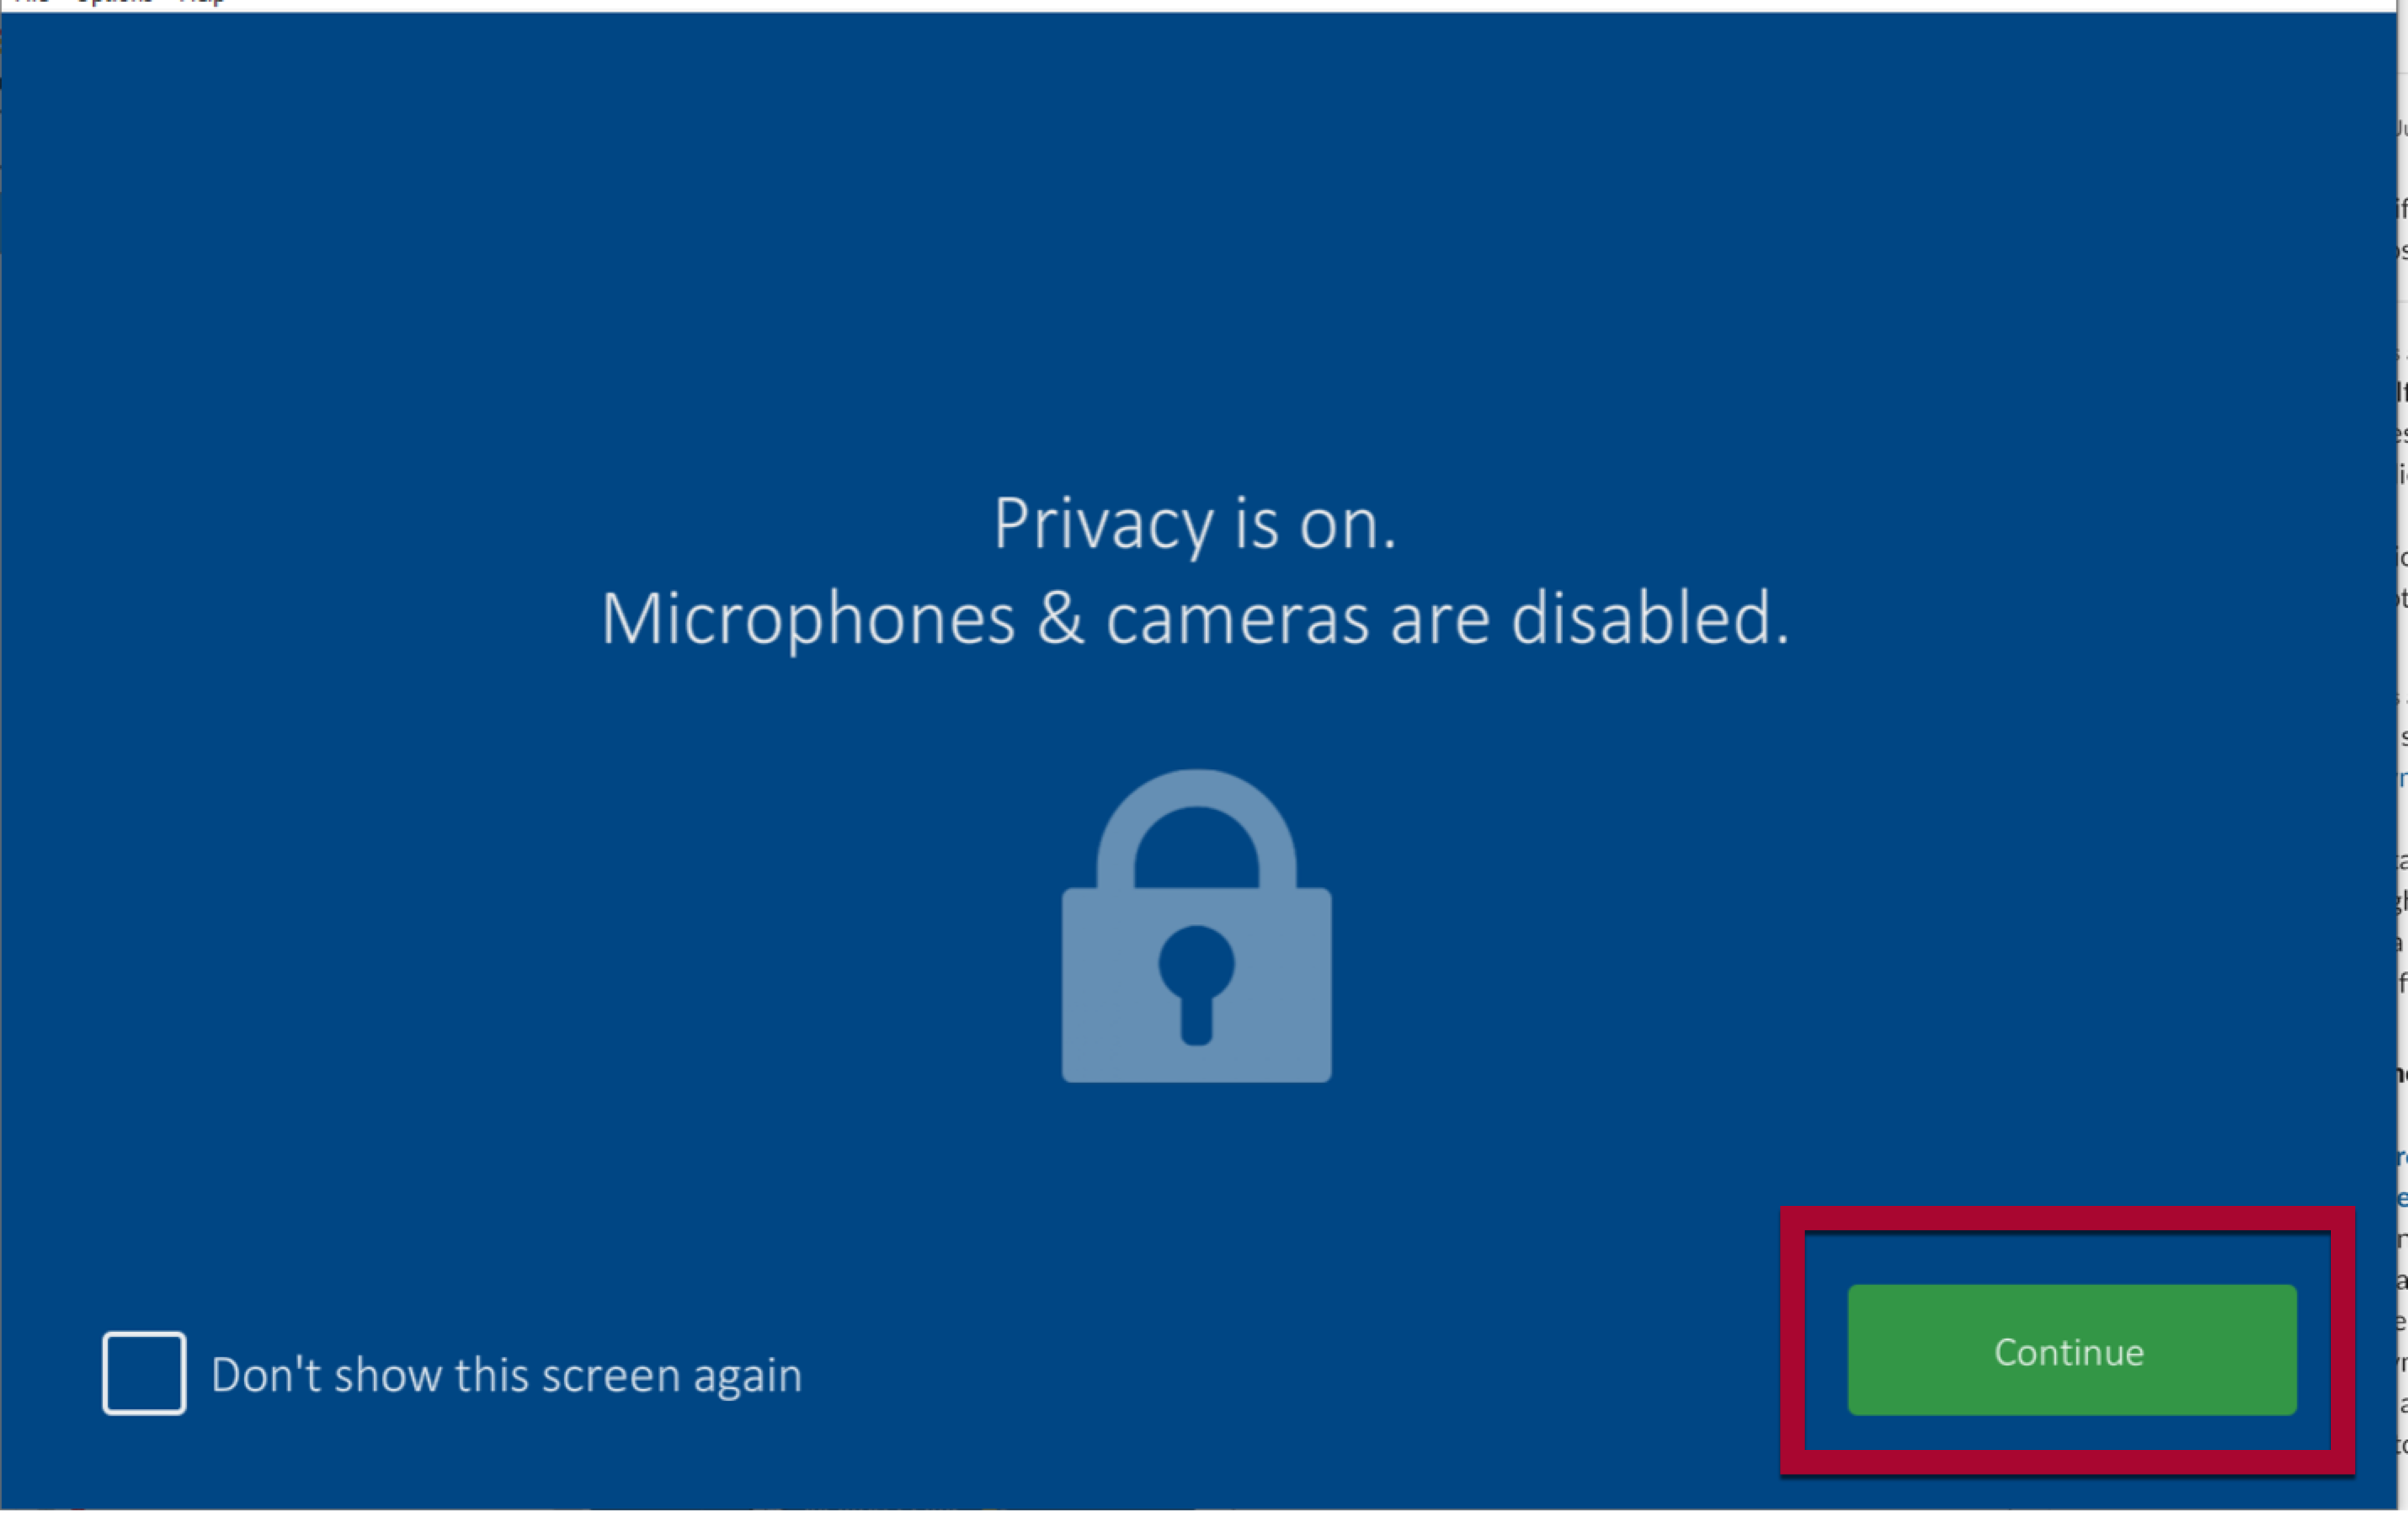
- A full-screen notice that Privacy Mode has been turned on is displayed. Tap the green Continue button to return to the Classroom Interface (you can also check Don't show this screen again if you'll be using Privacy Mode often).
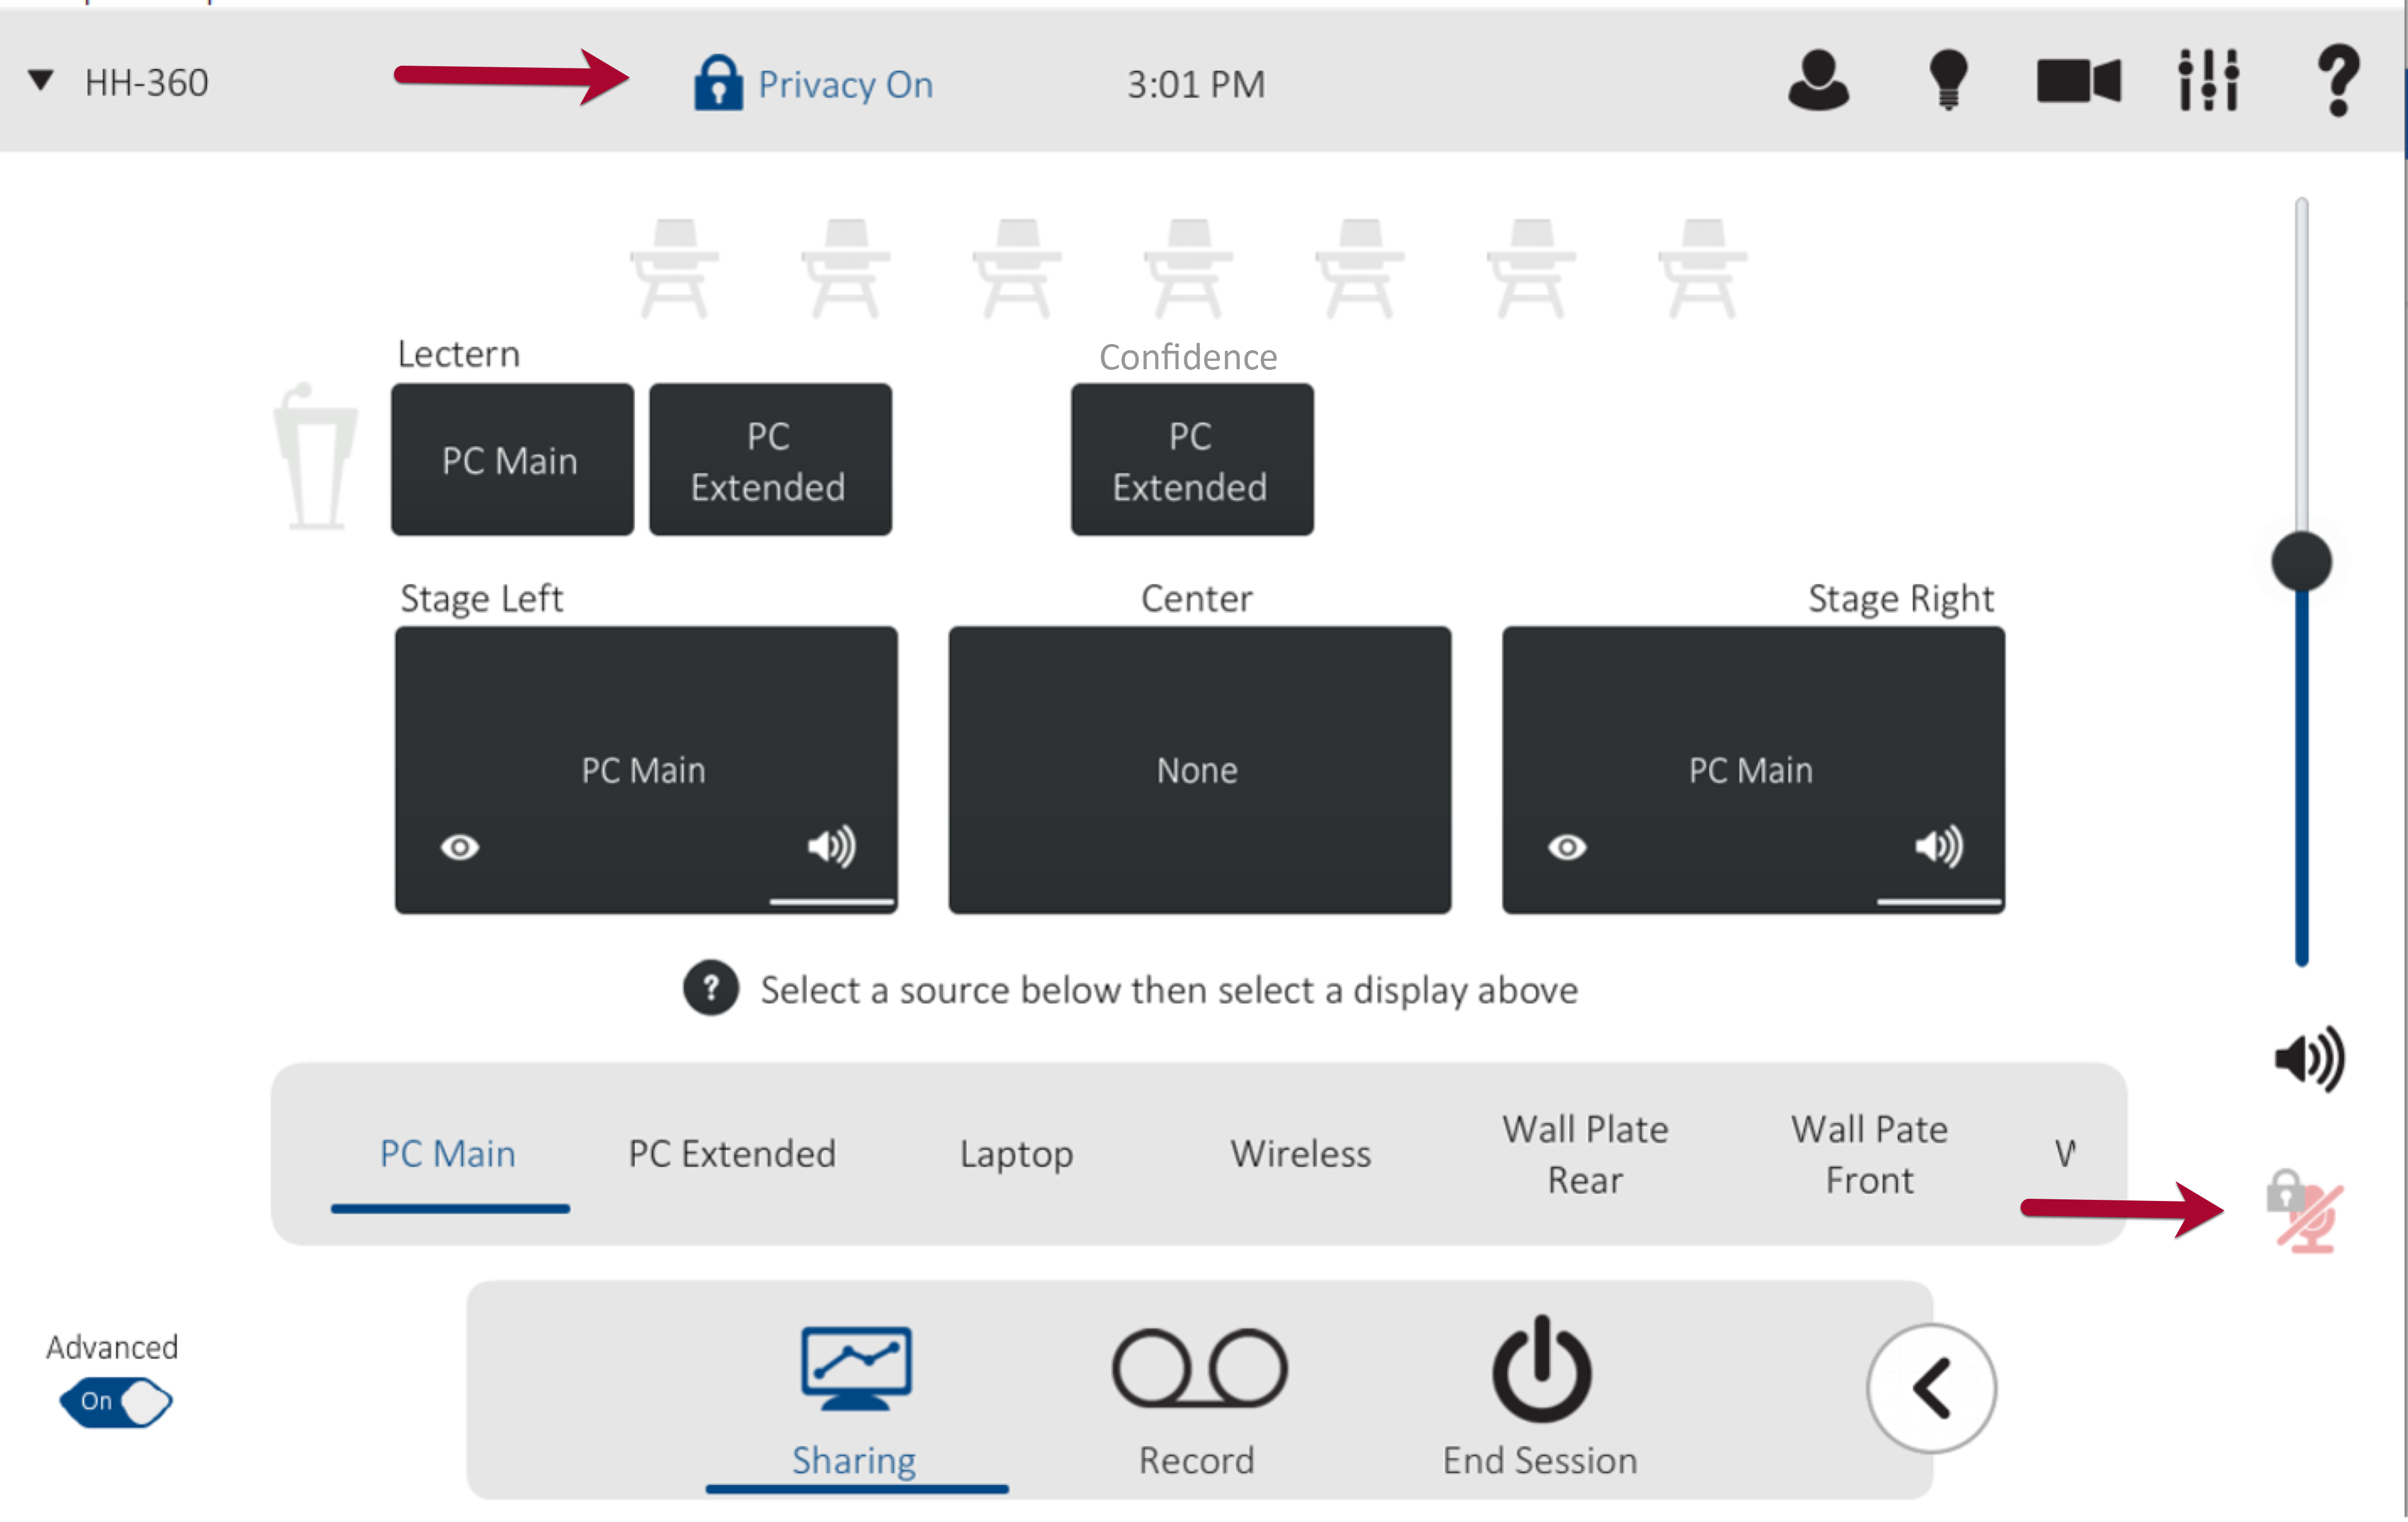
- Privacy Mode is now on for this room. A notice appears on the RCP's toolbar, the microphones are muted, and control is locked from the interface.


To turn Privacy mode off, either:
- Tap the Privacy On notification in the RCP toolbar, OR
- Tap the Room number in the upper left corner of the screen and then tap the Privacy Off button.
Questions?
The Classroom Technology team is available for assistance with all technology features upon request. If you are having an issue with classroom technology, please call (215) 573-0402.