Instruction Center is Wharton's application for faculty management of courses and their overall classroom experience. It includes a range of tools to assist with instruction, which are described in greater detail below.
Before You Start
You will need the following before you can use Instruction Center:
- A Valid PennKey
- Access to Instruction Center
- Faculty teaching courses within Wharton: automatically available for each of your sections per term.
- TAs and staff supporting faculty: access automatically granted through Canvas (see below), or on an as-needed basis; contact courseware@wharton.upenn.edu cc:ing the professor.
Instruction Center contains the following tools, accessible from the left navigation bar:
- Home Screen: Summary view displays current courses, sections, and the number of enrolled students for the current term.
- Course Resources: Provides basic information and links for any courses that you are managing.
- Classlists: Displays an active roster of your section's current students, including student details.
- Seating: Manage seat assignments, class participation, and more.
- Participation: Manage participation and related notes for students for each section.
- Grading: Submit and change course final grades. (Separate from Canvas' assignment grading functions.)
- Reports: Access various reports. (Courses, enrollment, grading, etc.)
- Tech Surveys: Provide Wharton Computing with information on your needs for each teaching semester.
There are two ways to access the Instruction Center:
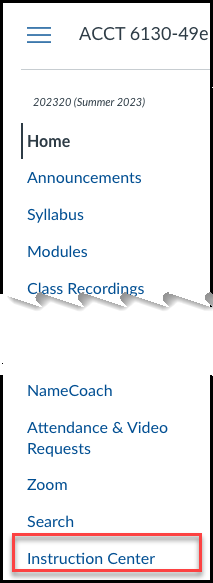
Accessing Instruction Center through Canvas is a separate service. Upon clicking the link in the Canvas sidebar, faculty teaching courses within Wharton will see links to all available permissions for their section in Instruction Center.
For users with the TA role in a Canvas site, users are automatically granted access to the section in Instruction Center upon clicking the sidebar, and will see their permissions reflected in Canvas:

Home Screen
Instruction Center is intuitive, responsive, and works on desktops/laptops, smartphones, or tablets. (Some features and functionality may not be fully available in the mobile-only experience.)
For an overview of the home screen,
When you log into Instruction Center, you will see a summary view showing your current courses, sections, and enrolled students for the current term.
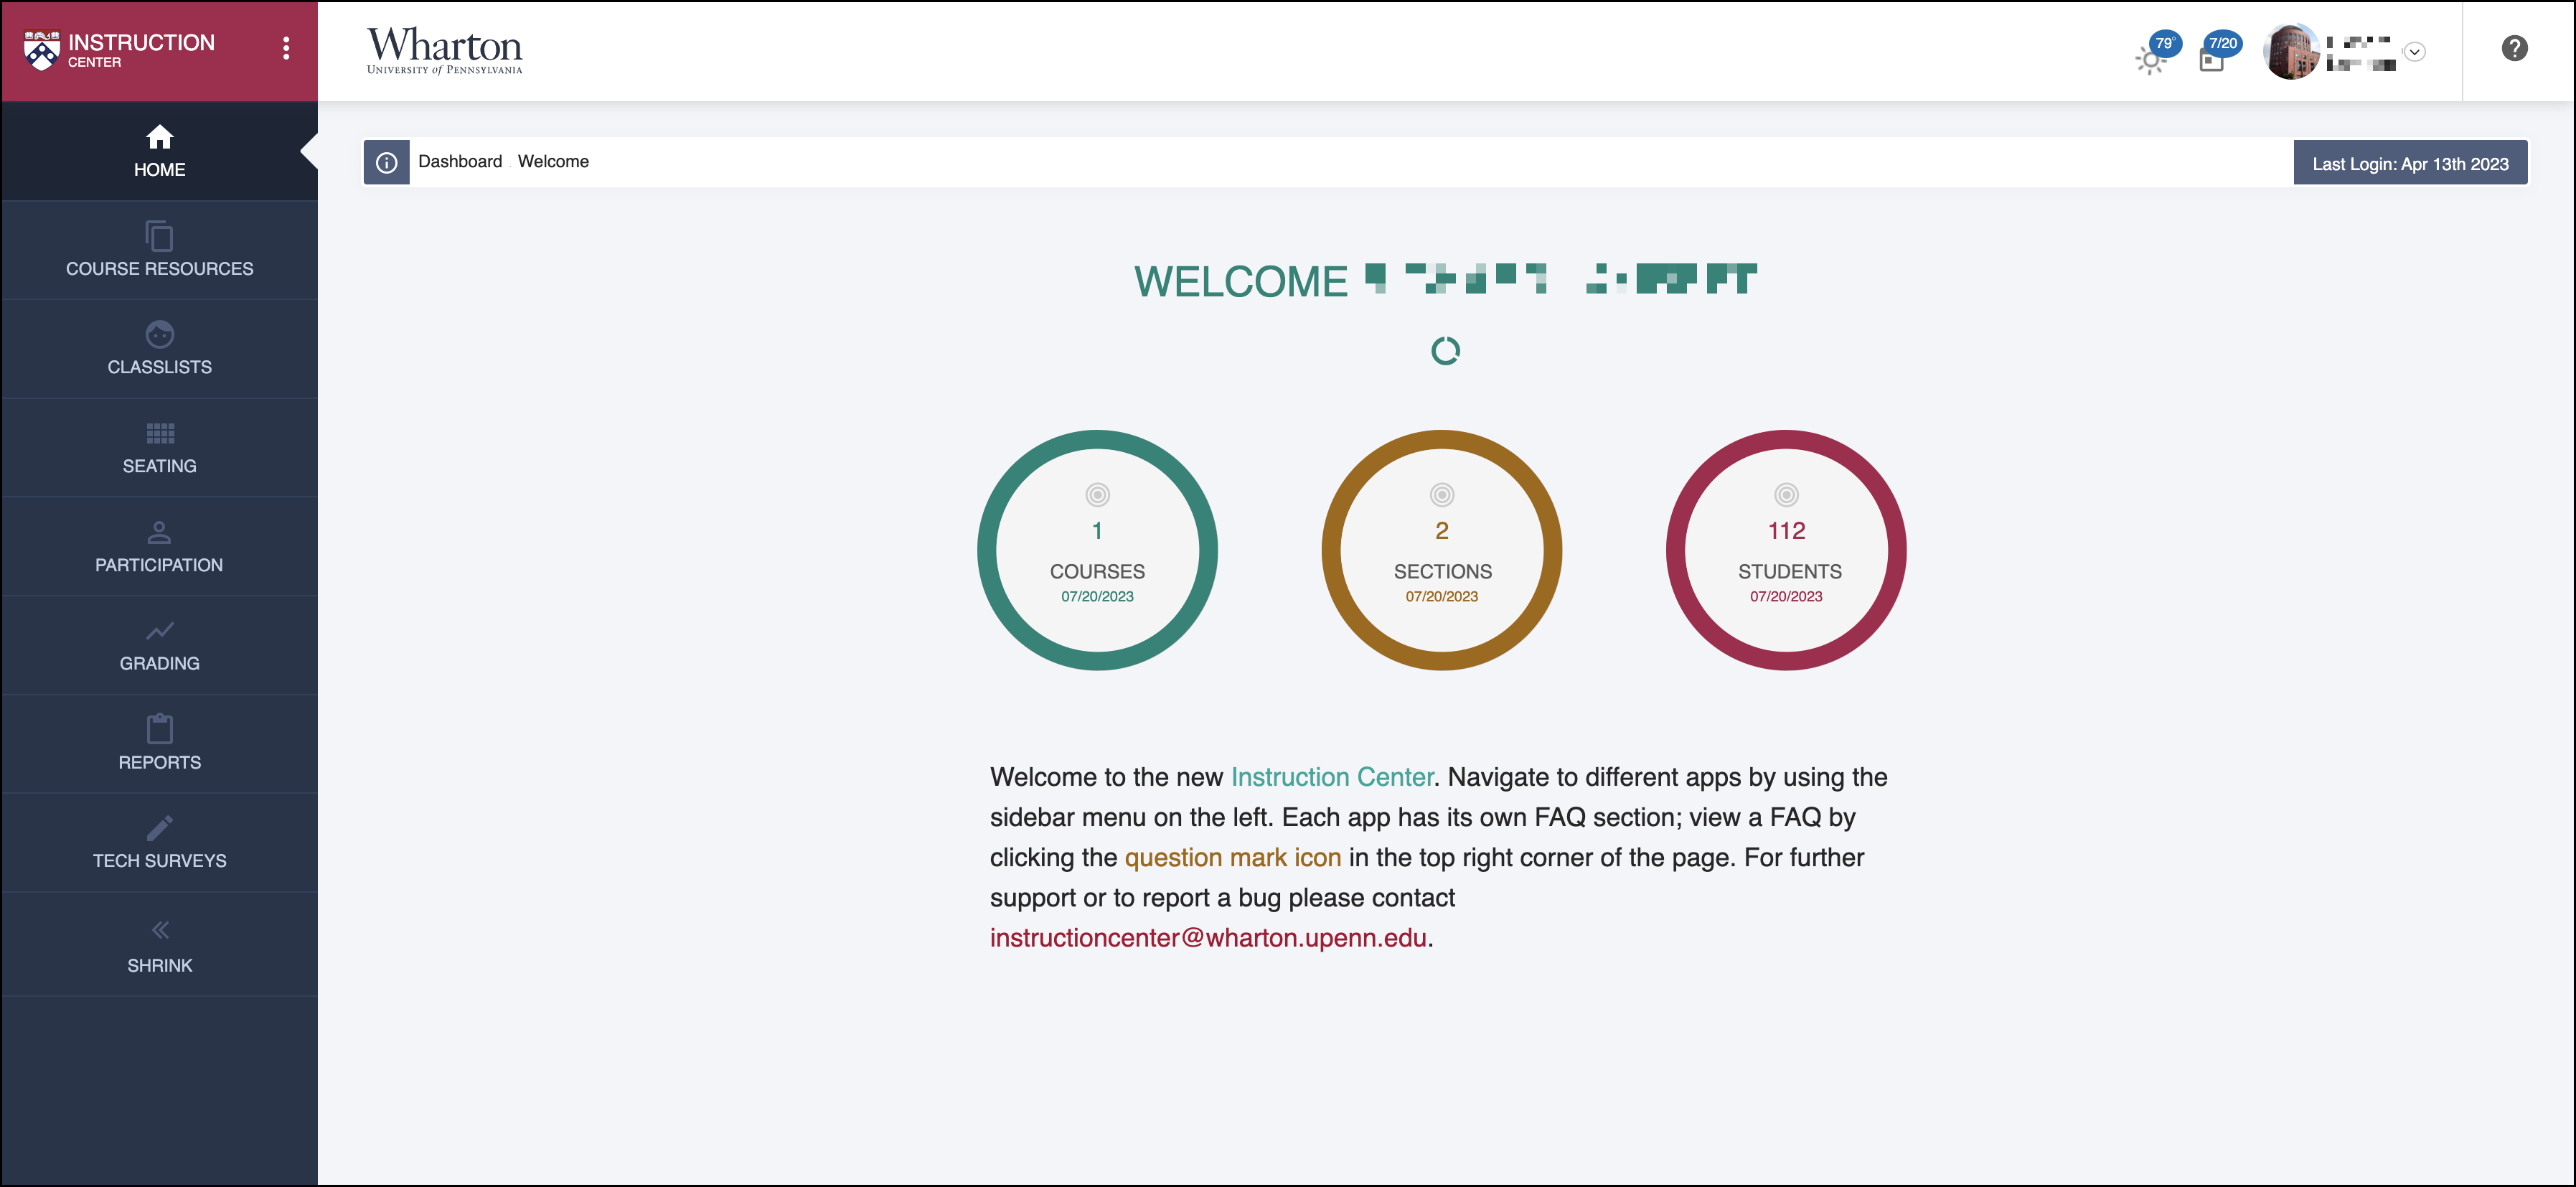 Welcome Screen
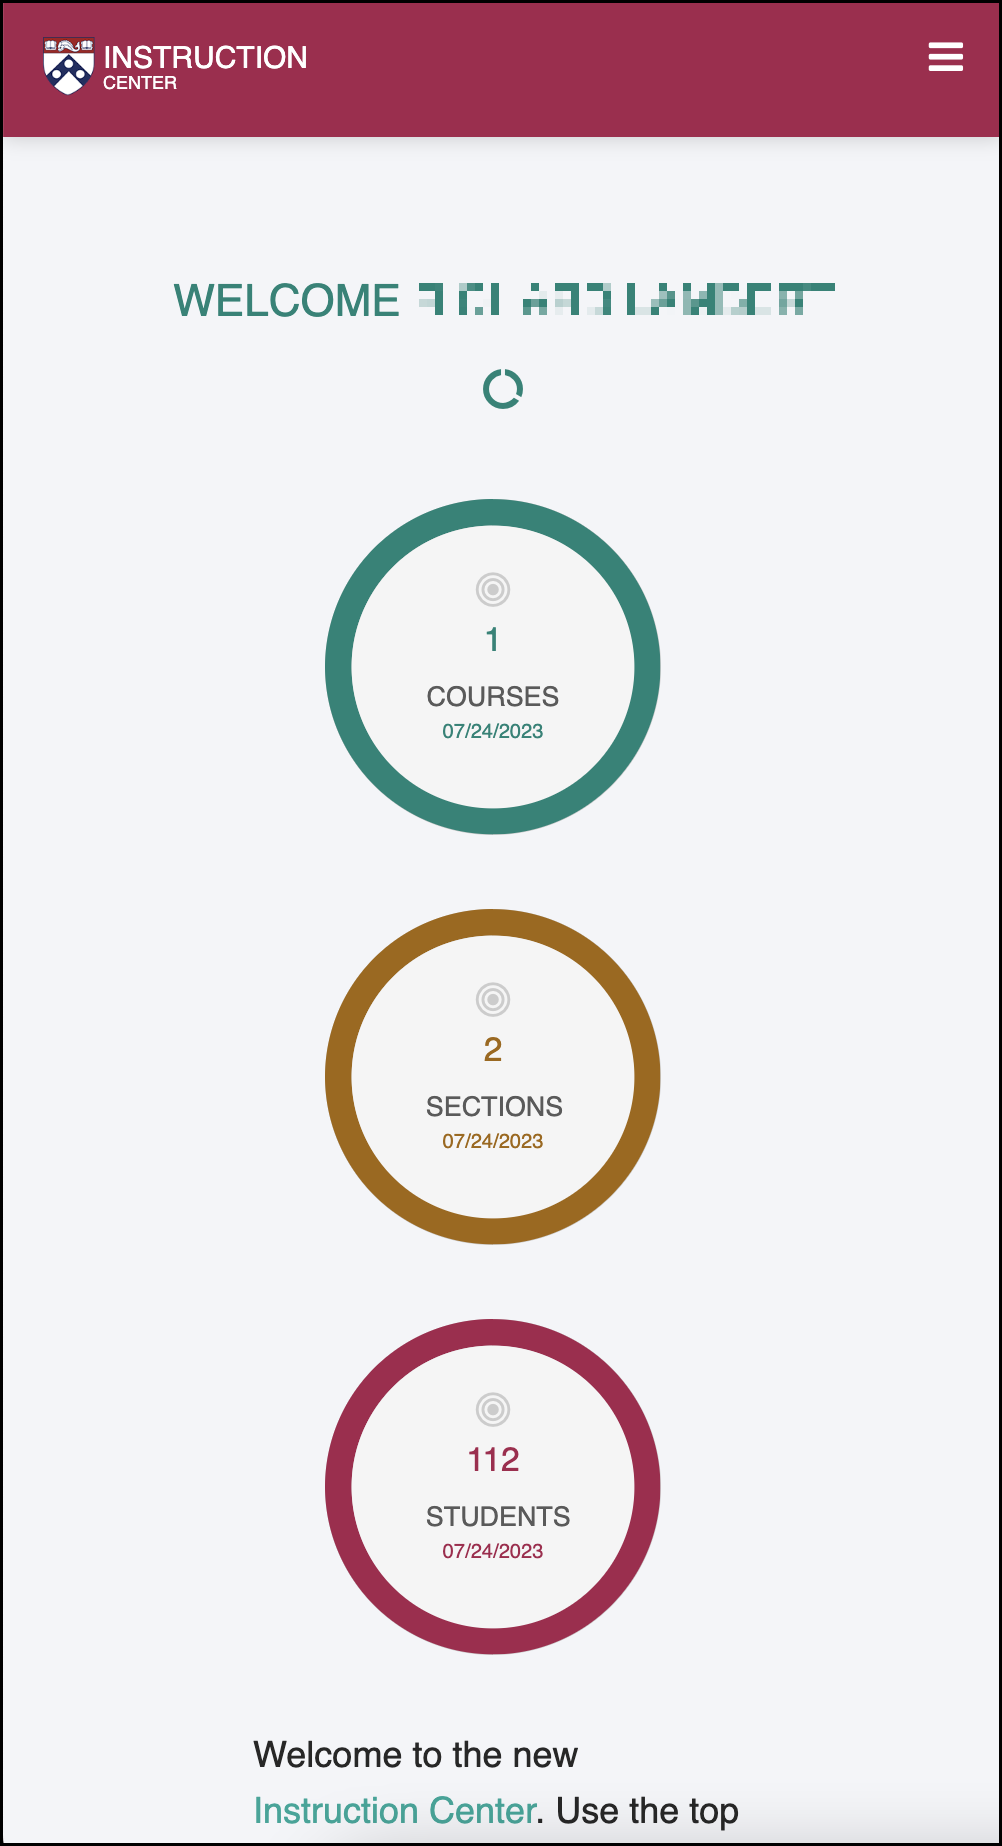 Mobile Welcome
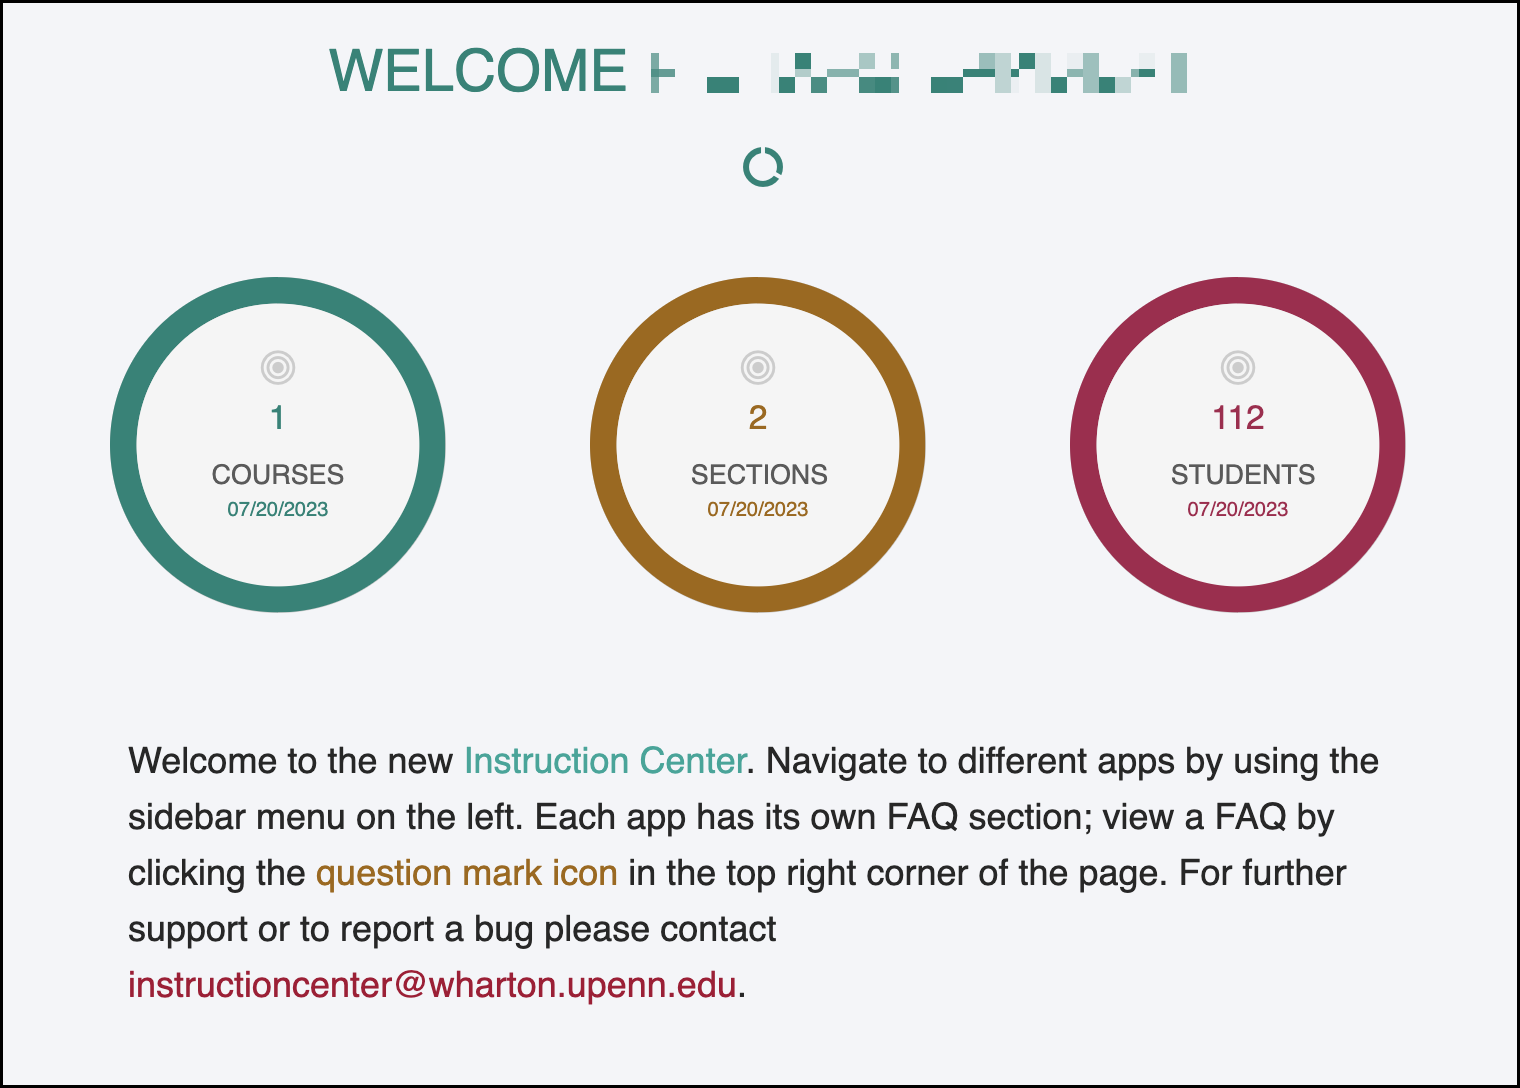 Welcome Screen - Close Up
Navigation
Along the left side of the screen, there are links to the different tools listed above.
 Shrink Column Shrink Column |  Expand Column
|
Click << Shrink or | >> | on the bottom to toggle the sidebar's size.
Section Search
The Section Search bar runs across the top of each screen. Use it to search for the section you want to manage on the Instruction Center screen that you're viewing.

The default choice will always be the current term -- use the dropdown to select any term during the five previous years.
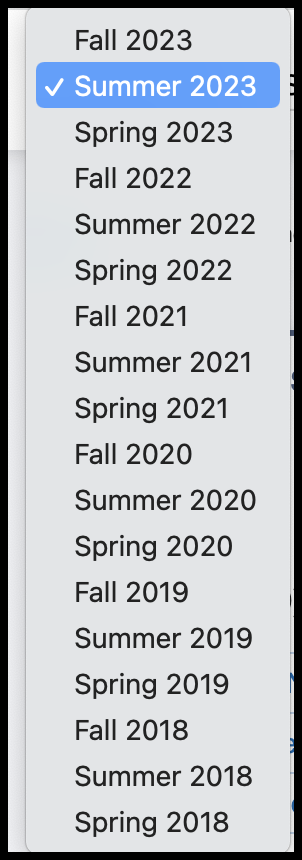
As you type in the section search field Instruction Center autocompletes your entry. You can either:
- Start typing to begin looking for a course, or
- Paste in an entire section ID to find the course
Click the Search button to load that particular section.
Log In/ Log Out
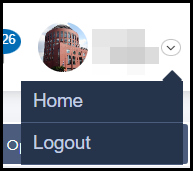
Instruction Center uses your PennKey credentials to log you in. When you are finished and ready to log out, choose Logout under your Profile.
Help Center
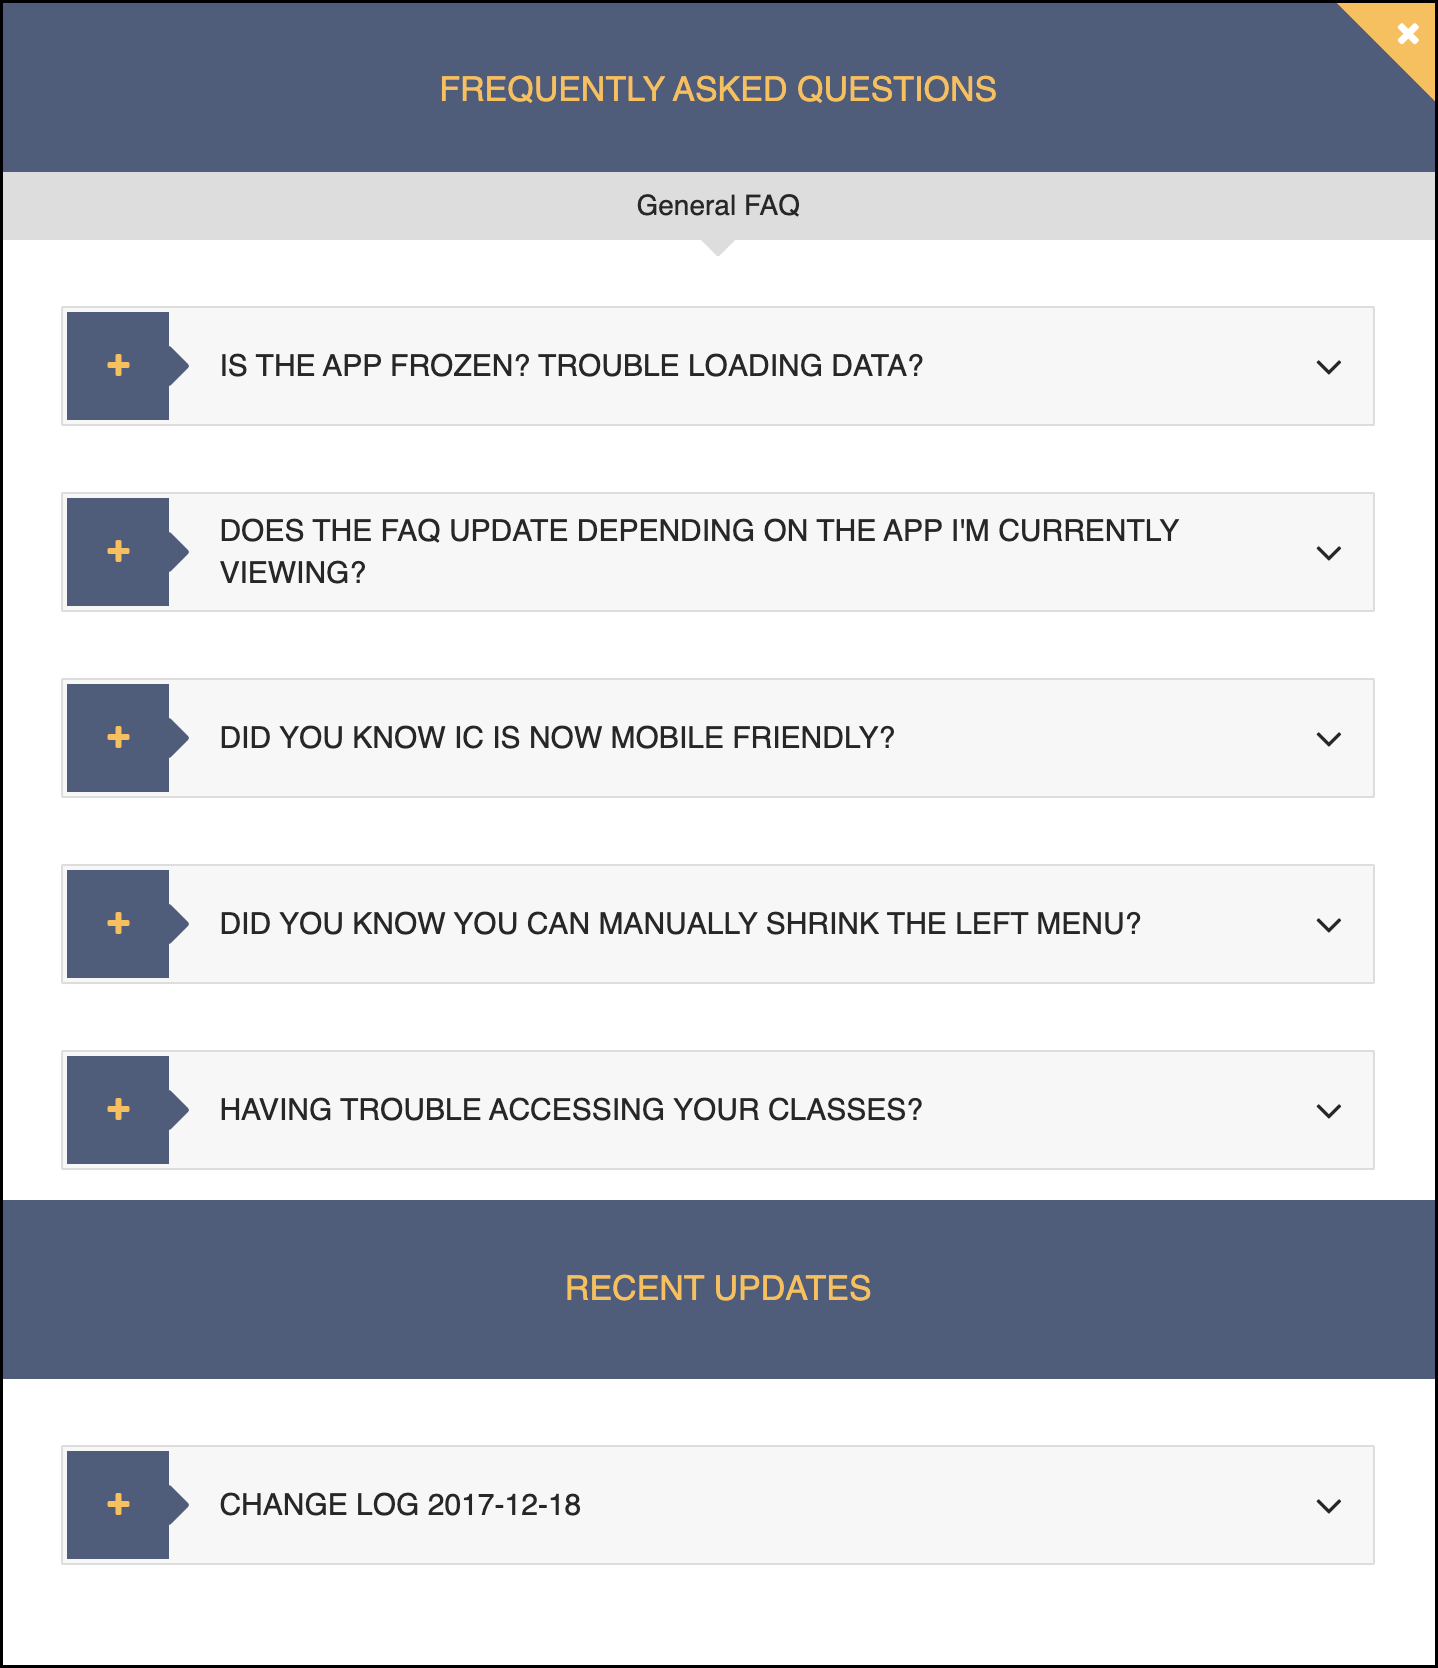
Use the | ? | icon (towards the top right of the screen) to get Help.

Course Resources
The Course Resources tool contains important information and links for any courses you are managing.
For details on Course Resources,
By default, Course Resources displays your current courses. You can filter on specific courses using the Section Search bar, and view basic information (e.g. section, location, instructors) about each course.
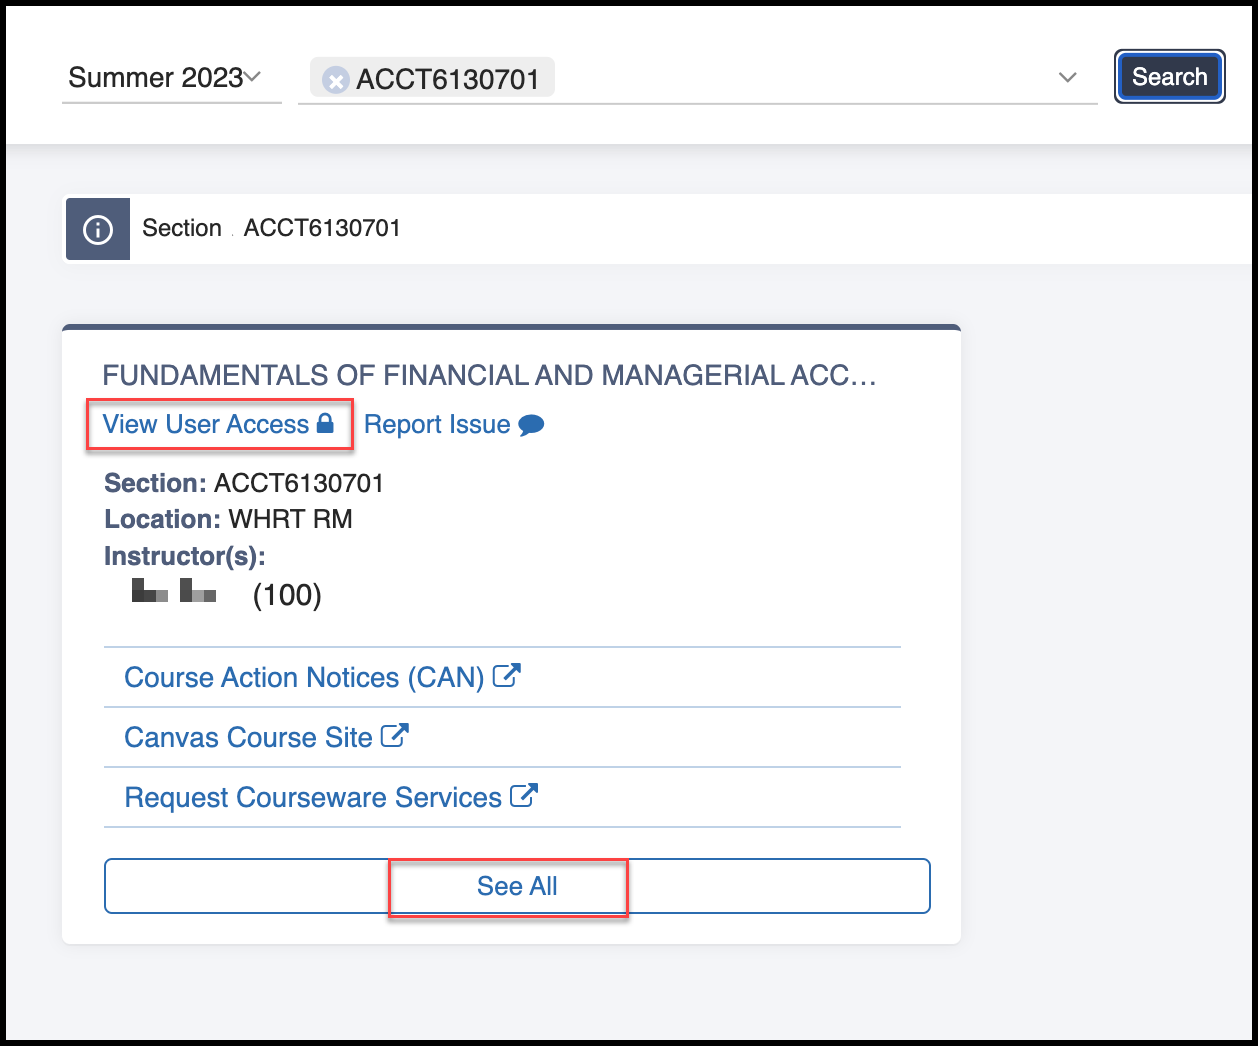
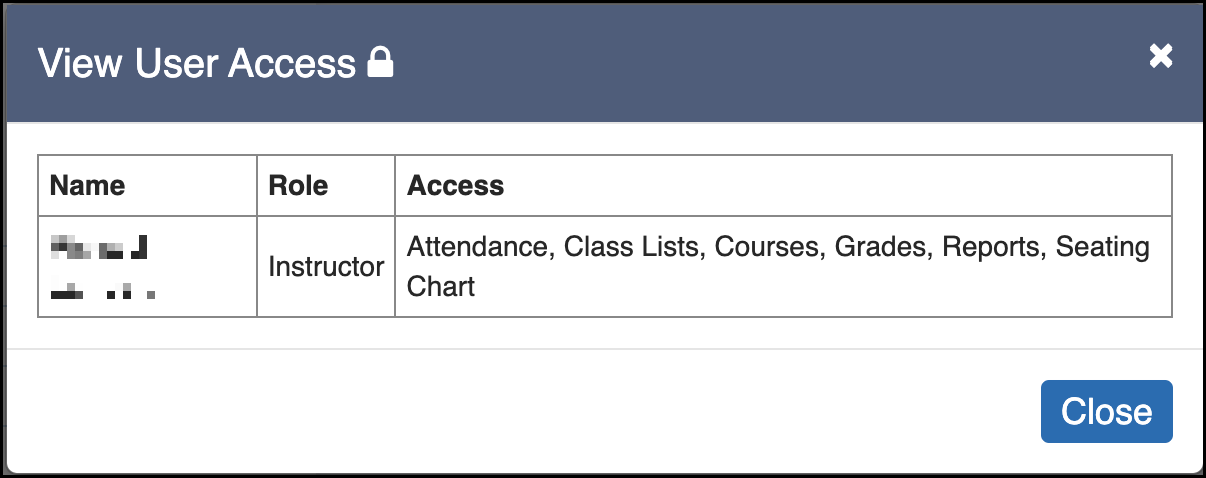
Click View User Access to display Instruction Center users who have access to manage this section, including their role(s) and level(s) of access.
 Click See All to expand the full list of available links.
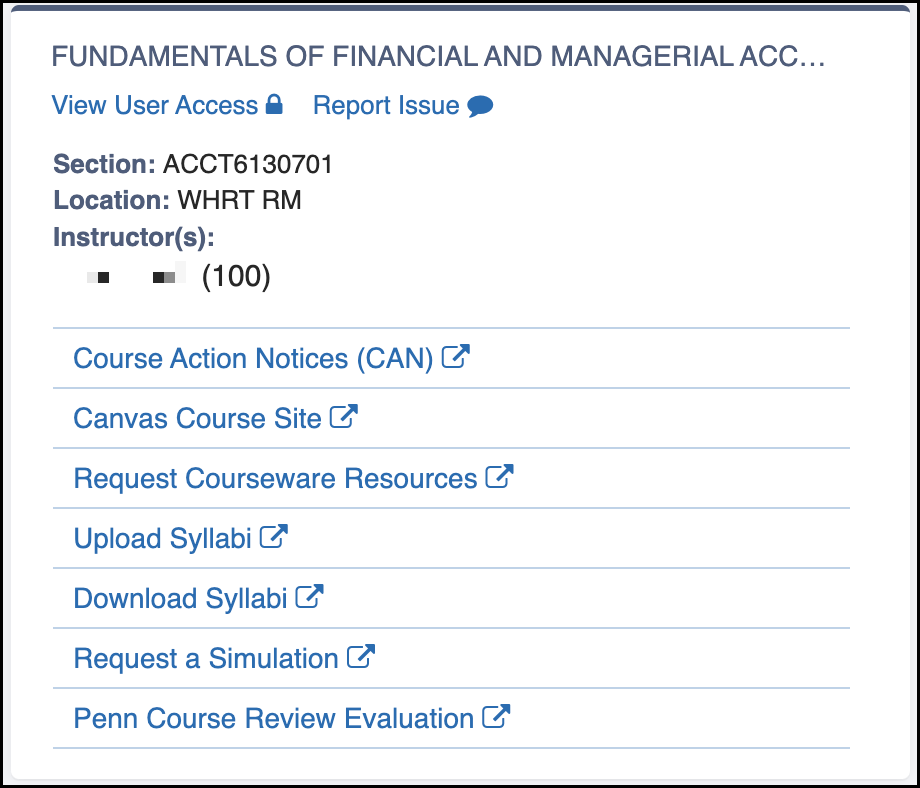
These links take you to a variety of external tools:
- Course Action Notices (CAN) - Connects to Courses@Penn for sending Course Action Notices to students.
- Canvas Course Site - Accesses the course's site directly on Penn Canvas.
- Request Courseware Resources - Connects to Wharton's Courseware Team for questions related to Canvas, Study.Net, and additional resources managed by the team.
- Upload Syllabi - Allows you to upload and manage existing syllabi for the section in Wharton's Syllabi application.
- Download Syllabi - Downloads the syllabus for the current course in the given term.
- Request a Simulation - Contact Wharton's Learning Lab team for any simulation request, support, or other related topics.
- Penn Course Review Evaluation - Accesses Penn's Course Evaluations system for end-of-semester and self-created evaluations.
Classlists
The Classlists tool displays an active roster of your section's current students and includes a variety of details.
Once you've selected your desired section and the list of students has loaded, you'll be able to use the Details, Options, Filter, and Sort options, described below.
 Classlist Screen
Details
By default, the following details are displayed for each student in the class: Name, Email, PennID, and Section ID (some details in these screenshots are blurred for privacy).

Click the Details dropdown field to select additional fields to customize your output.
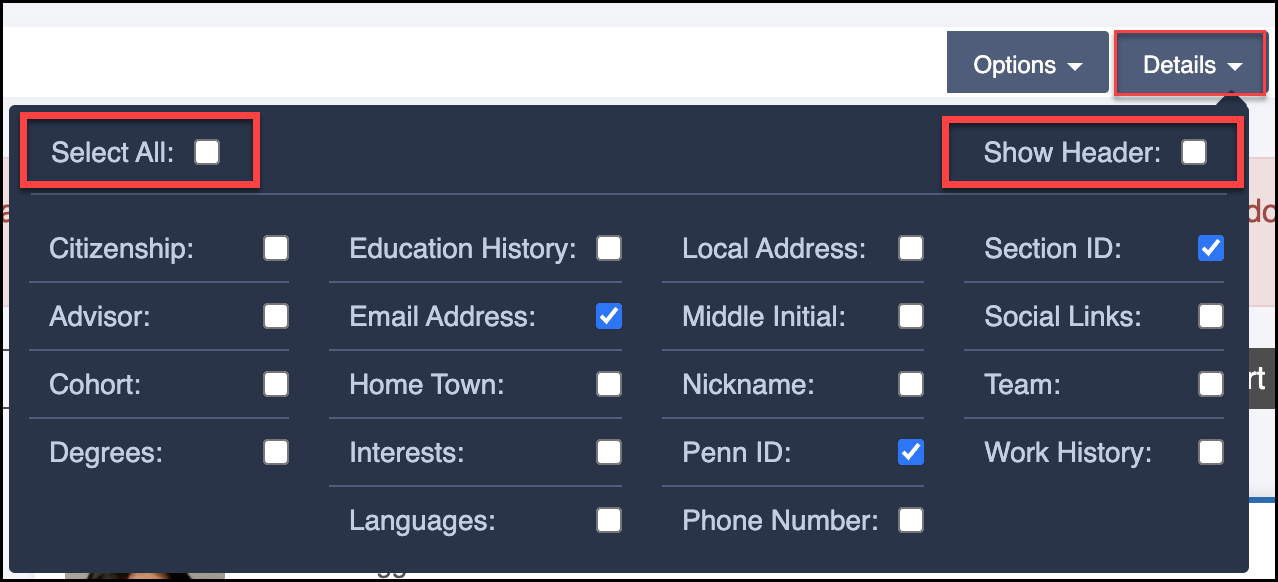 Details Dropdown Field Options
- Choose Select All to show all fields for all students, displaying all available data for each field.
- Choose Show Header to display a header with section summary information above the list of students.
- De-select any fields you don't want to see in the output.
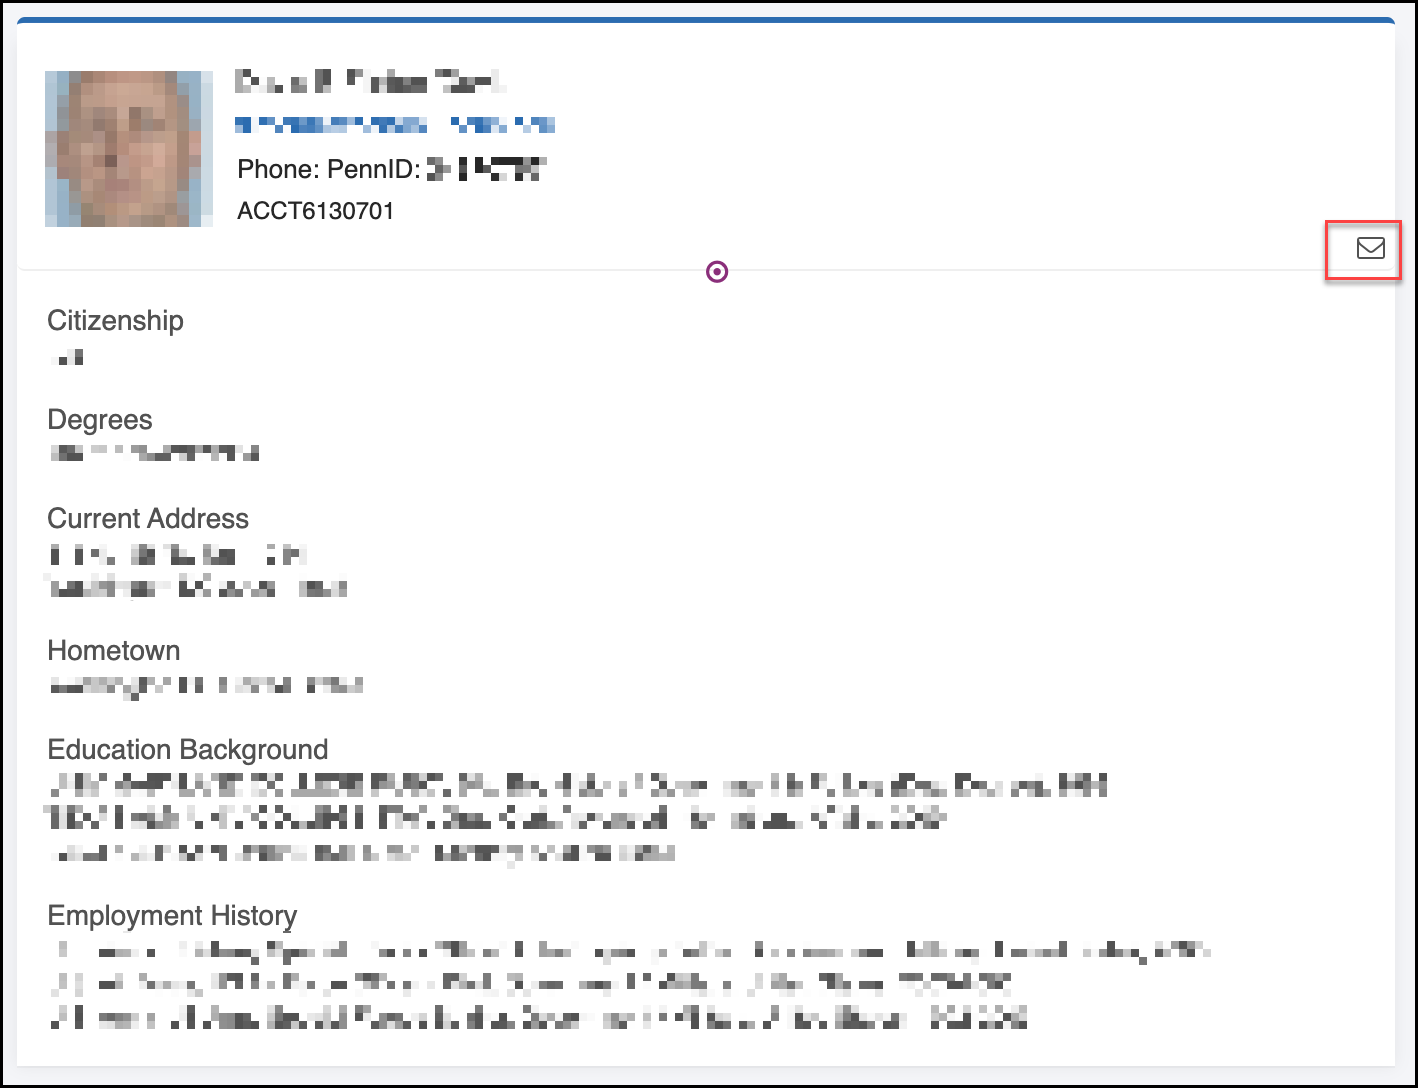 Student Detail with Additional Fields Checked
(Notice the email icon in the top right.)
Student cards also contain a Select Email icon, indicated by the mail symbol in the bottom right of the card's header:


Selecting email address(es) using this feature will affect what you can see in the Options dropdown (see next section).
Options
Use the Options dropdown to manage your classlists.

Use these options to:
- Copy All Emails - Copy all email addresses to the clipboard for the currently filtered selection of students.
- Copy Selected Emails - Copy all email addresses explicitly selected through the Select Email option for each student.
- Email <SectionID> - Send mail to the official Penn Classlist for the section (managed by Penn's ISC).
- Print Cards - Generate a printable card view for each student of the section that includes the selected Details.
- Print List - Generate a printable summary list including each student in the section.
- Export As Excel - Generate an .xlxs file of exported data for each student in the section using the selected Details.
Filtering and Sorting
Above the student class list cards is a bar that allows you to filter and sort the class list data.

To filter your section's students, select one of the available fields in the "Filter By" list, and select Filter to narrow down your results to specific students who match that condition.

Students can also be sorted. Select one of the available fields in the "Sort By" list, and select Sort to order your results to that specific condition.

Select the Reset button at the top right to clear the current filter and display all students again.
Seating
The Seating Chart allows you to place students in designated seats for a specific classroom layout. This helps you assign seats, track class participation, and more. Generally, an empty seating chart is automatically created for each course in advance.
Once you've selected your term, section, and meeting date, you can load your course's Seating Chart by selecting your course and clicking Search.
How To Use Seating Chart

Click the How To Use Seating Chart button at the top of the chart to view a visual summary of the different features of the Seating section within Instruction Center.
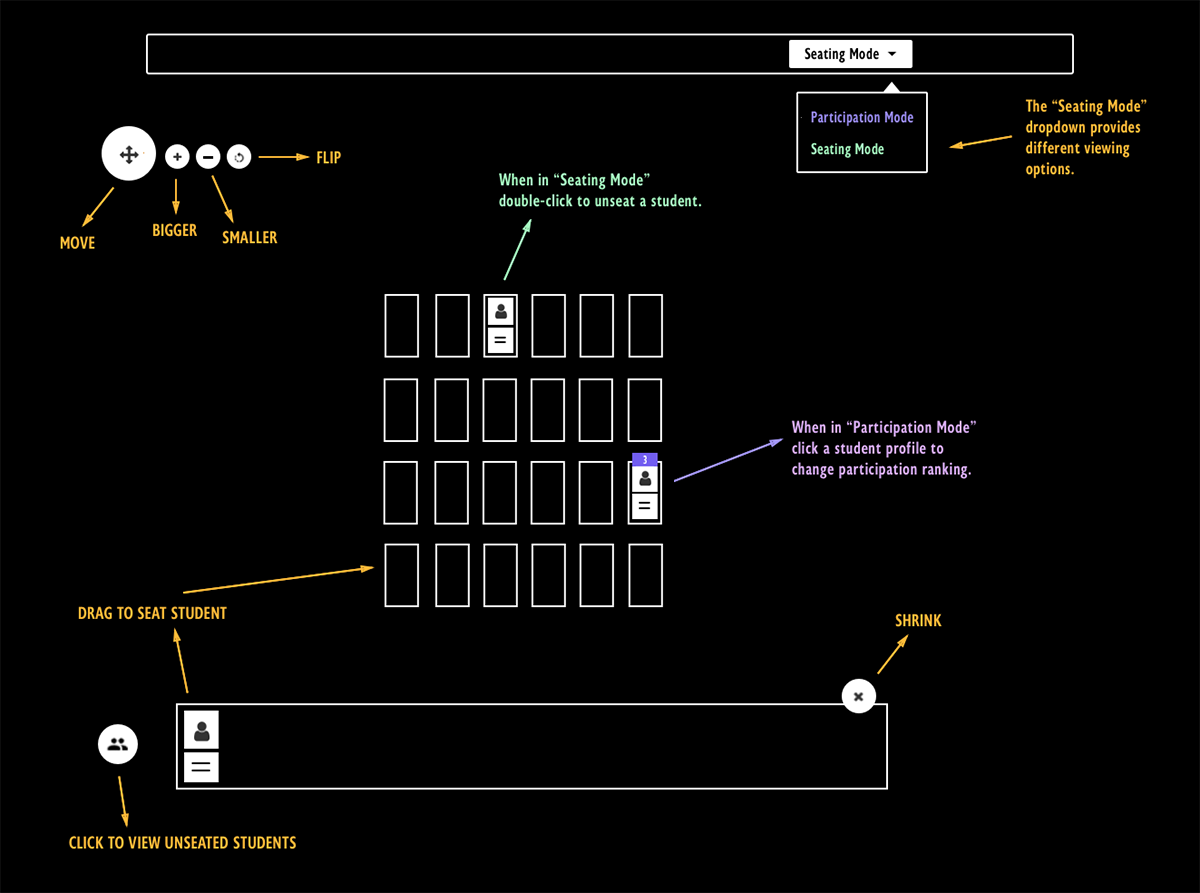
Seating Chart Modes
Seating Chart operates using two different modes, which you can select via the dropdown menu toward the top right of the screen.
- Participation Mode - Allows faculty to assign participation points for students in their section on a given meeting date.
- Seating Mode - Allows faculty to seat students in the selected room layout and assign them for the section.
For any of the modes, use the available controls at the top left of the screen to move the Seating Chart around the screen, zoom in, zoom out, or flip the seating chart from its default front layout view to show the room's layout from the rear.
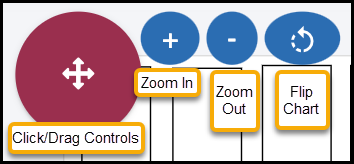 Controls Explained
In any of the modes, students are displayed with their full name, PennCard photo, and their team designation in the bottom left corner of their photo (details are blurred in the screenshots below).

Hovering over a student's seat will display an expanded pop-up with their name and team details.
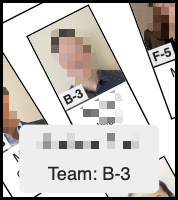
Participation Mode
In Participation Mode, faculty can assign participation points for each student on a scale/rating of None-5. Participation points are shown in a numeric value above the student's seat and will appear elsewhere in related sections.
Left-click a student to assign a participation value of 1 -- subsequent clicks add points until 5 is reached. To remove points and restart the process after 5 is reached, left-click.
Right-click the student to bring up the expanded menu to set participation points and other values (e.g. Notes).
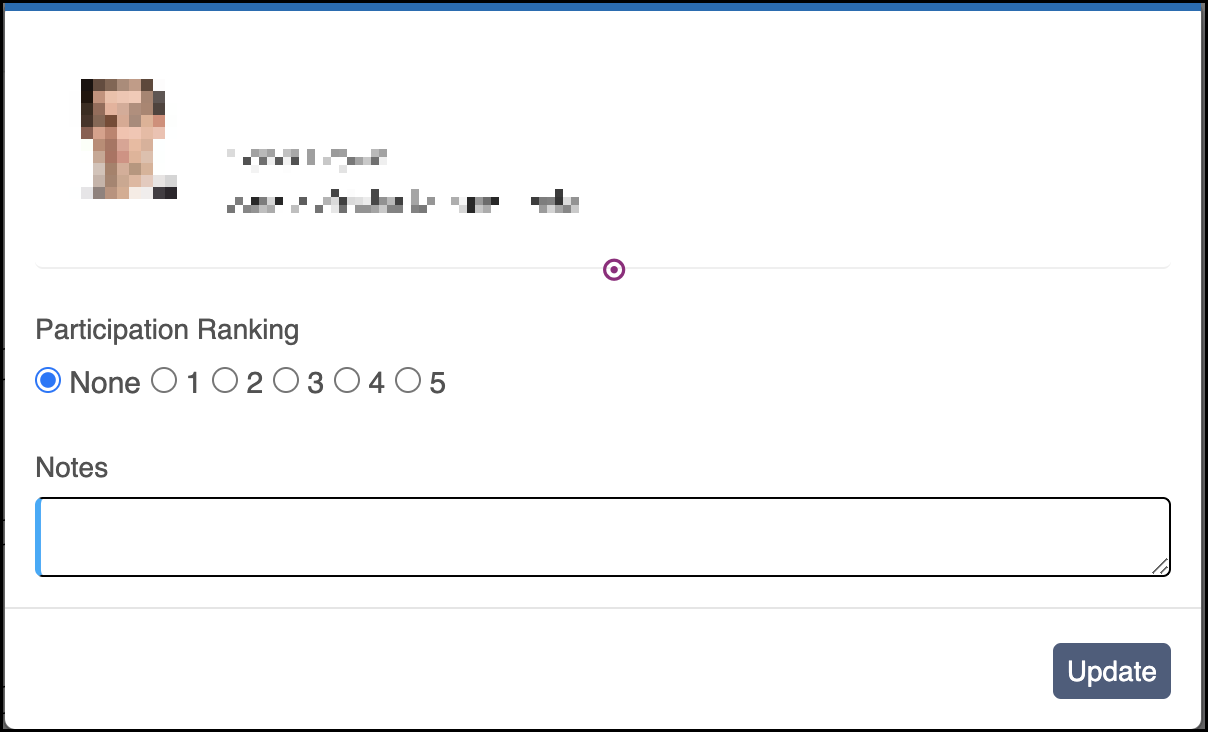
Seating Mode
In Seating Mode, place students from the available grid below the room layout by dragging them onto specific seats to assign them.
 Available Pool of Students Below Seated Students
| 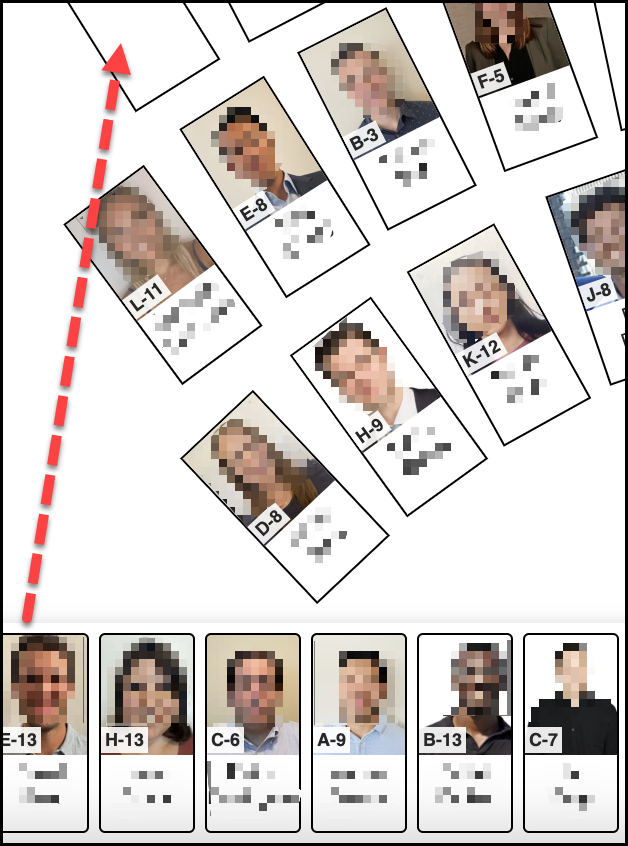 Click and Drag To Fill Seats
|
In Seating Mode, students without an assigned seat are displayed in the available grid under the room layout:
- Assign a seat to a student by dragging them out of the available grid and onto an empty seat.
- Unassign a student from an existing seat by double-clicking their photo and they will be added back to the grid of available students below.
The controls on the bottom right of the Seating Chart can be used to:
- sort students by first name alphabetically
- sort by team alphabetically
- hide the unseated students grid

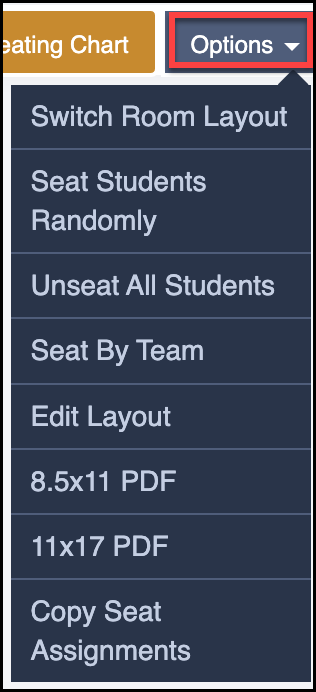
Use the Options menu in the upper right of the screen to seat students randomly, by team, or to unseat them all.
When finished assigning all students, click the Save Seating Chart button to save your changes.

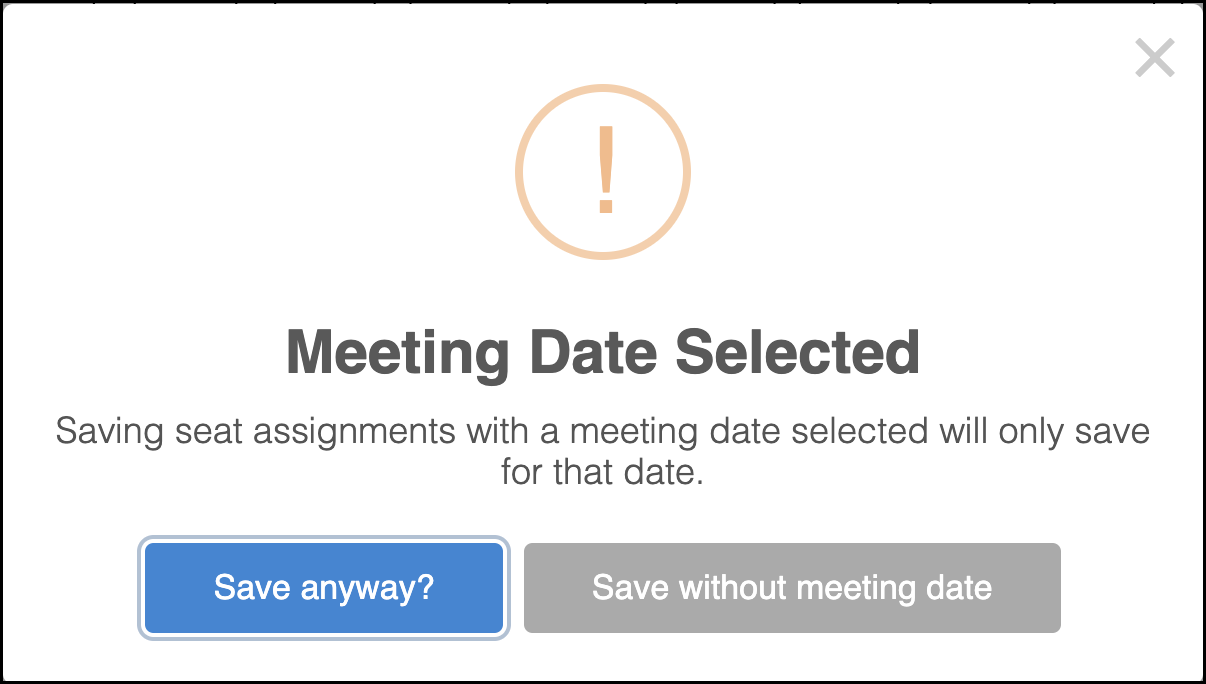
If you edit a Seating Chart in Seating mode while a date is selected, you will be presented with two options:
- Save anyway?: only saves seat assignments for that date.
- Save without meeting date: saves seating for the entire term.
Options
The Options menu contains several shortcuts for viewing and modifying data within the Seating Chart.

- Switch Room Layout - Select a different room layout or create a custom one of your own (see Creating Seating Charts and Rooms below).
- Seat Students Randomly - Seat all students within the section randomly within available seats. This will override any existing seat assignments, available in Seating Mode only.
- Unseat All Students - Unseat all students and return them to the unseated grid (available in Seating Mode only).
- Seat By Team - Seat all students to logically group them by team. This overrides any existing seat assignments (available in Seating Mode only).
- Edit Layout - Edit the existing Seating Chart room layout (see Creating Seating Charts and Rooms below).
- 8.5x11 PDF - Generate a printable 8.5x11 PDF version of the selected Seating Chart.
- 11x17 PDF - Generate a printable 11x17 PDF version of the selected Seating Chart.
- Copy Seat Assignments - Copy seating assignments from one section to another. This can be within the same term or for a previous/future term. Room layouts must match in order for this to work, and only students enrolled in both the copied and pasted sections will have their seat assignments carried over.
Creating Seating Charts and Rooms
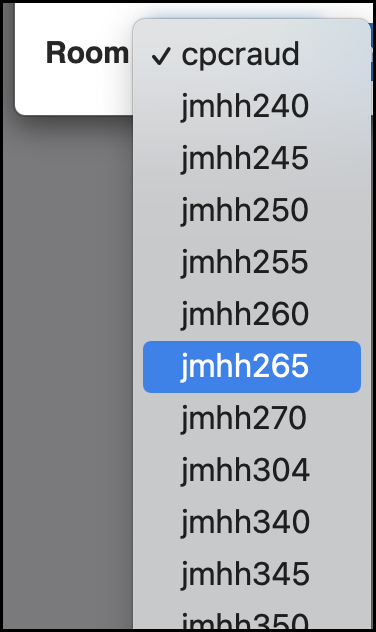
You may encounter a “No Seating Chart Found” warning for your course if a designated room hasn’t been assigned to the class in Instruction Center.

From the warning, select a room from the box that contains the list of available rooms within Wharton buildings, and select the Create Seating Chart button to build a blank chart for the section.
Alternatively, you can click the Create Room button to create and customize a room based on an existing room layout.
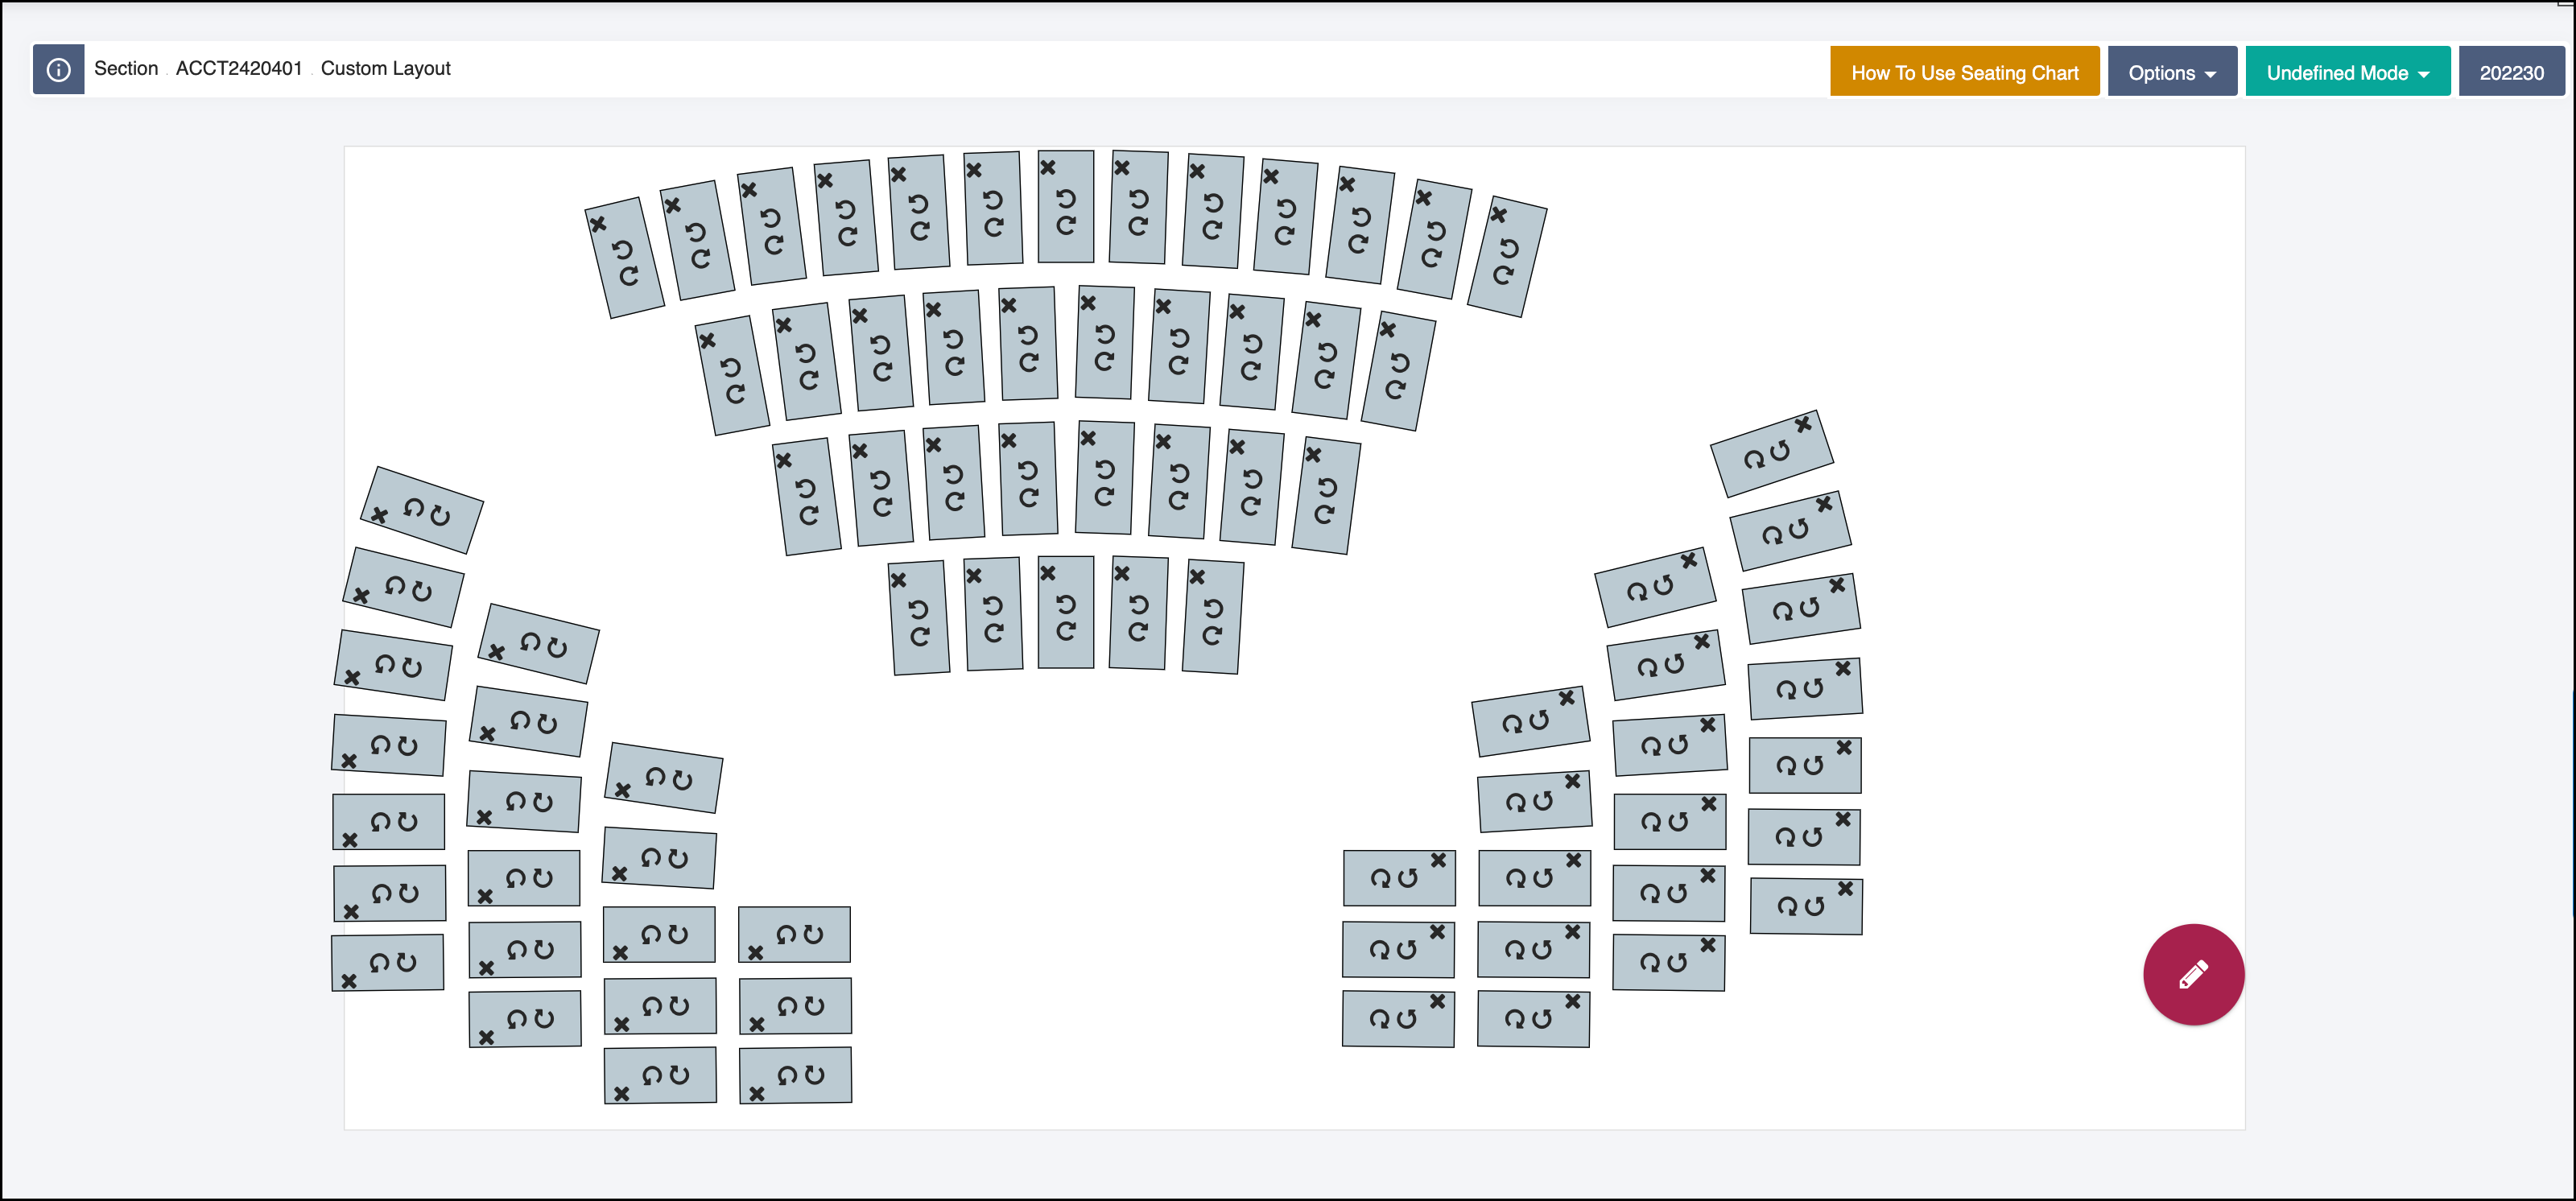
When creating a room, you may drag and drop seats anywhere on the available grid and use the forward and backward arrows to rotate the direction the seats face.
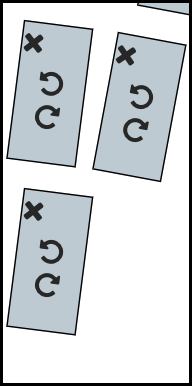 Seat Direction Arrows
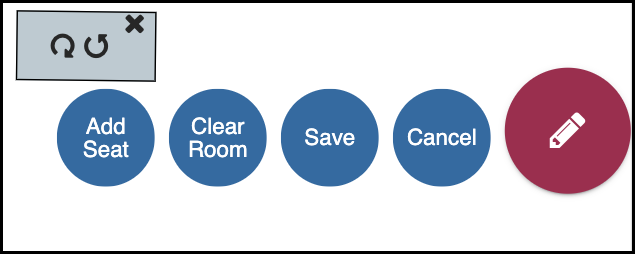
Hover over the pencil icon to reveal some actions:
- Add Seat to add a seat to the existing layout
- Clear Room to remove all seats from the chart
- Save or Cancel your changes to create a custom seating layout
Participation
The Participation section of Instruction Center allows faculty to assign participation points and related notes for each student within their sections.
To assign participation points, use the Section Search bar to locate the specific section and meeting time for the course and click Search. This will bring up a list of each student in the course and their participation points for that date.
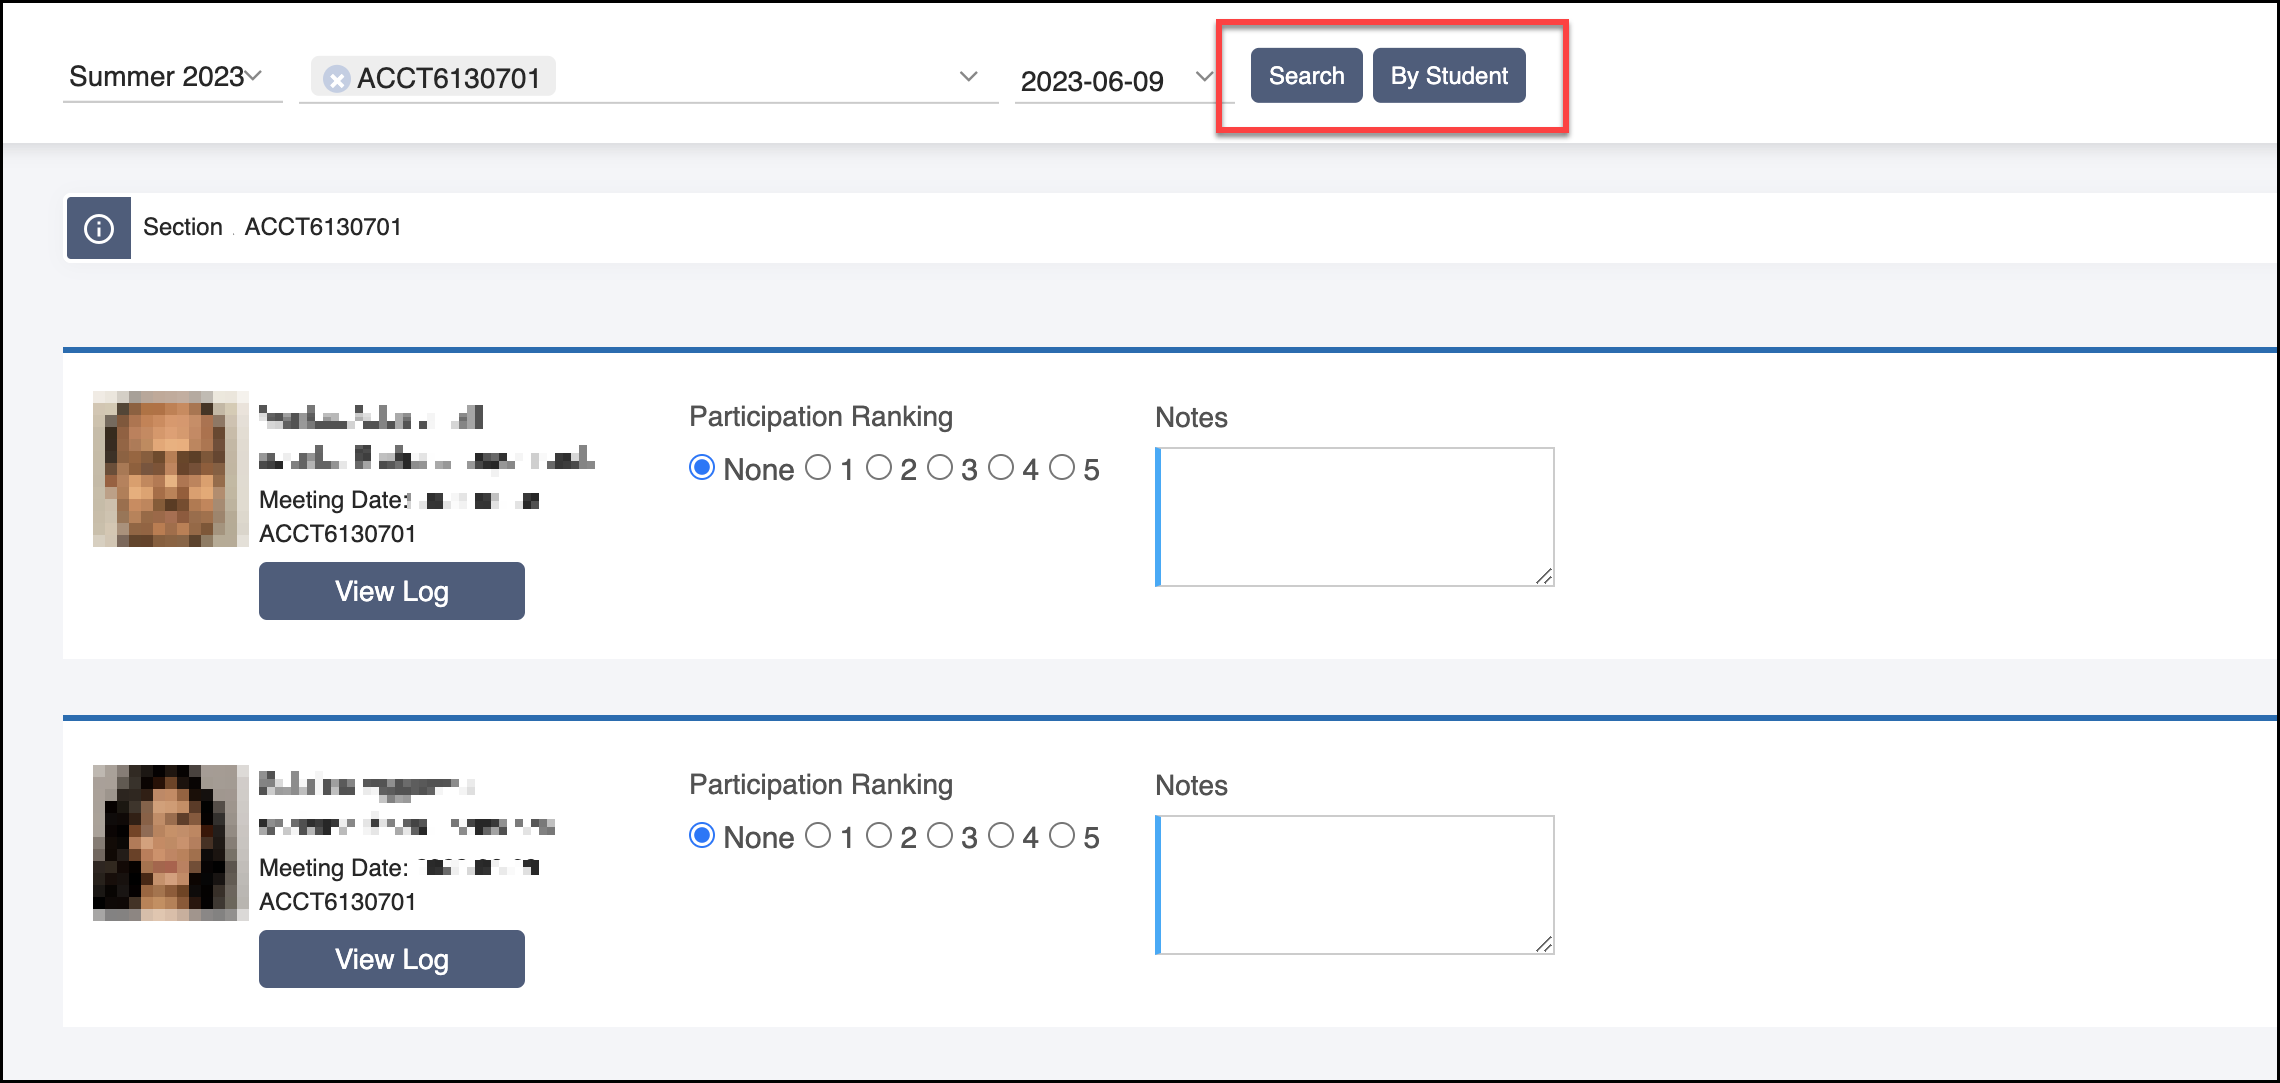
In addition to searching by section, use the By Student button to search for a particular student and bring up all participation points for that student.
Once the students' participation points have loaded, towards the top right of the window, you can sort records by first/last name, section ID, and meeting date. Choose either an asc(ending) or desc(ending) sort order and click the Sort button to sort the records.
For each student's record for that section and date, you can provide participation points, and add any notes used later for assessing student participation. Click the View Log button to show a full log history of changes made to the student's record.
Once all participation points have been adjusted as desired, save changes by clicking the Submit button towards the top right of the screen.

Grading
The Grading tool allows faculty to manually submit final overall grades in a course, either individually for each student or via bulk upload, and to submit grade changes.
This grading tool in Instruction Center is completely separate from the grading functions within Canvas -- final grades must be uploaded via Instruction Center. For more information on the grading options in Canvas, see our Canvas grading capabilities article.
Additional questions about grading? Contact: onlinegrading@wharton.upenn.edu
Submitting Grades
Select the term and enter section(s) to grade, then press Search. Next, you will see the following screen:
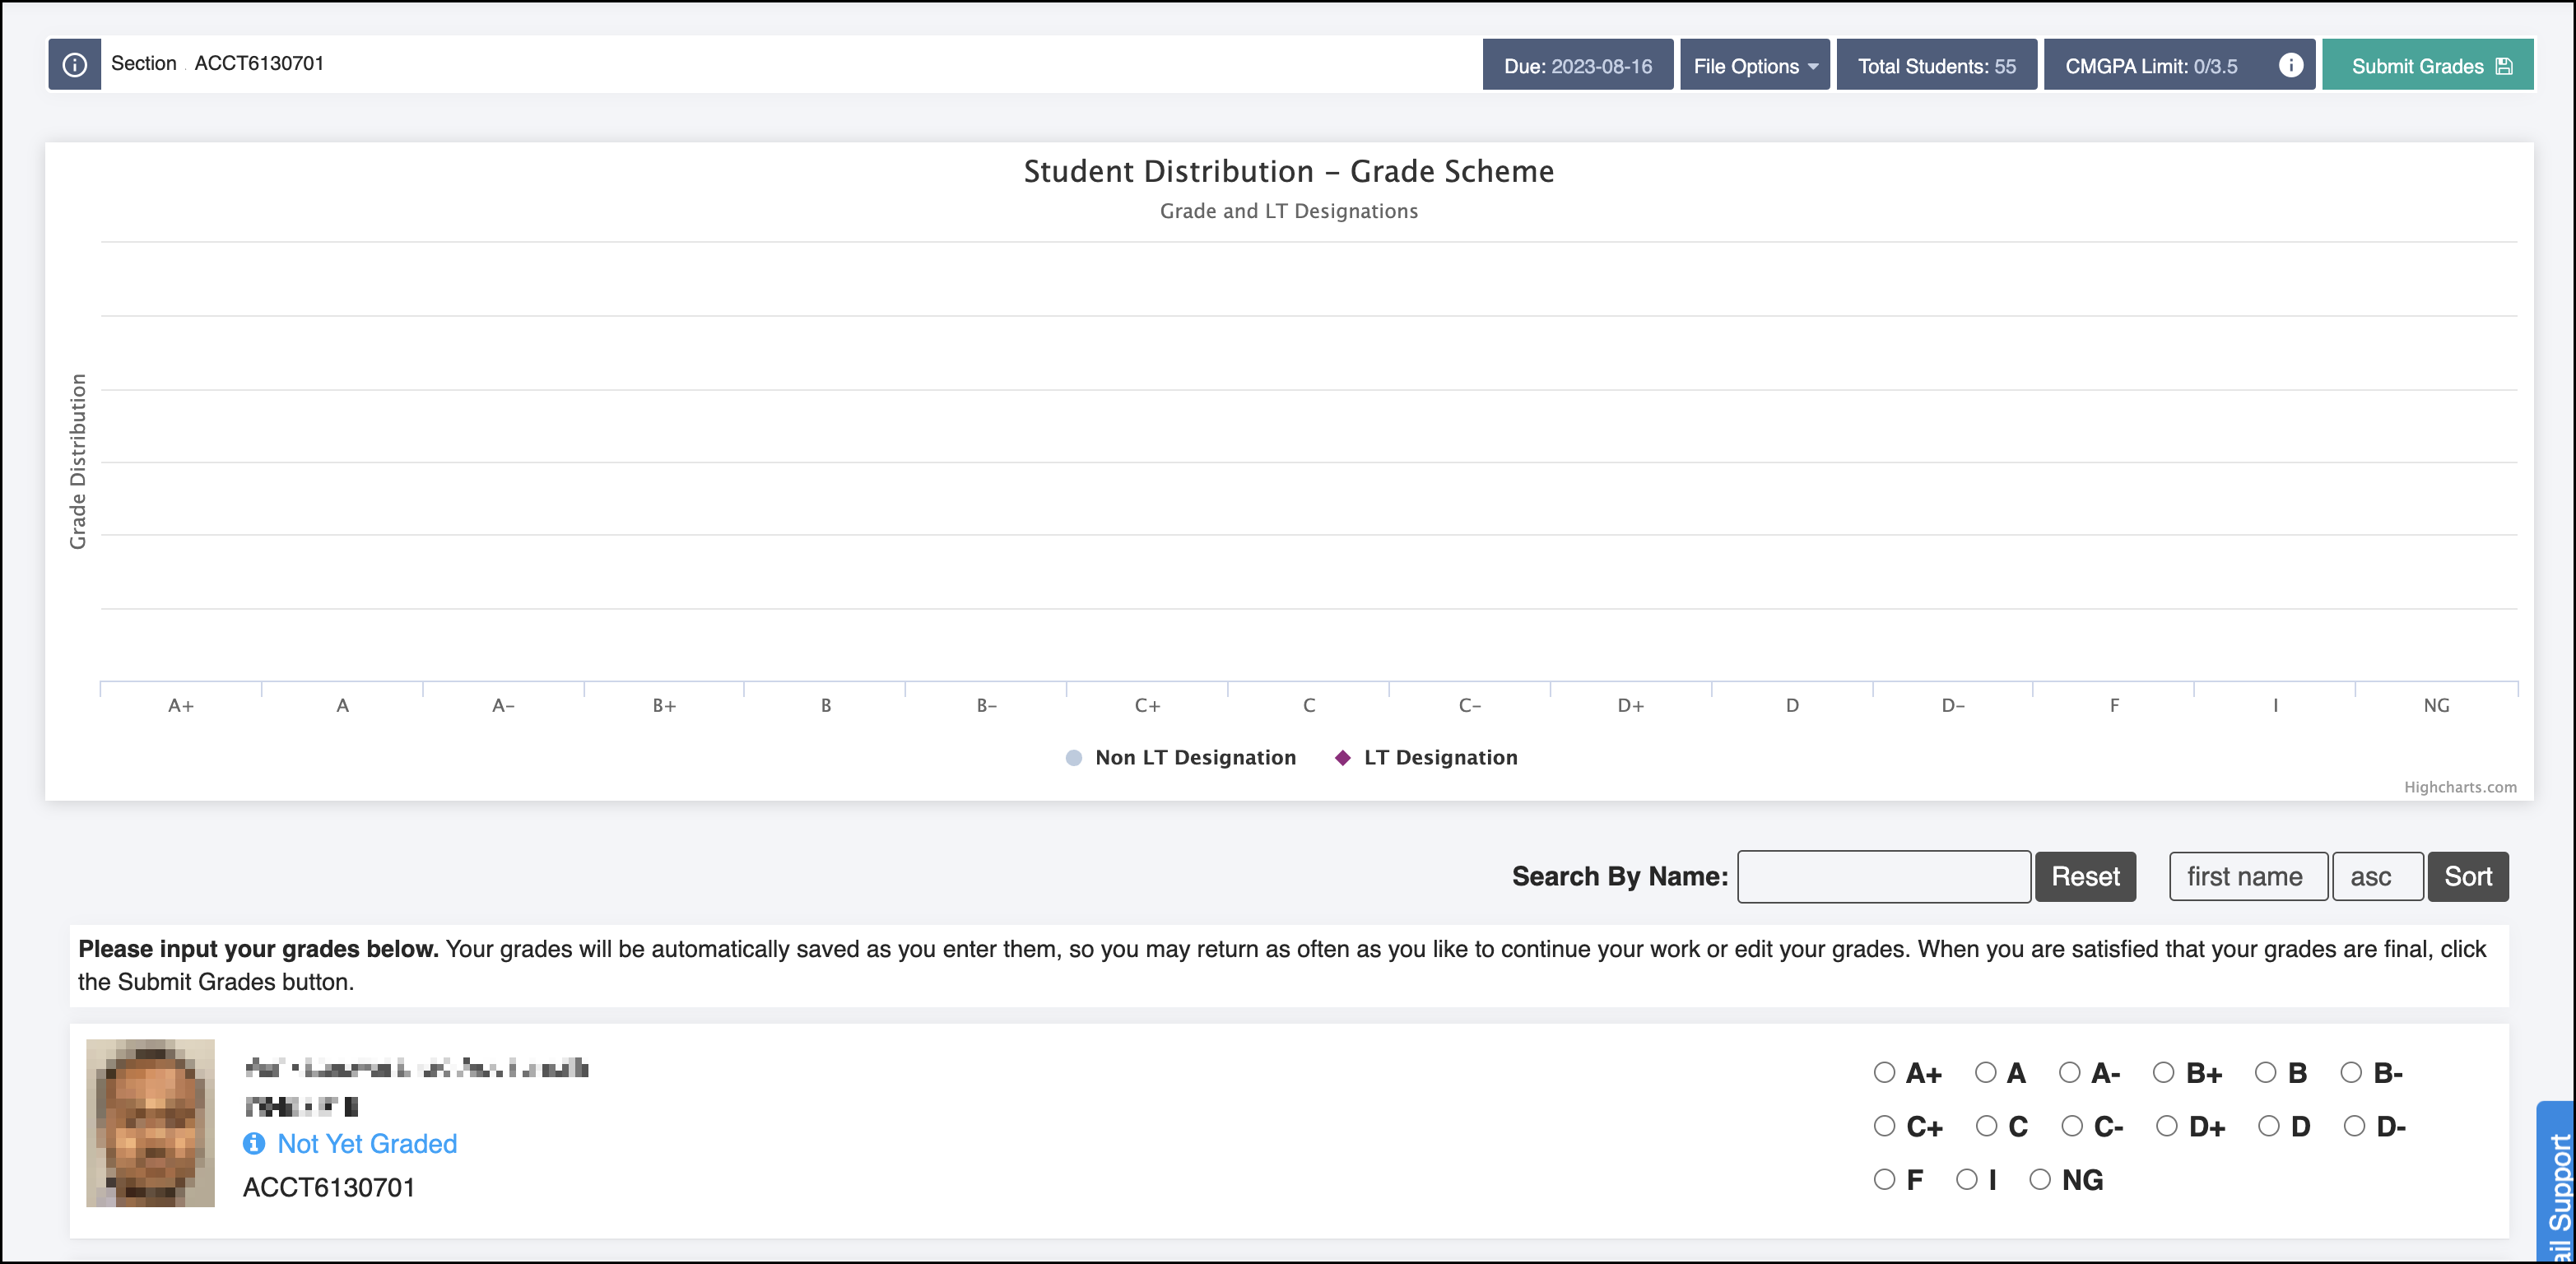
The top bar shows the section, due date, and the total number of students. It also shows:
- File Options, for importing and exporting data:
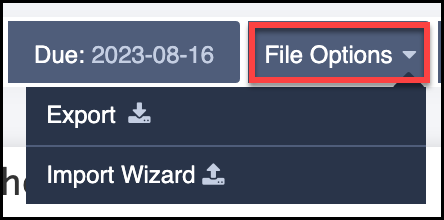
- Export - Generates an .xlsx of the existing submitted grades for the students within the section, along with their Penn ID and name.
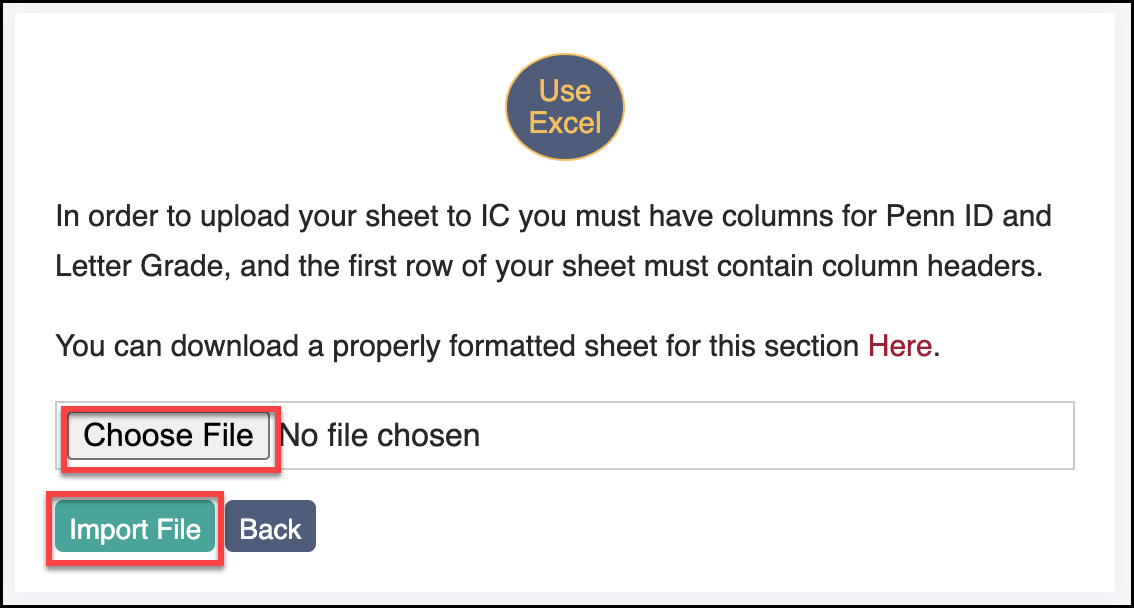
- Import Wizard - Allows you to bulk-submit grades using an uploaded .xlsx file. The file requires two columns, one for Penn ID and one for Letter Grade, and the first row of the file must contain column headers.
- The wizard provides a default file with properly formatted columns and rows for all students that can be filled out and submitted.
- Once complete, click the Choose File button to upload the finished spreadsheet and Import File to upload and submit grades.
- Submit Grades, for submitting grades per student:
- Use the radio buttons next to each student to select a letter grade, or choose one of the additional options
(I = Incomplete, NG = No Grade). These choices are saved automatically when you click on them.

- When entering grades manually, you can filter students by name and/or sort by several values (first name, last name, section, final grade). Use this filter to navigate through long lists of students, sections and grades.

- As you enter grades for students, the Student Distribution graph of grades adjusts to reflect the current grades entered.

- Once you have completed grading for all students, click the Submit Grades button to submit them.

- CMGPA, for calculating the Class MBA Grade Point Average (CMGPA):
- This number automatically updates to reflect the latest grades entered.
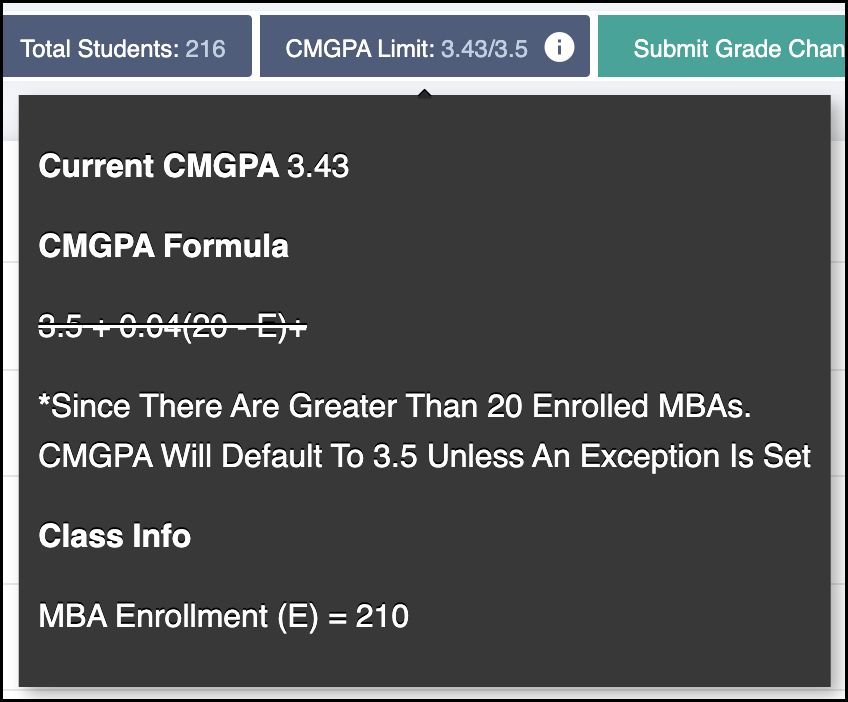
- For MBA classes with an enrollment of 20 or more students, the CMGPA may not exceed 3.50. This upper limit CMGPA is then raised by 0.04 for every enrollment count below 20. For more details, see Wharton MBA Academic Policies (choose the Grading System dropdown option).
CMGPA is defined as the average point value of the grades assigned to all MBA students in the specified section(s) who are governed by this grading system.
- TIP: To compute CMGPA across more than one section, first choose each desired section at the top of the page, then press Search and follow the steps above beginning at Submitting Grades.
- After you submit grades across several sections, the combination of sections you chose previously will be shown again when you return to the Grading tool.
Course Evaluation Survey
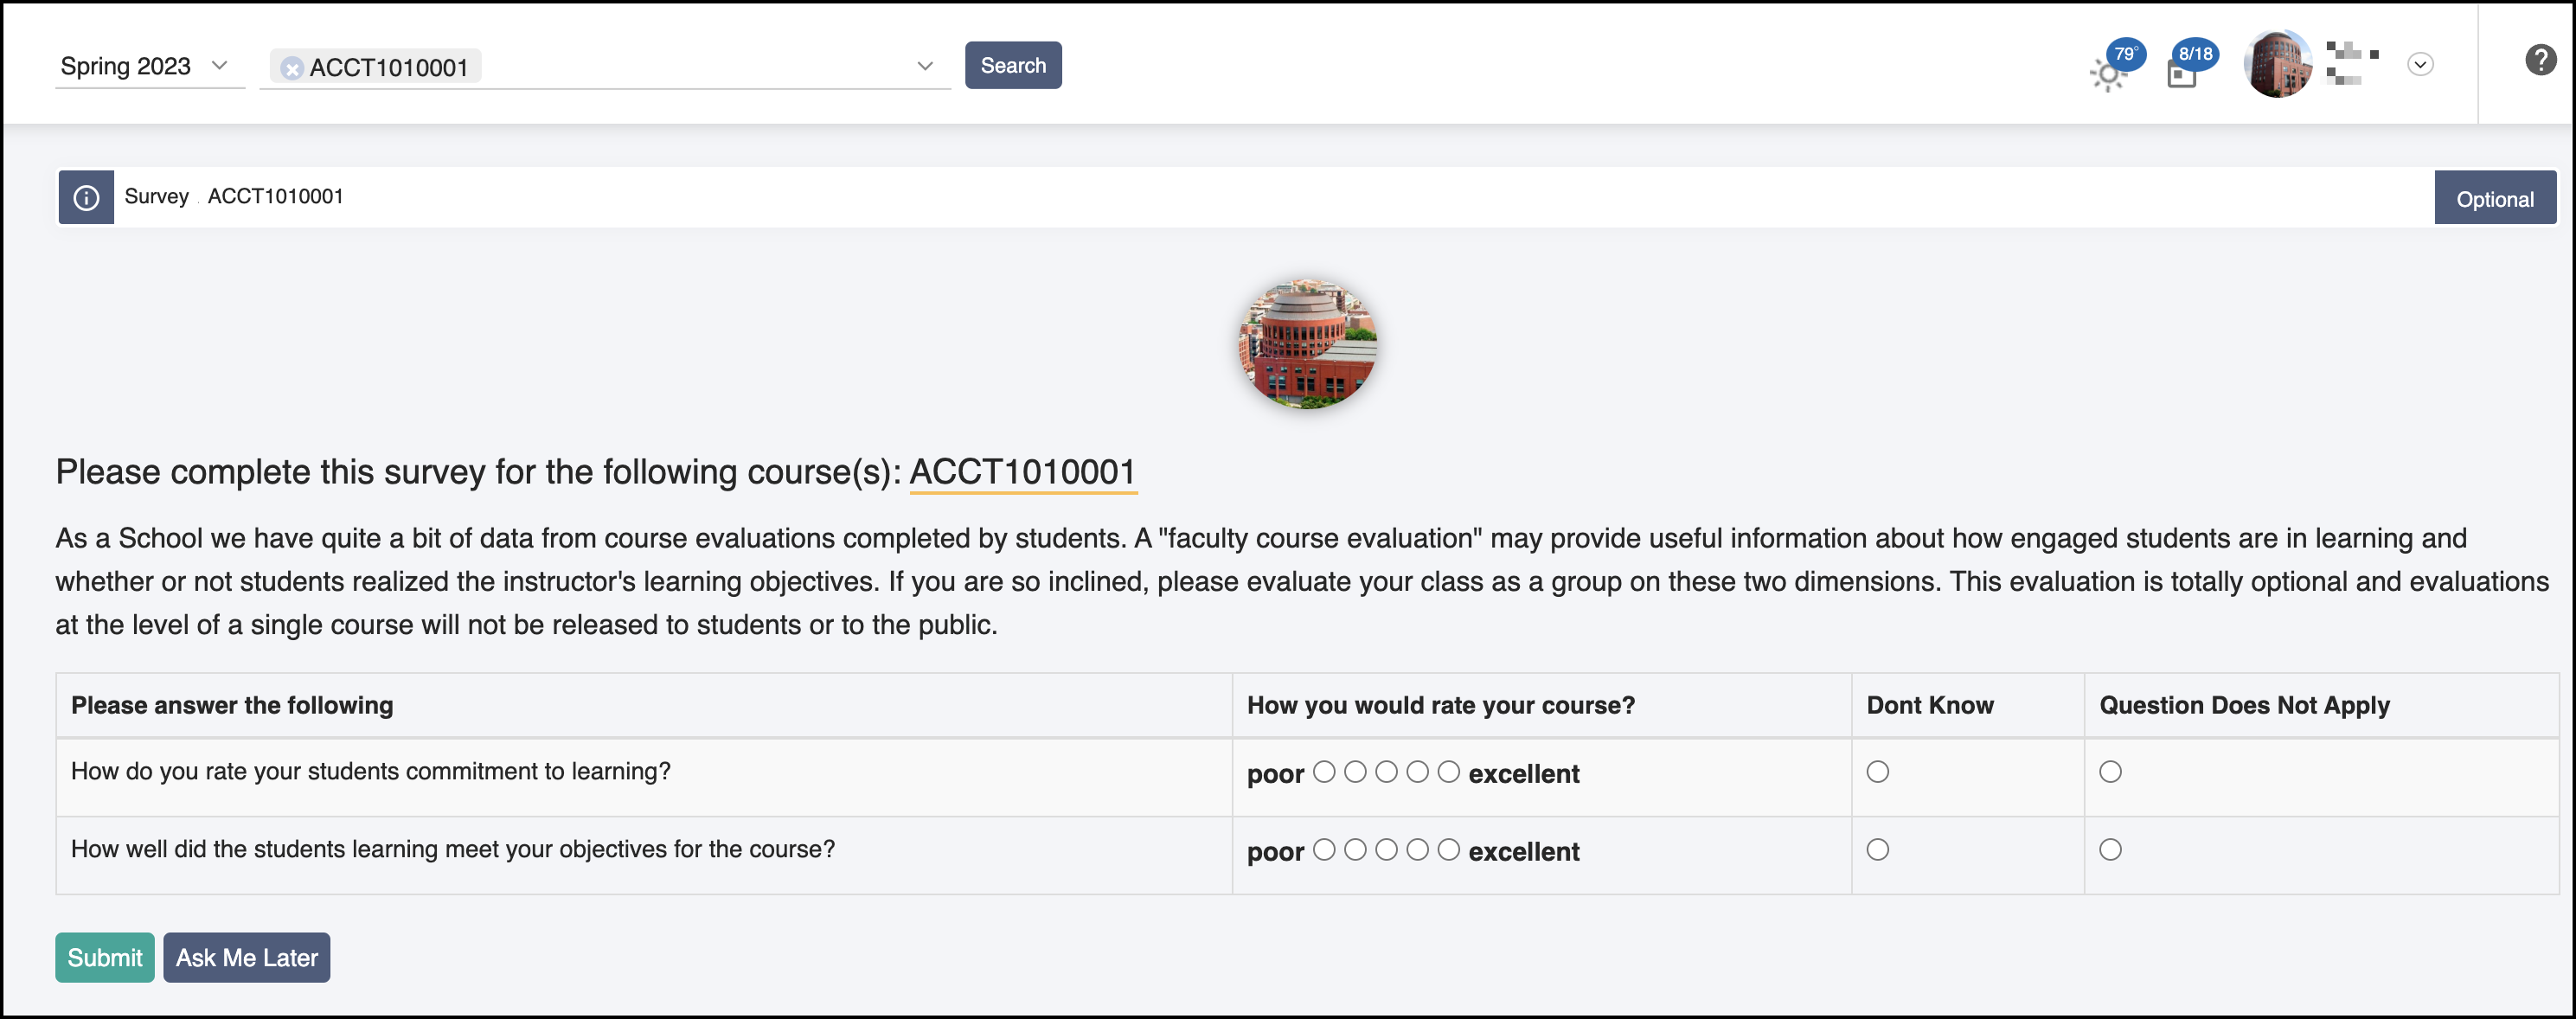
When you have viewed or submitted grades for a section, you may be presented with an optional Faculty Course Evaluation survey used to measure student engagement in the course. You'll have the option to postpone filling it out by choosing Ask Me Later.
Viewing and Submitted Grades
Viewing Grades
After grades are submitted you can view them, along with the following information for each student in the section.
Editing Grades
Use the Edit Grades button to adjust a particular student's grade, provide a designated reason for the change, and enter an optional comment to add additional context around the grade change. Click Save Grade to save this new grade for the student in the section.

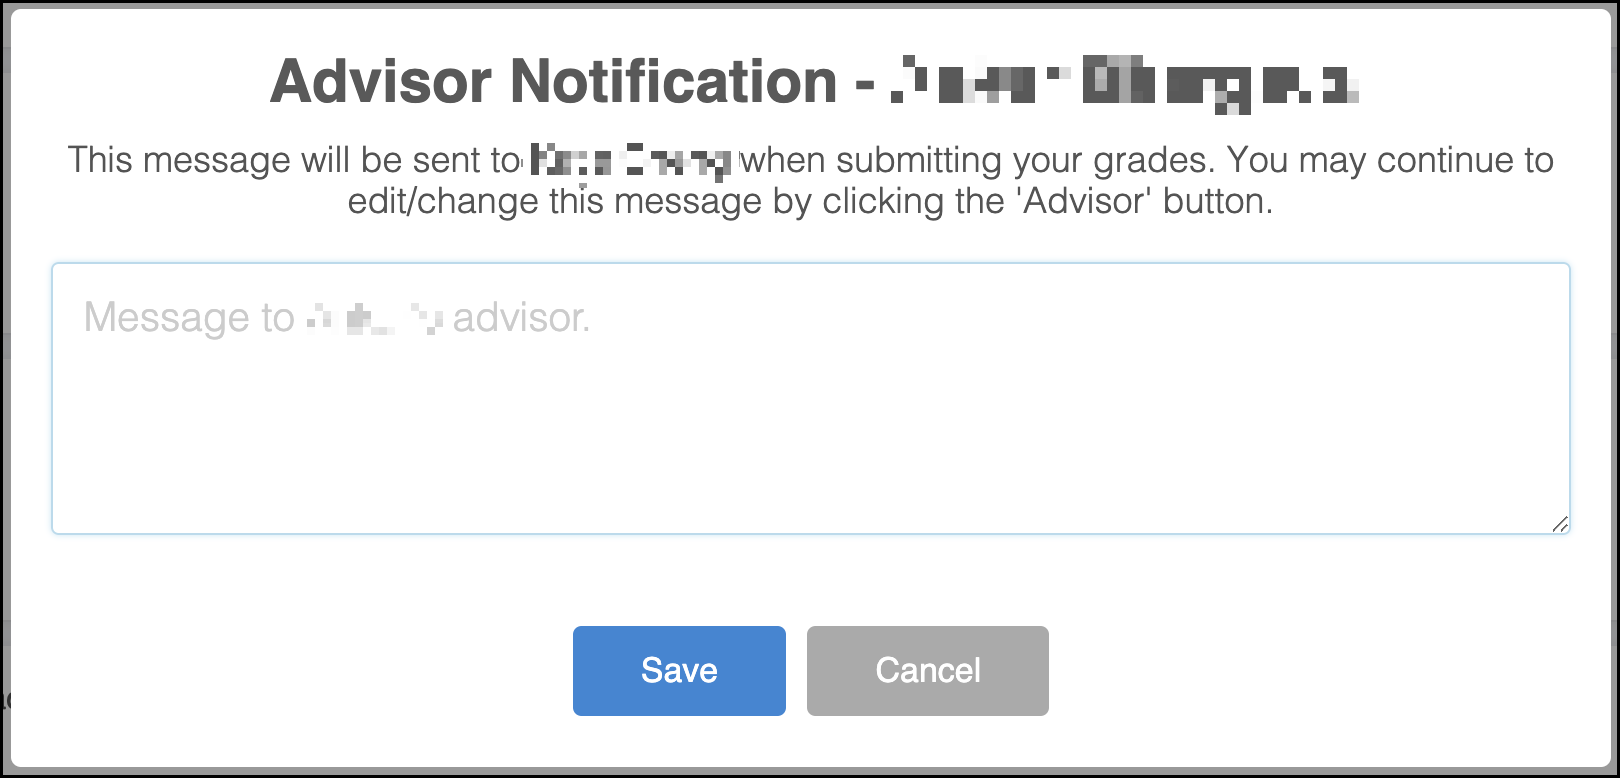
Use the Advisor button to launch the Advisor Notification window and send a message to the student's academic advisor notifying them of the grade change.
Use the View Logs button to show a full log history of all grade submissions, changes, etc., for the chosen student, including who made the changes, the date/time they were made, and what grade values were set or changed at that time.

Upon completing all grade changes for the desired students, click the Submit Grade Changes button to submit them.

Reports
The Reports screen contains links to relevant reports for you and your respective section(s).
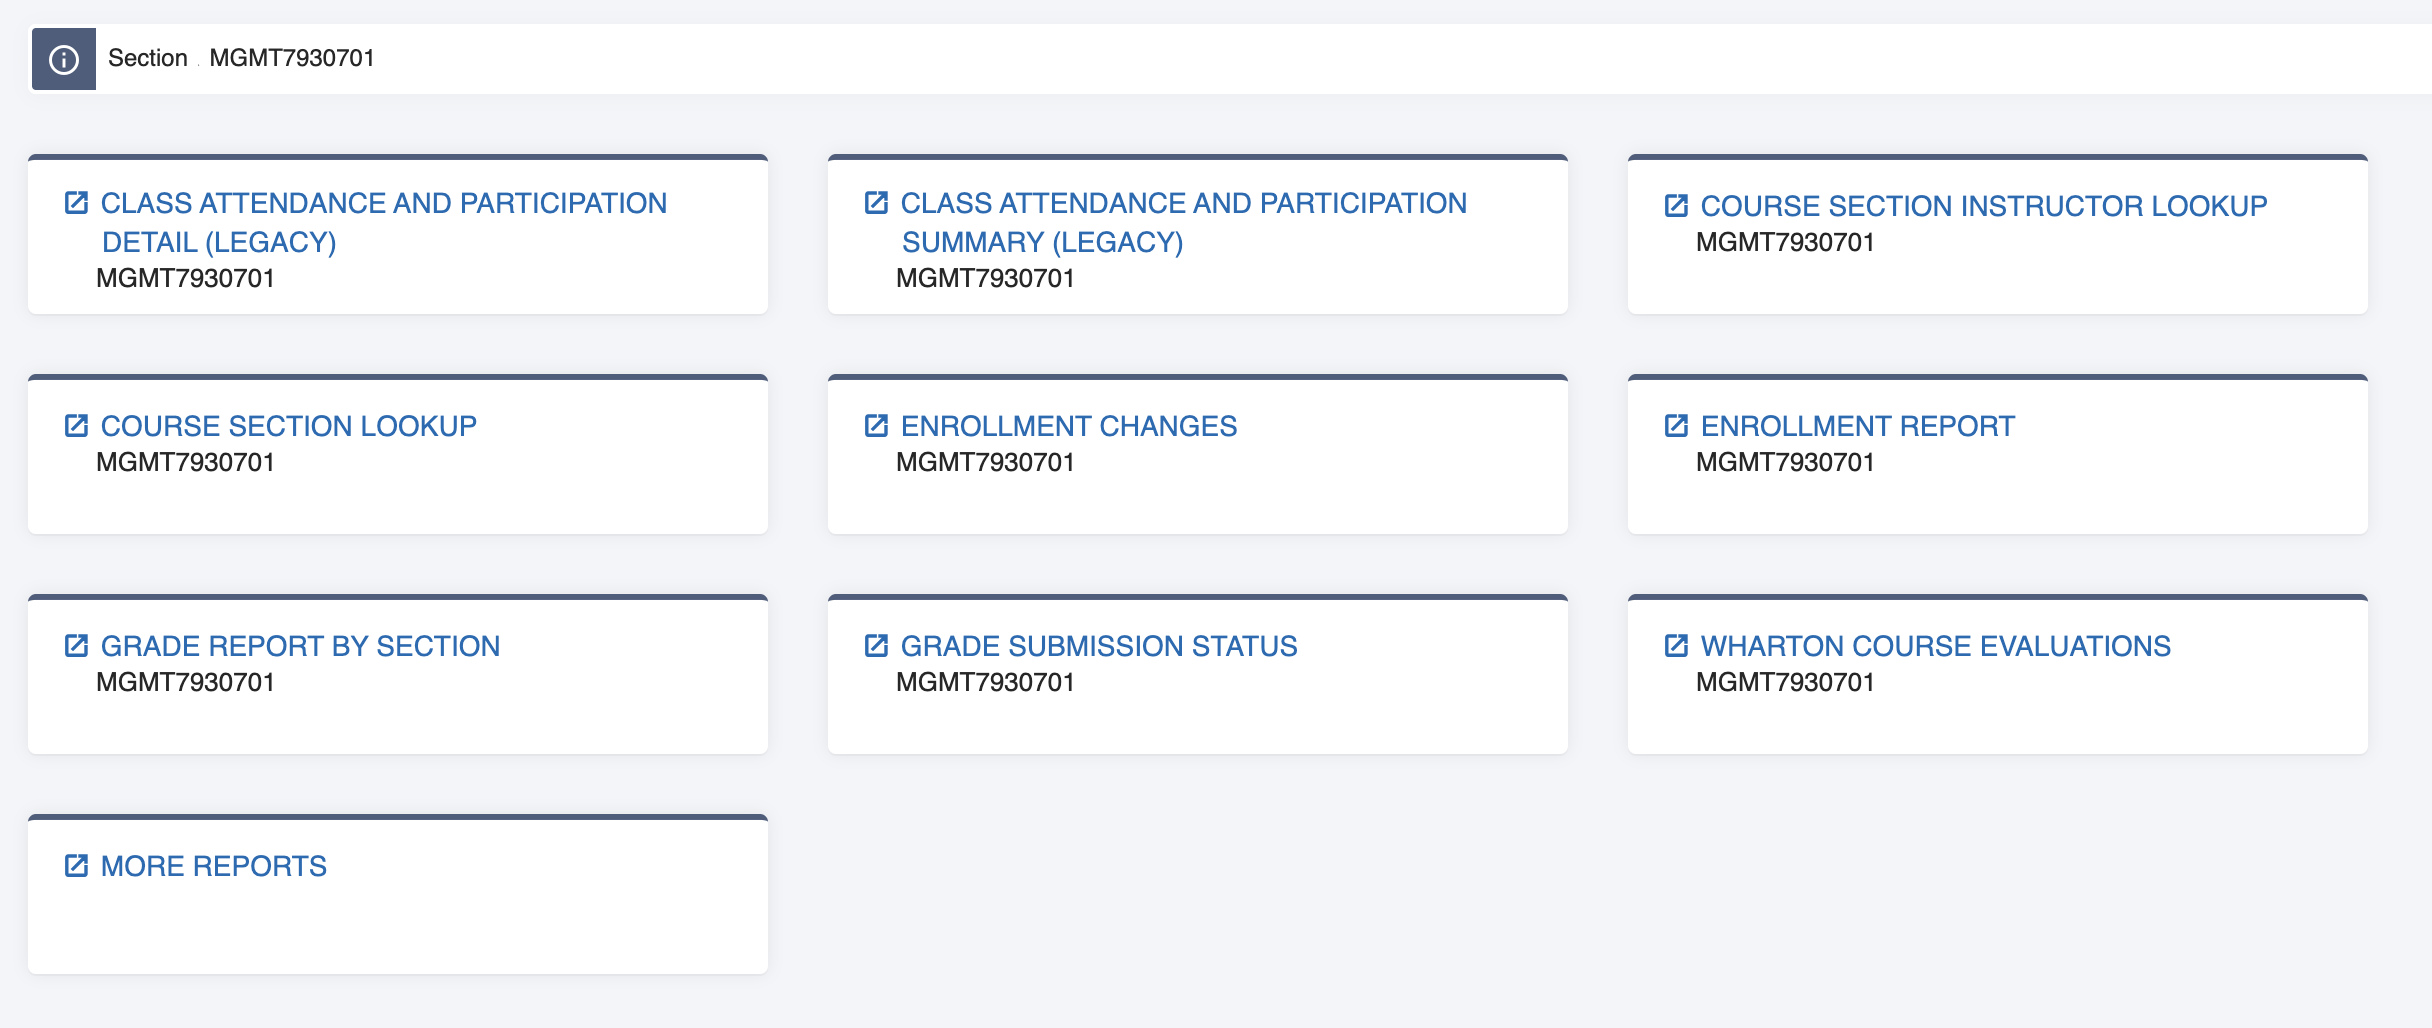
These reports include data on:
- Course section and instruction information
- Enrollment changes (e.g., adds, drops)
- Class participation
- Grading submissions, changes, and reporting
- Wharton course evaluations
Clicking a link will launch the relevant report within Wharton's Reports application, providing additional details.
Tech Surveys
The Tech Surveys section is used by Wharton Computing to gather information on faculty needs for each teaching semester. It also displays links to other relevant surveys involving faculty access to teaching resources.
Questions?
For additional questions about Instruction Center, please contact: instructioncenter@wharton.upenn.edu


 Click See All to expand the full list of available links.


