Sharing Your iPad or iPhone Screen with Zoom
Last Modified on 12/15/2025 5:07 pm EST
Zoom on a Mac or PC allows you to share the screen of an iPad, or iPhone, with your meeting. This enables you to use your iPad as a whiteboard that your fellow meeting attendees can see, or you can show a PowerPoint presentation from your iPad and use the touchscreen to annotate as you present.
The way you set up your sharing will depend on whether you are using a home network or whether you are on campus, using Penn's wifi network AirPennNet. Choose the directions below that apply to your use case.
Sharing iDevices on AirPennNet (Campus Wifi)
Because of security features in place, the AirPennNet wifi network will not allow Zoom on a Mac or PC to share the screen of an iPad or iPhone. Instead, those on campus can:
- Open Zoom on an iPad or iPhone and then share directly from that device.
- Use the "Wired" option detailed below; this is available for Macs only.
Sharing iDevices using a Mac on a Home Network
With Zoom for the Mac, you have two options for sharing your iPad/iPhone screen: wirelessly or via a wire.
Wirelessly
Before you attempt to share your iPad’s screen, there are a couple of things to be aware of:
- Your iPad/iPhone and Mac must be on the same network.
- Zoom client for Mac 3.5.27094.0918 or later.
- This only works with the following iOS devices: iPhone 4 or later; iPad; iPad mini, 4th generation or later
While in a Zoom meeting, click the green Share Screen button at the bottom of the meeting window.
Click iPhone/iPad via Airplay from the Basic screen sharing options and then click the blue Share button.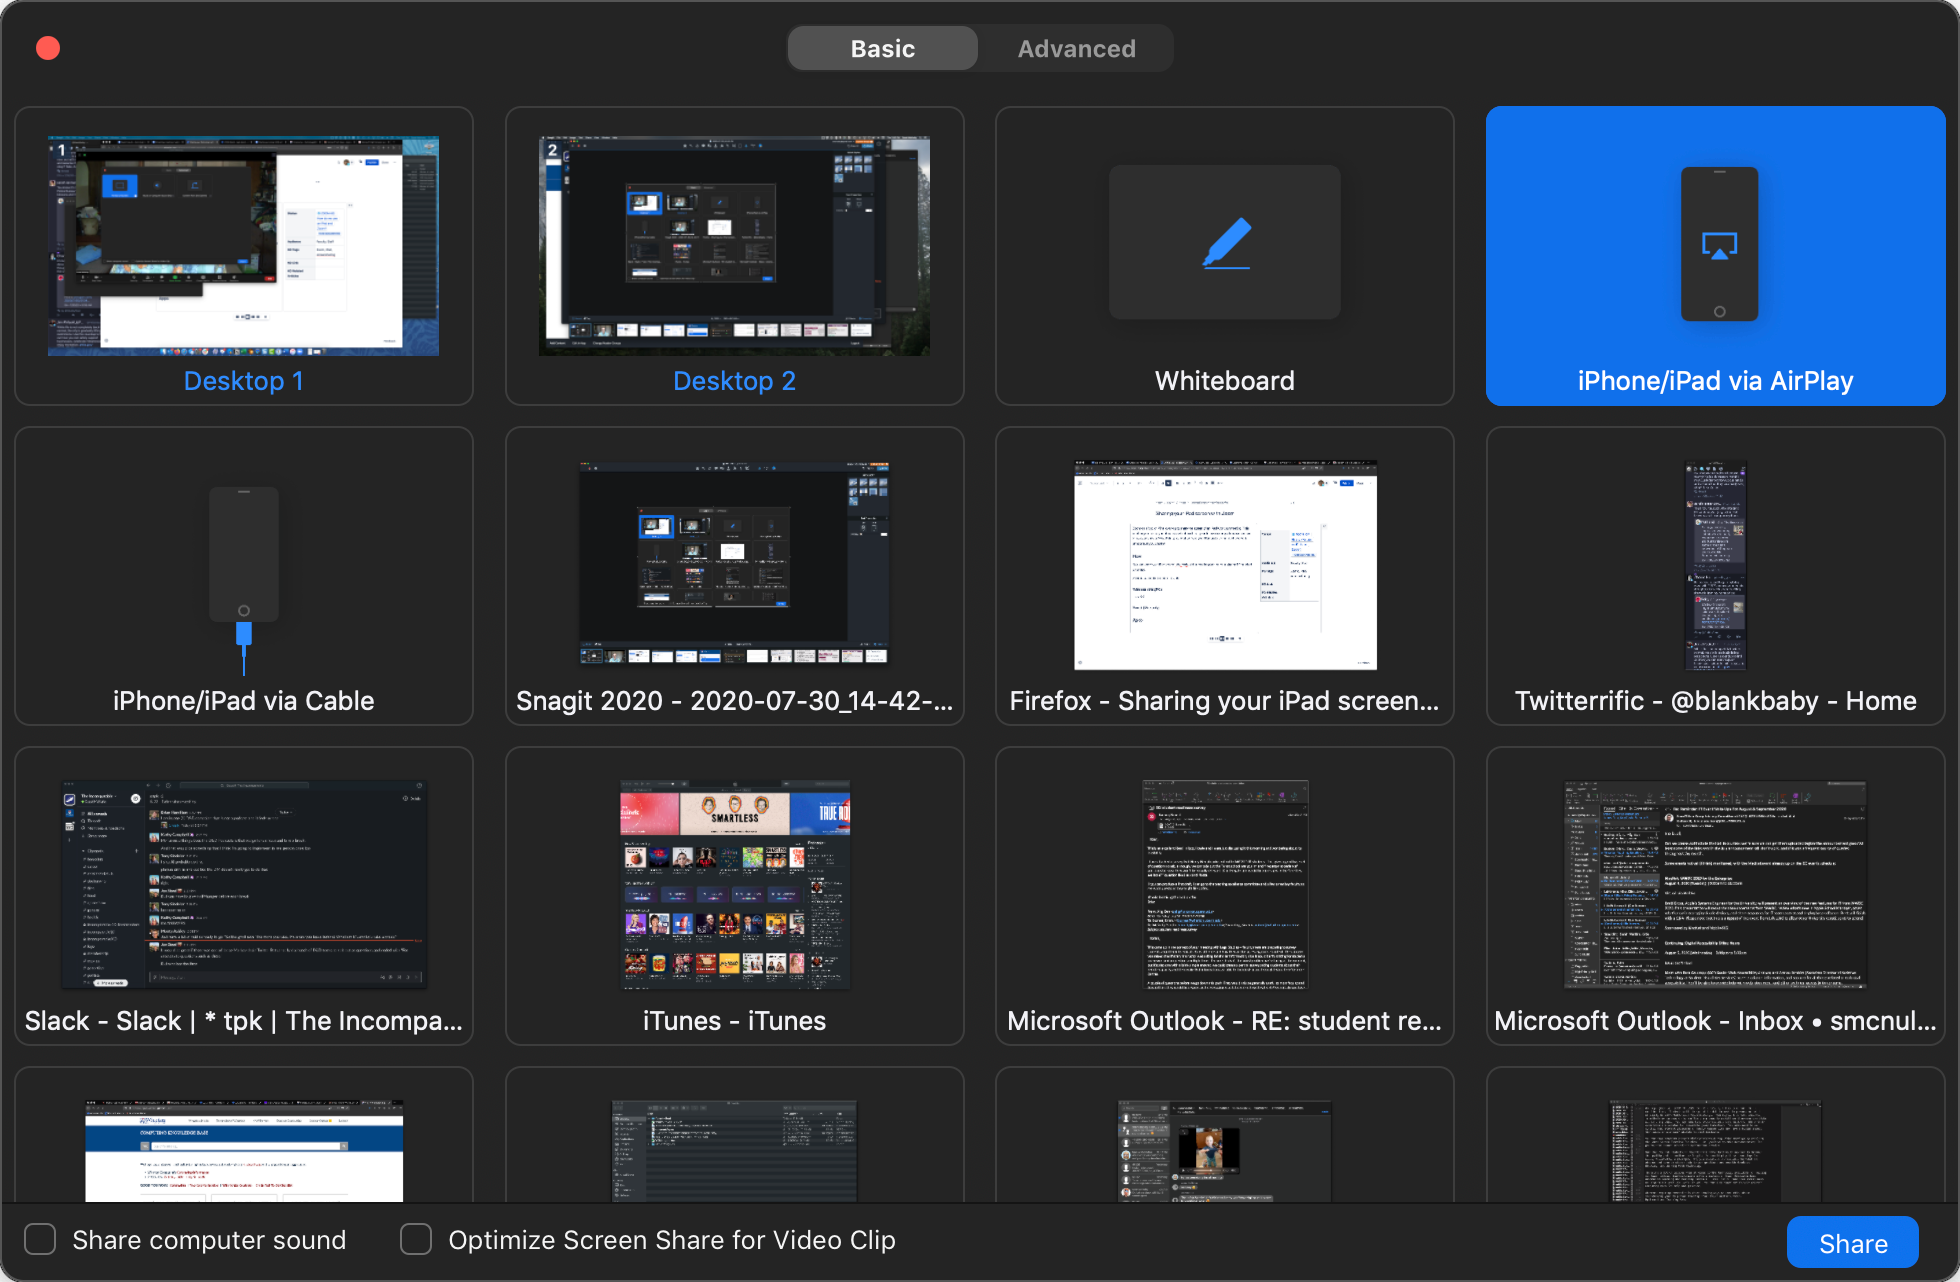
The Zoom app on your computer will display some instructions for you to follow on your iPad.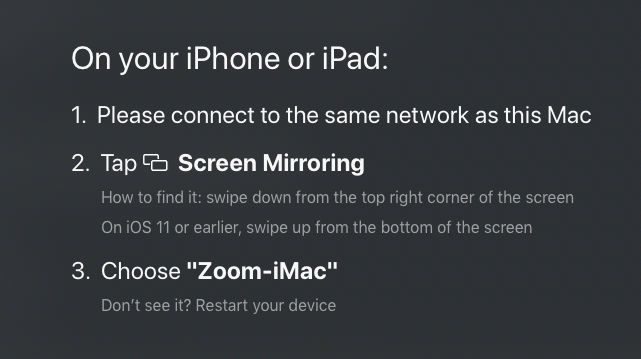
On your iPad, swipe down to access the Control Panel and tap the Screen Mirroring icon: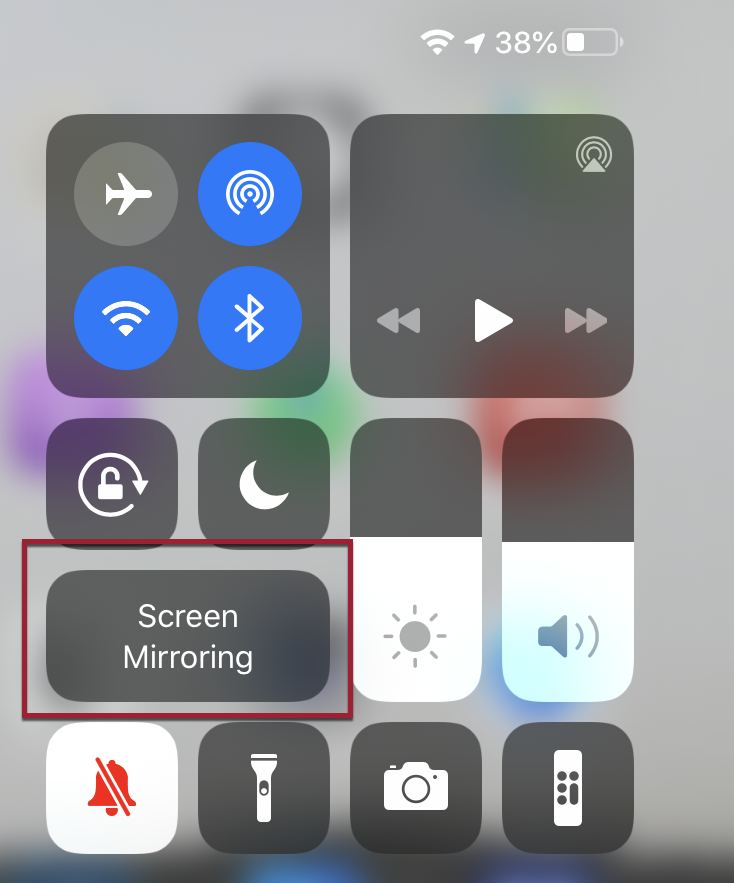
Tap on the name of the target displayed in the instructions above. In this case, it is “Zoom-iMac,” but it’ll be something different for you.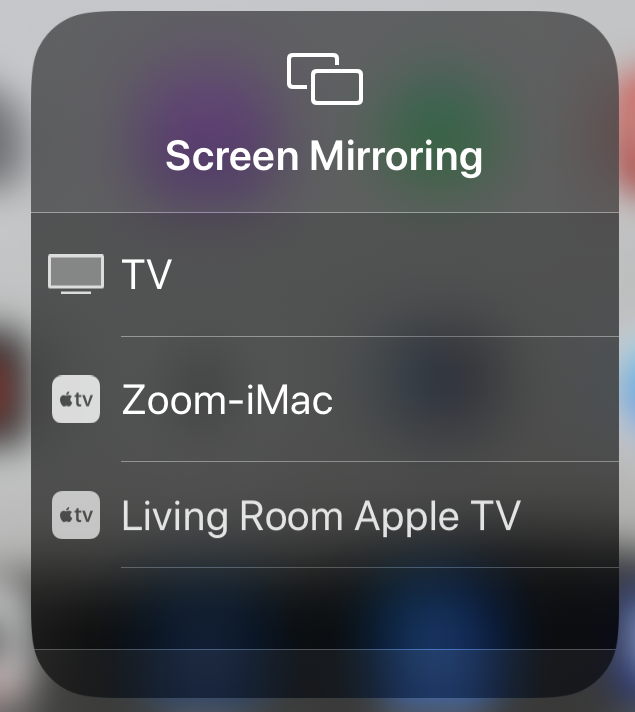
Your iPad will connect, be displayed on your computer screen, and shared with your meeting. You can interact with your iPad as usual.
Wired
This option is Mac only.
You must connect your iPad directly to your Mac with the included cable (which varies depending on iPhone/iPad model).
While in a Zoom meeting, click the green Share Screen button at the bottom of the meeting window.
Click iPhone/iPad via Cable from the screen sharing options and then click the blue Share button.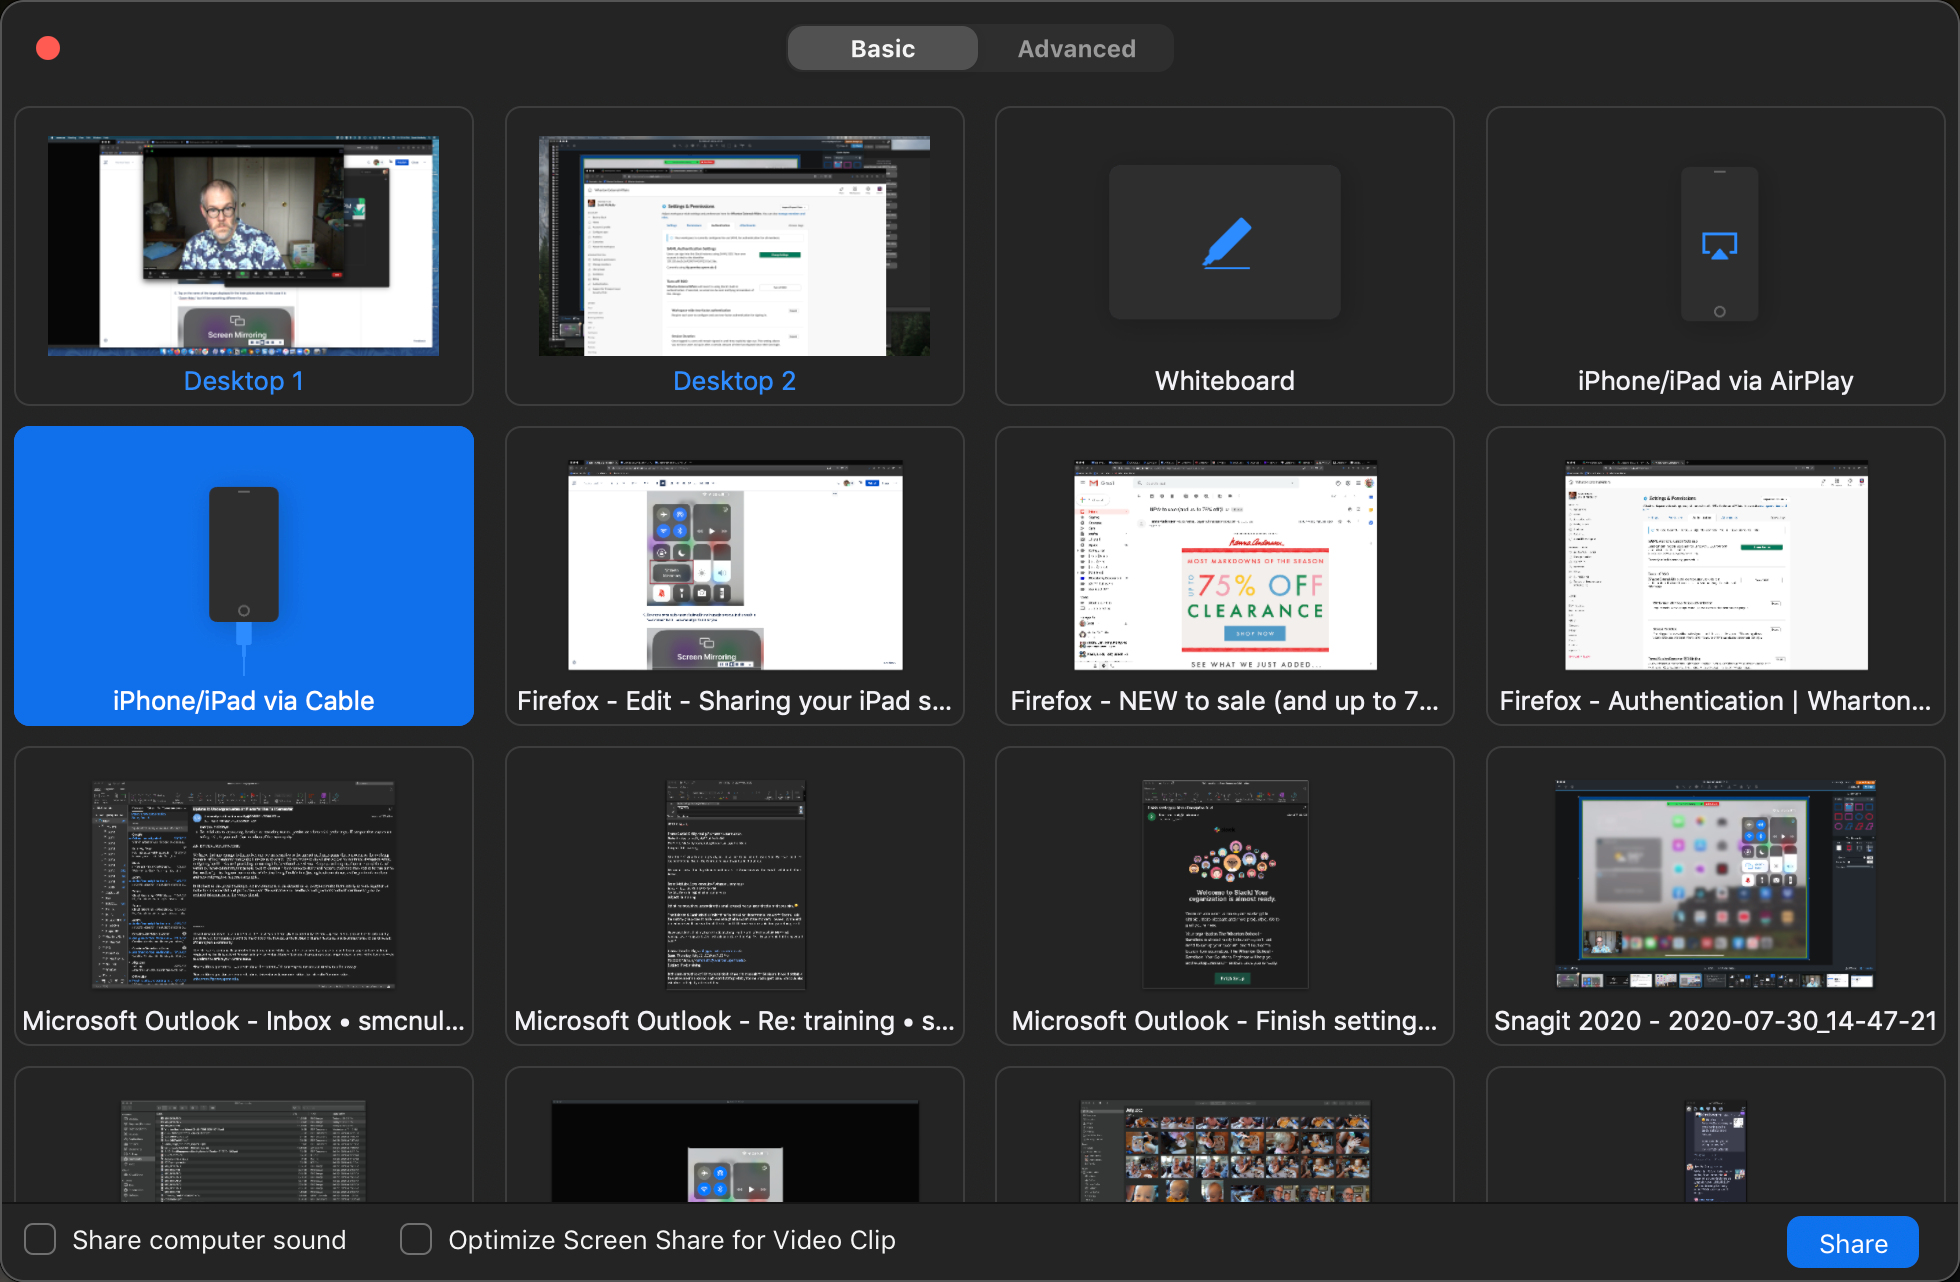
The Zoom app on your computer will display some instructions for you to follow on your iPad.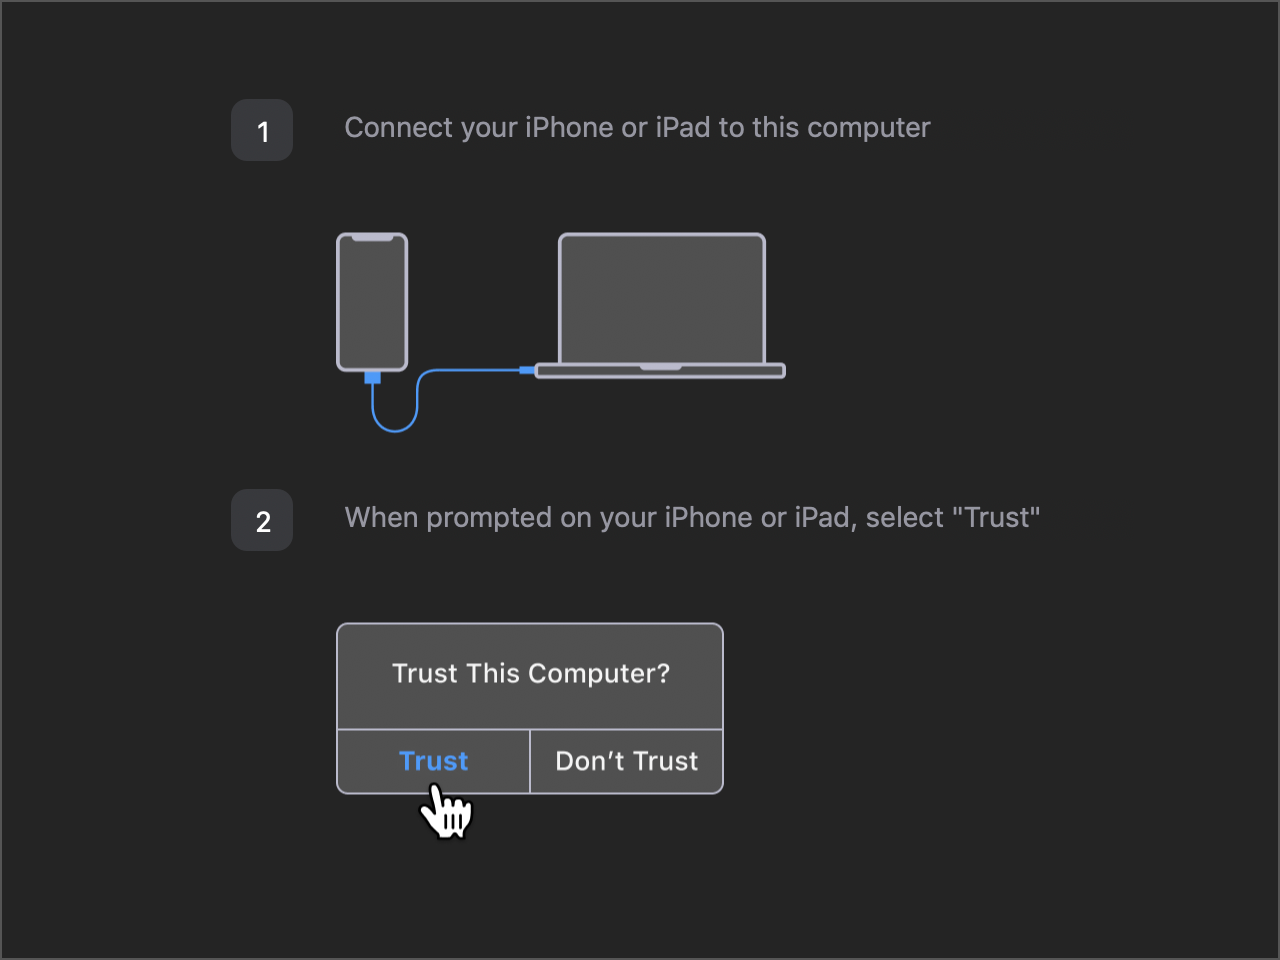
Connect your iPad to your Mac with the appropriate cable and tap the Trust button on the iPad (if it appears).
Your iPad will connect, be displayed on your computer screen, and shared with your meeting. You can interact with your iPad as usual.
Sharing iDevices using a PC on a Home Network
Before you attempt to share your iPad’s screen, there are a couple of things to be aware of:
- Your iPad/iPhone and PC must be on the same network.
- Zoom client for Windows 3.5.27094.0918 or later.
- This only works with the following iOS devices: iPhone 4 or later; iPad; iPad mini, 4th generation or later
While in a Zoom meeting, click the green Share Screen button at the bottom of the meeting window.
Click iPhone/iPad from the screen sharing options and then click the blue Share button.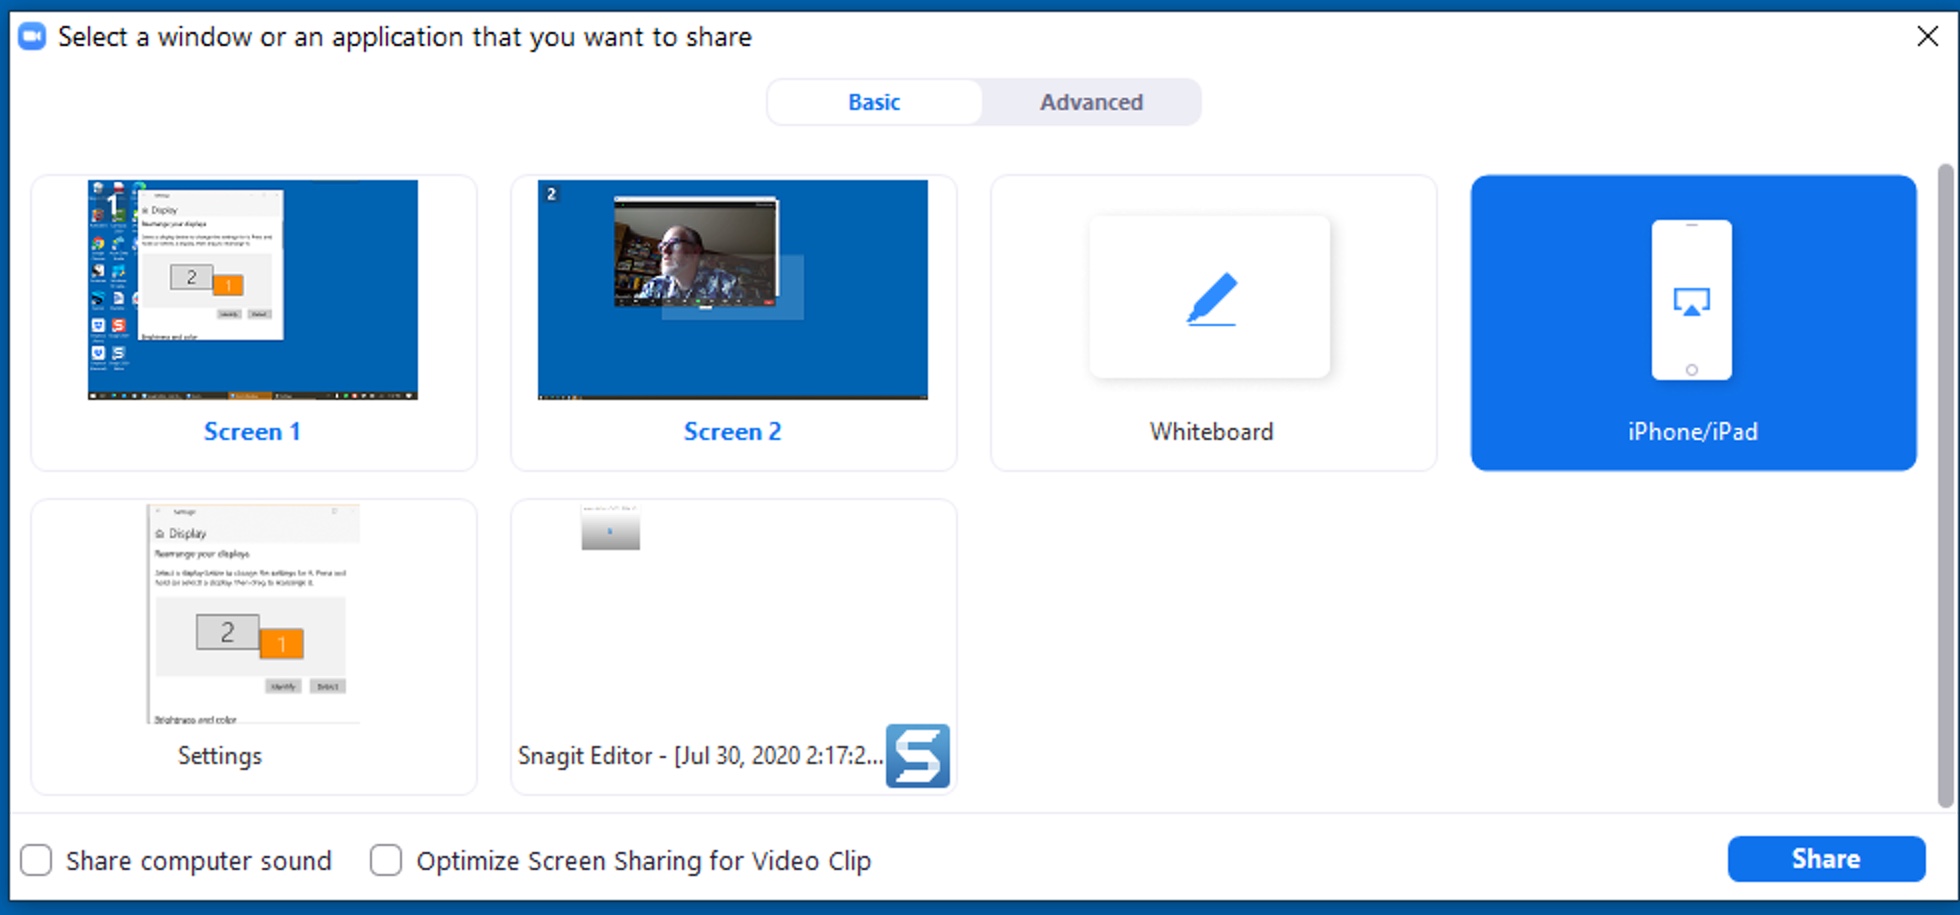
If this is the first time you’re sharing your iPhone/iPad you’ll need to install a plugin on your computer. Click Install and follow the directions.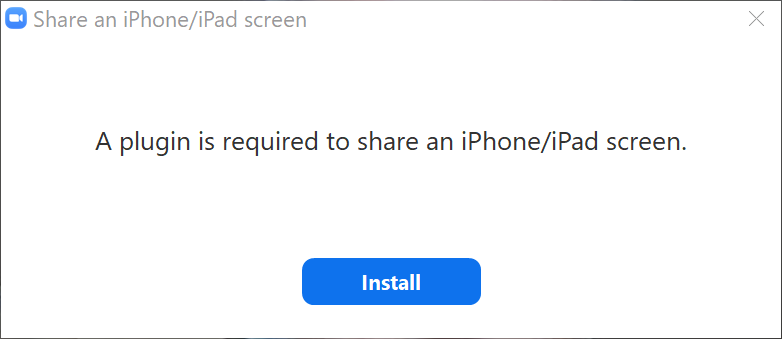
The Zoom app on your computer will display some instructions for you to follow on your iPad.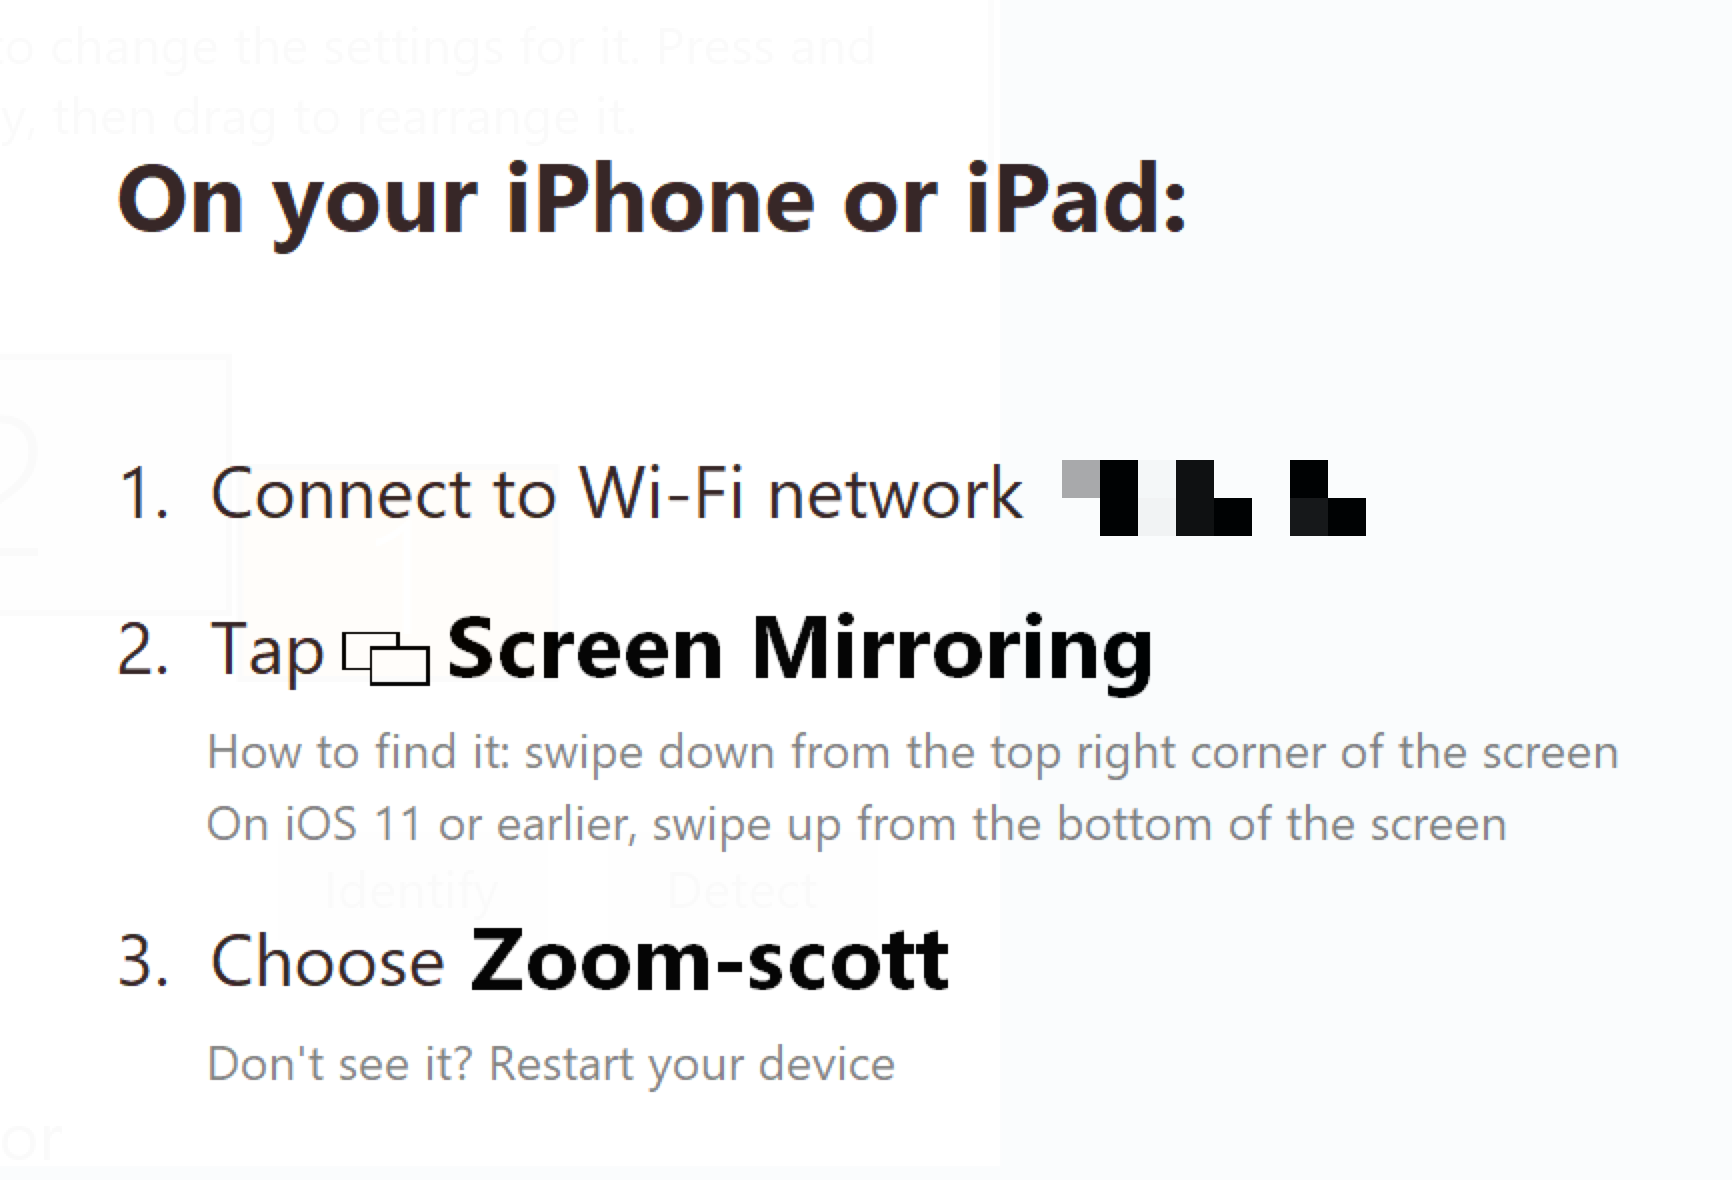
On your iPad, swipe down to access the Control Panel and tap the Screen Mirroring icon:
Tap on the name of the target displayed in the instructions above. In this case, it is “Zoom-scott,” but it’ll be something different for you.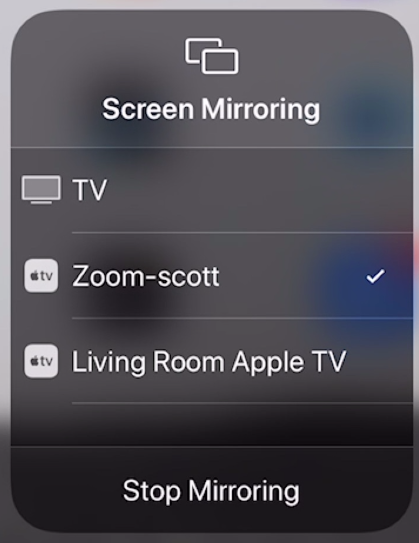
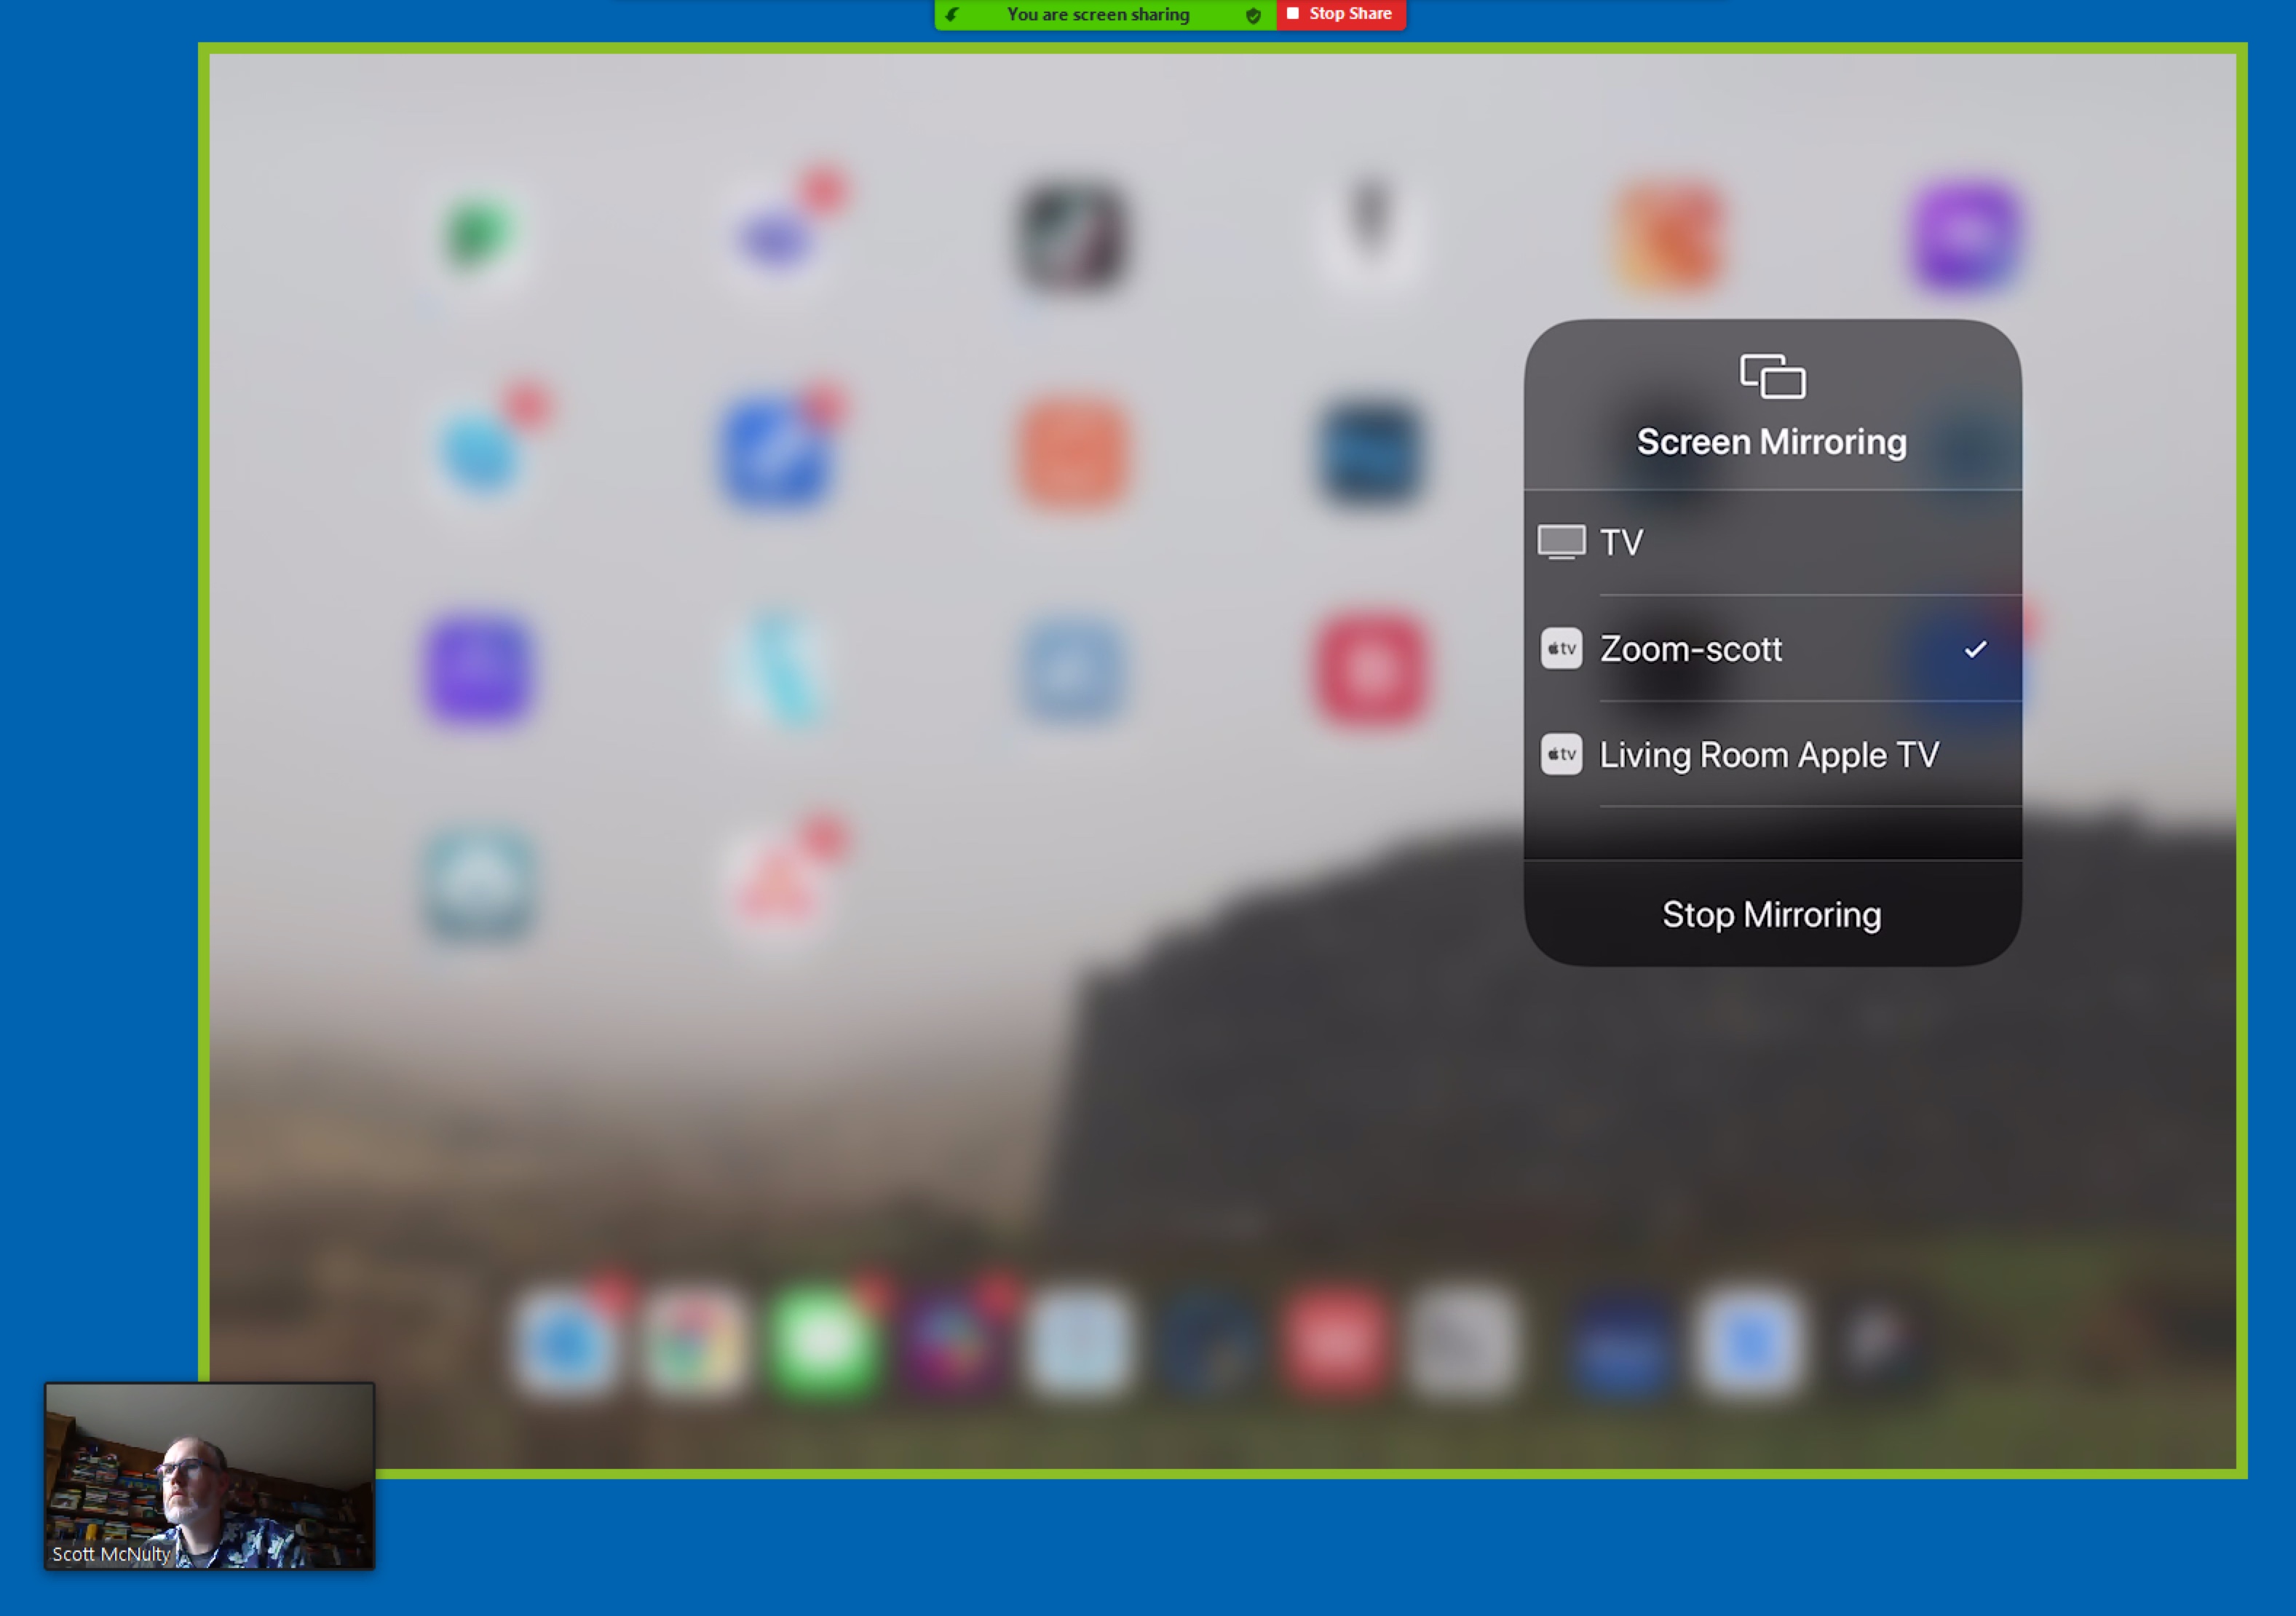
Your iPad will connect, be displayed on your computer screen, and shared with your meeting. You can interact with your iPad as usual.
Apps
Sharing your iPad/iPhone screen allows you to use your favorite apps to teach. A couple of popular apps for whiteboarding and annotating include:


