The Class Recordings Permissions tab in Canvas is a standalone app to help you manage access to your class recordings.
Before You Start
You will need the following before you can complete this task:
- Canvas Site
- Class Recordings Tab
- Class Recording Permissions Tab
Students can review Class Recording Permissions (for Students).
Video Walkthrough
This 8-minute walkthrough recording of a demo to faculty shows the entire app - from setting your preferences to managing student permissions. The rest of this article provides written instructions and screenshots for these same features.
Click Read More to view this excerpt from a recent faculty demo:
Configuring Class Recording Permissions
You'll need to set your permissions preferences for your Class's recordings. See our video above or follow the step-by-step instructions to configure your class.
Configuration Step-by-Step Instructions
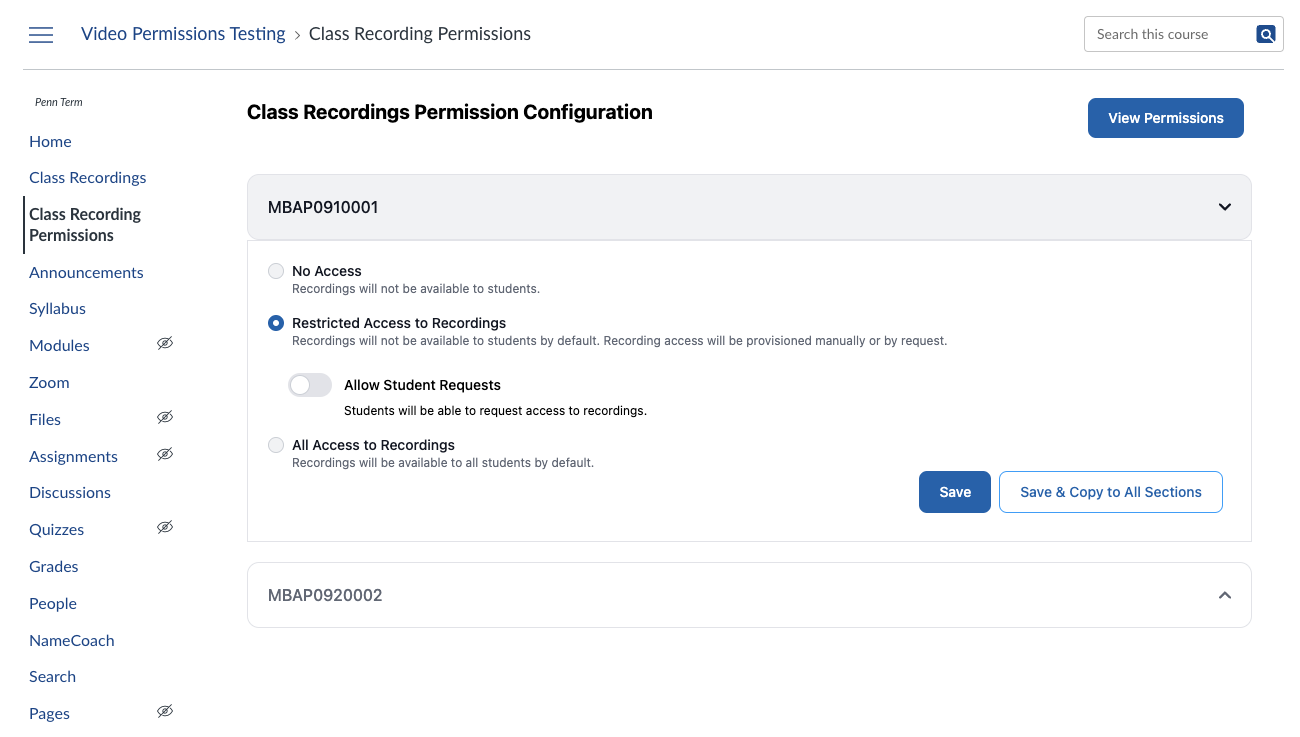
The Class Recordings configuration screen allows you to view and set general settings for classroom recording permissions, such as "No Access," "All Access," or "Restricted Access."
NOTE: Your changes to Configuration will not be saved until you confirm your choices as follows:
- Save Changes: Changes will not be saved until you click the Save button.
- Apply to All Sections: Changes will not impact all sections unless you select "Save & Copy to All Sections."
You will need to make one of the following choices:
- No Access: If you choose this, recordings will not be available to students. This is the default setting; if you want recordings to be available to students you must pick another option.
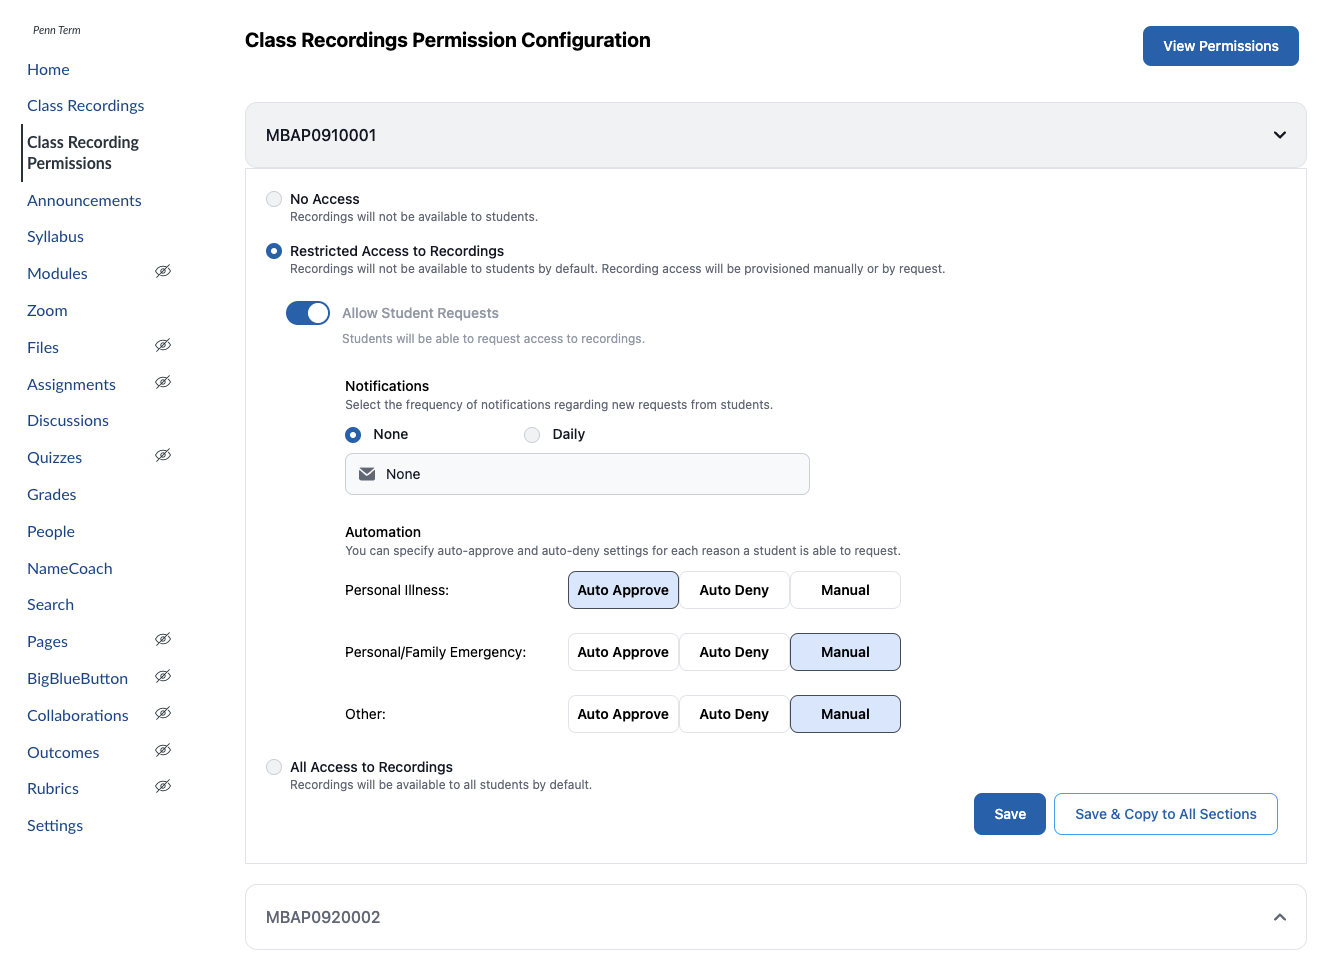
- Restricted Access to Recordings: This setting allows you to grant students access to recordings selectively. For example, you might grant the entire class access to an exam review session.

-
- Allow Student Requests: When you restrict access to recordings in general, you can still allow students to submit requests for certain videos. In addition, you can:
- Determine how frequently you receive notifications for these student requests.
- Automate whether to approve or deny the student requests based on the reason.
- Allow Student Requests: When you restrict access to recordings in general, you can still allow students to submit requests for certain videos. In addition, you can:
- All Access: This choice makes recordings available to all students.

Once you've chosen your settings, click the blue View Permissions button (Top Right) to navigate to the next page, where you can further refine your configuration choices.
Managing View Permissions

The View Permissions page provides an overview of all the permissions for your Canvas course. All sections will appear by default, sorted by meeting date and request status.
- Filter these results with the search bar, or by using any of the dropdown menus underneath the Search bar.
- Sort by clicking on the column headings (e.g. Section, Student, Meeting Date, and more).
- Grant Permissions in the Action Column. If you have decided to allow student requests, Approve/Deny buttons become visible, allowing you to handle those requests. You can remove permissions at any time.
- To add a permission proactively, click the blue Add Permission button at the top right of the screen.
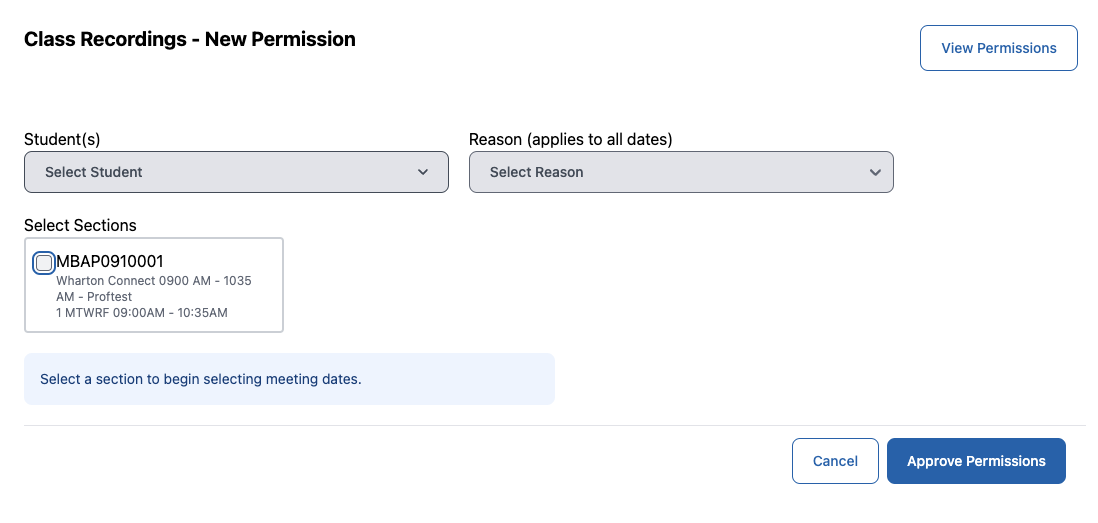
Adding Permissions
When you have chosen Restricted Access to Recordings in the configuration section, you can add permissions selectively for individual students or for the entire class.
 New Permission Screen - Prior to Selecting a Student
Selecting Students
From the Student(s) dropdown, search for a single student. If you would prefer to add a global permission for all students, select the Viewer Group (All Students) option, usually first in the list.

Selecting Sections
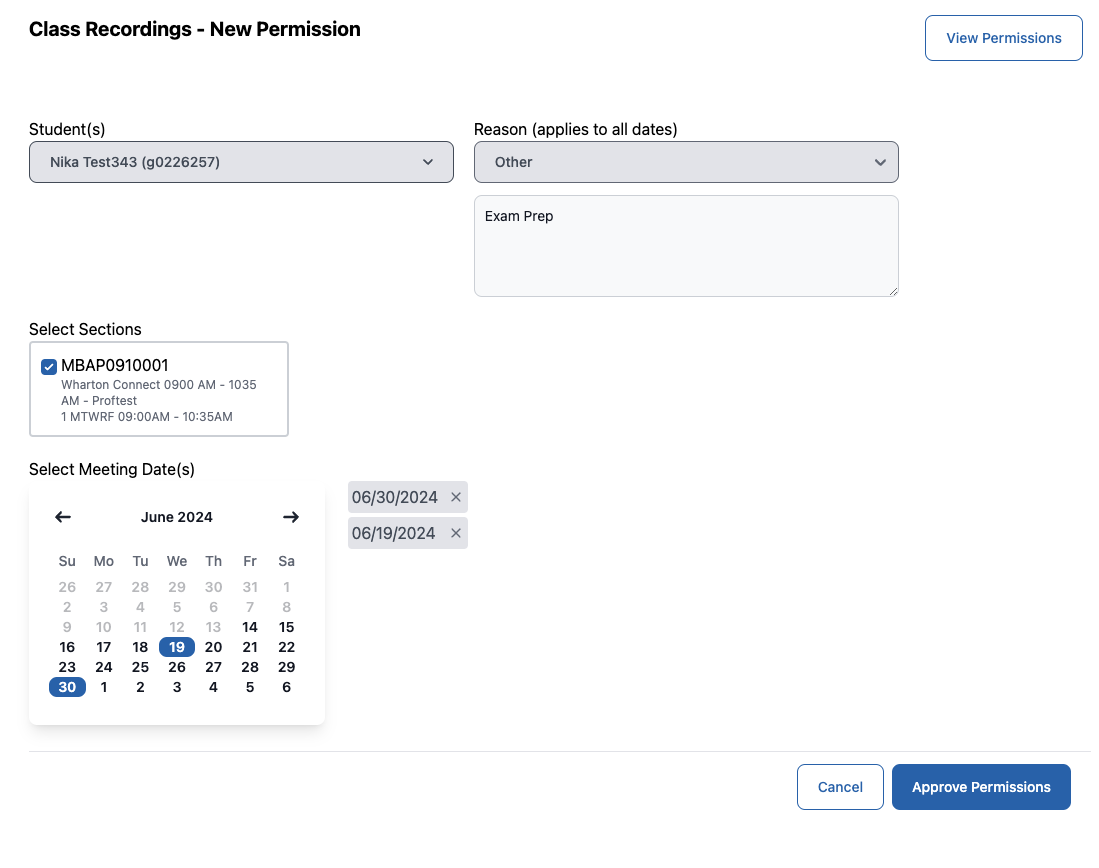
Once you have selected a student, select the section from the available list. You will then see a calendar for choosing meeting dates.

- Select the meeting dates by clicking on each date
- Assign your Reason.
- Choosing Other allows you to enter a customized message explaining the reason.
- Choosing Other allows you to enter a customized message explaining the reason.
- Click the blue Approve Permissions to add this video permission.

Setting Expiration Date
You can set an Expiration Date when granting individual permissions which will automatically remove access at 12 midnight of the selected date (eg 3/4/26 00:00)
To set an Expiration Date, select the Expiration Date box below the “Select Sections” area. Then use the calendar picker to select the date you’d like access to expire. Click Approve Permissions buton.

Permissions for Midterms/Exams
Granting Access for All Students
You easily grant all students access to recordings so they can prepare for an exam but still maintain Restricted Access without affecting individual student requests.
- From the Student(s) dropdown menu, select the Viewer Group (All Students)

- Once you have selected the Viewer Group (All Students), select the section from the available list. You will then see a calendar for choose meeting dates.
- Select individual meeting dates or the blue Select All Dates button. Assign your Reason.
- Choose Other allows you to enter a customized message explaining the reason.

- Click the blue Approve Permissions to add this video permission.
Removing Access After Midterm/Exam
To remove All Student access after an exam, navigate to the View Permissions page, is the search bar type All Students. This will filter all current permissions to show only the All Students group. Click the red Remove button beside each recording you’d like to remove the All Students group.

Questions?
If you have questions about this application, please contact your Wharton Computing representative for help.