Before You Start
You will need the following before you can complete this task:
- An active PennCard
- PennKey credentials
- Sufficient funds in either Wharton print credit or PennCash
This article provides information on using Wharton's public Workstations to print, scan and copy. To print from your laptop or device, you'll need to use PaperCut, the printing software at Wharton. If you are new to PaperCut, see Using Wharton PaperCut for the First Time, below.
We recommend using the PaperCut portal for the best printing experience.
Printing From a Wharton Public Workstation
Follow these directions to print to a Wharton printer from any public workstation. (If you prefer, you can use the PaperCut portal to send your document(s) to print).
- In your document, choose Print from the File menu.
- Select the print queue: Wharton-Print on PrintAtWharton.
- If the print queue is not available, from your desktop open the Printer Refresh folder and open the desired shortcut from there. This will connect the print queue, and it will appear as a choice in your print properties.
- Click Print to send your job to the print queue.
- To release your document at the printer:
- Go to the printer from which you would like to print.
- Each printer will have a Touch Panel (in the red box) and a Proximity Card Reader (in the blue box):
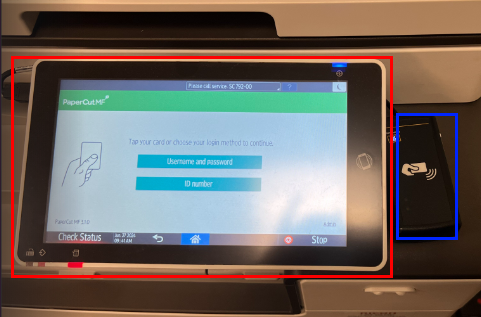 Printer Login Screen and Card Reader
 - PapercutMF should be open on the printer display (if not, simply tap the PaperCutMF icon to re-launch it).
- Tap your PennCard to the proximity card reader.

- You should hear a chirp as the reader picks up the information from the card, and you will see a message that you are being authenticated.
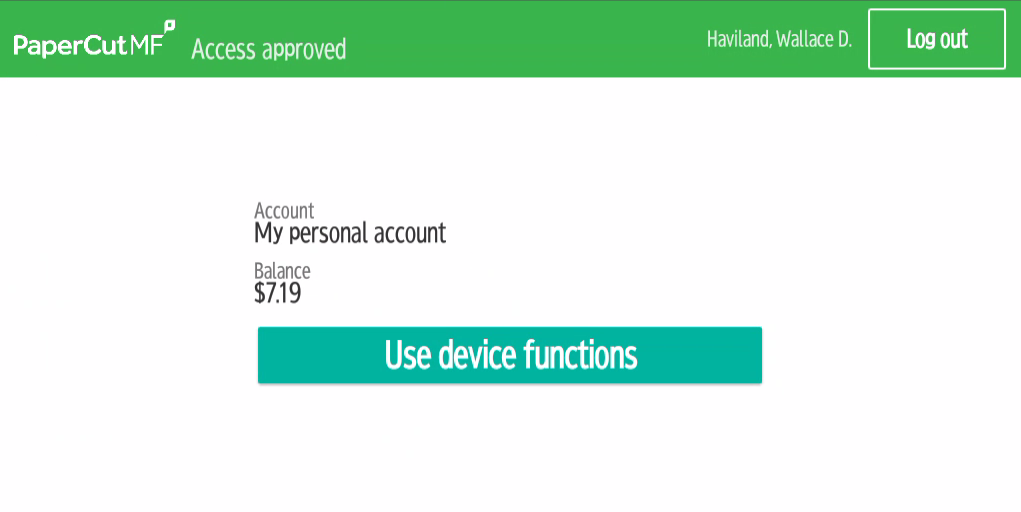
- Once authenticated, you will be at the PaperCut main screen:
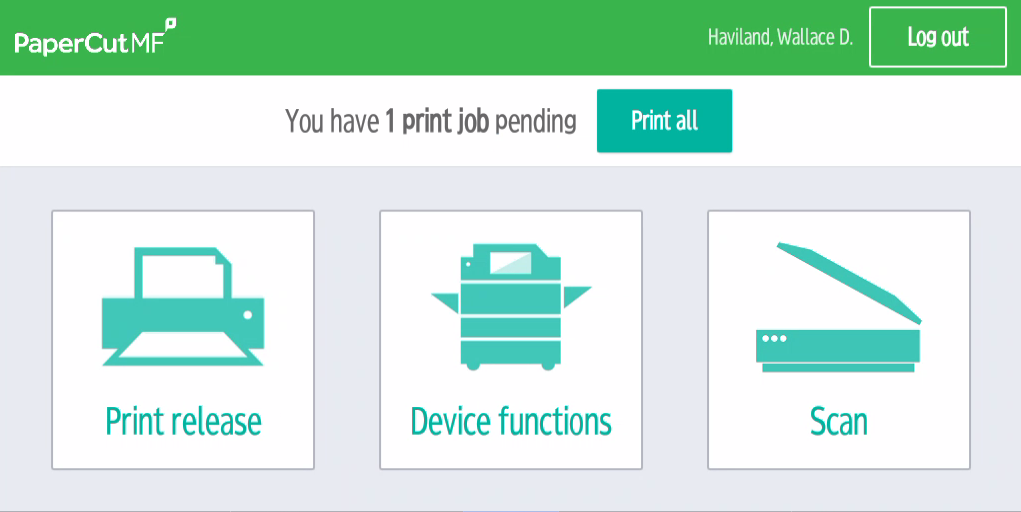 PaperCut Main Screen
- Click Print release and you will see a list of documents currently held in your queue.
- Select the document(s) you wish to print, and then click Print:
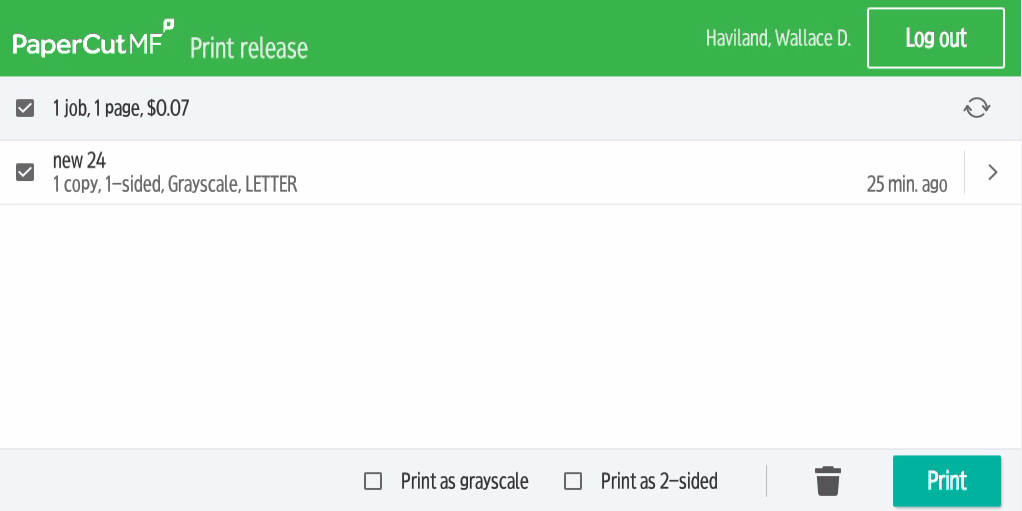 List of Documents Ready to Print
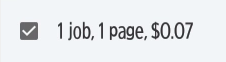
 - The amount to be charged will be displayed at the top left of the screen:
- There are also options at the bottom of the screen to help reduce cost and environmental impact of the printing:
- Print as grayscale.
- Print as 2-sided .
- Delete the job altogether from the queue.
 Additional Options
- Once your job has printed, tap Logout to log out of your account to finish printing.
Notes:
- Associate your PennCard: The first time you use a Wharton PaperCut printer -- and any time you get a new PennCard -- you will be asked to associate your PennCard with your account.
- Time-Limit: Documents sent to the print queues are held for 5 hours and can be released from any printer.
- Duplex Default: Documents printed are duplex printed by default. To print single-sided, uncheck the "Print as 2-sided" option at the printer upon release.
Copying and Scanning from Wharton's Multifunction Printers
In addition to printing, Wharton's multifunction printers also allow you to make copies and scan images for sending via email.
Before you Start:
- Make sure the display panel on the printer is lit. If not, touch the panel to wake it up.
Copying
- To make a copy of a document, log into the device by tapping your PennCard on the card reader mounted by the display:
You should hear a chirp as the reader picks up the information from the card, and you will see the PaperCut main screen.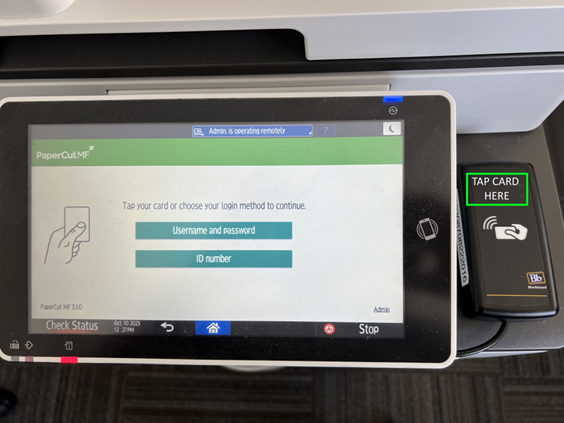 PaperCut login screen and PennCard reader.
 - At the PaperCut main screen click Device Functions:
 PaperCut Options
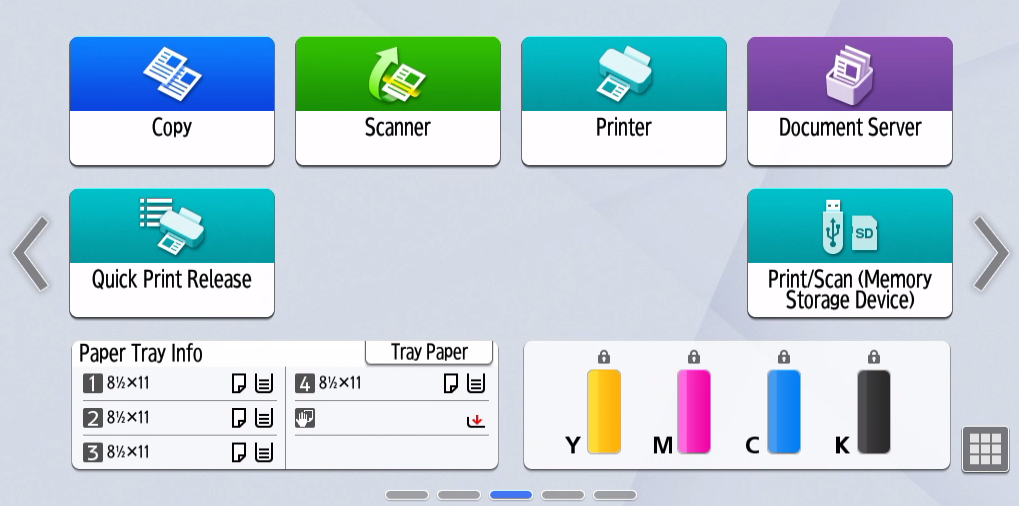
 - On the next screen, click Use device functions:
 Use device functions screen
 - At this point you will be taken out of PaperCut to the device’s native applications page:
 All Options Available
 - Click Copy and select your desired settings in the Copy interface:
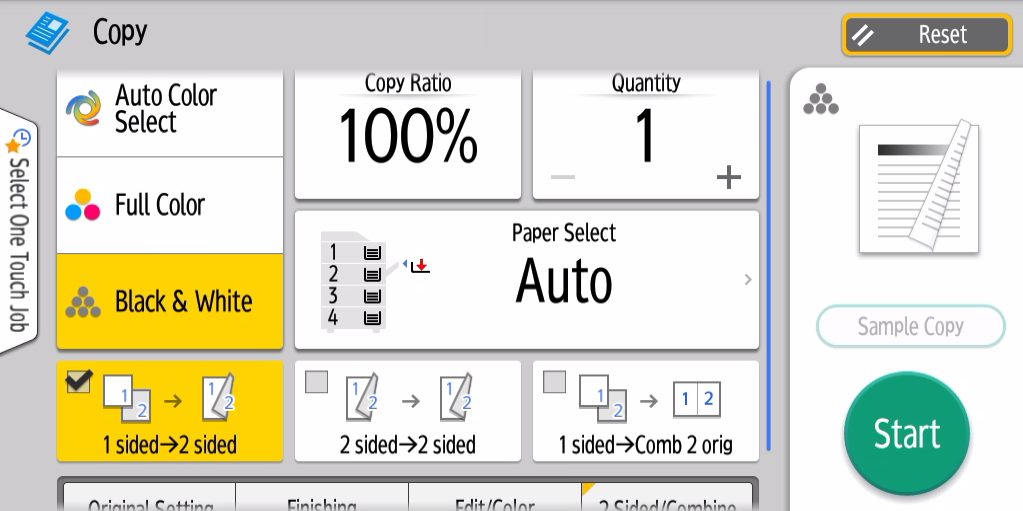 Copy Options Screen
 -
Once all options are set, place the document(s) to be copied on the device (either face up in the document feed tray, or face down directly on the glass) and click Start.
-
Indicate the appropriate orientation of the document in the Feeder or on the Glass:
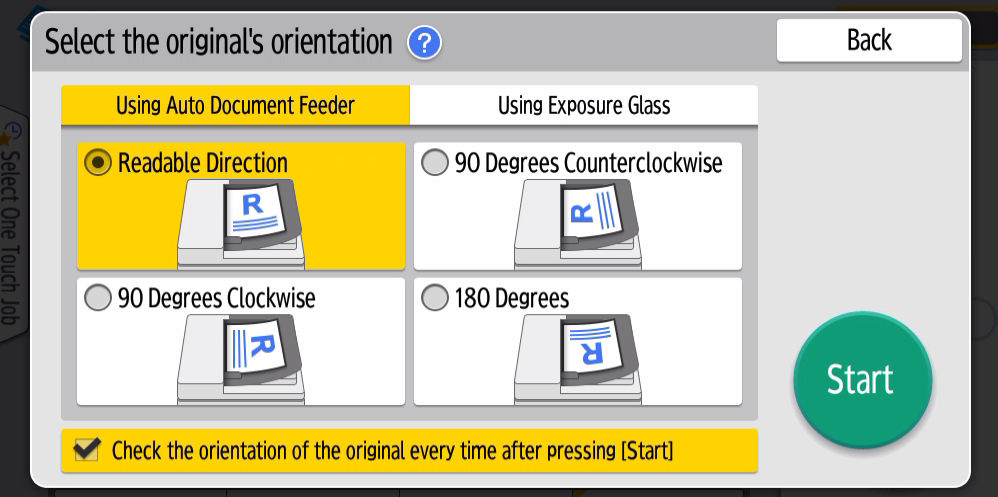 Page Orientation Choices
-
Click Start again, and a progress animation will be displayed as your copy job is processed.
-
Once complete, you will be returned to the main Copy interface.
-
Please be sure to click Logout to complete your interaction.
Scanning
- To scan a document to email, log into the device by tapping your PennCard on the card reader mounted by the display:
You should hear a chirp as the reader picks up the information from the card, and you will see the PaperCut main screen. PaperCut login screen and PennCard Reader
 - Click Scan.
 PaperCut Options
- You will see your email address populating the “To” field, and default entries for “Subject” and “Filename”:
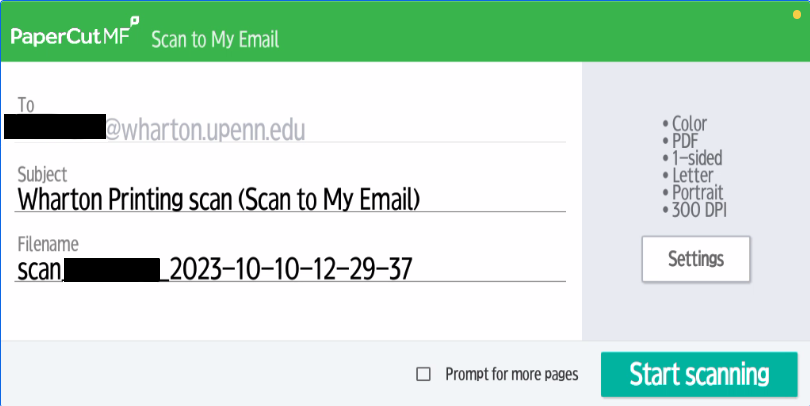 Scan to Email Options
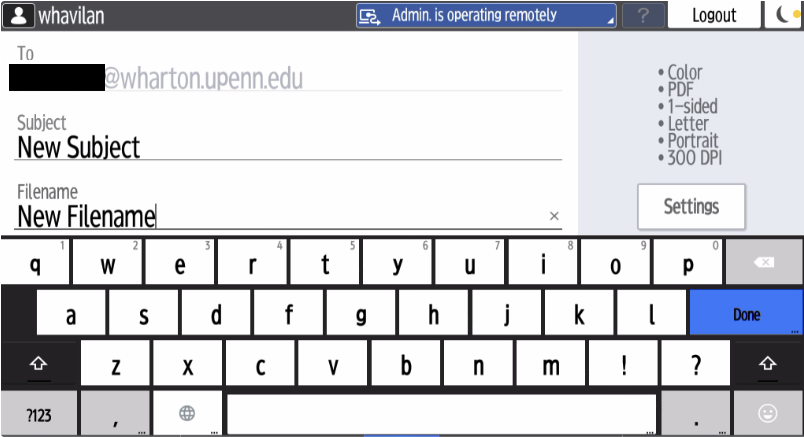
 - “Subject” and “Filename” can be changed, simply touch the display and an on-screen keyboard will appear:
- Click Settings on the right to select various options like Duplex, File type, etc.
(Note: Wharton only stocks 8.5”x11” letter sized paper.)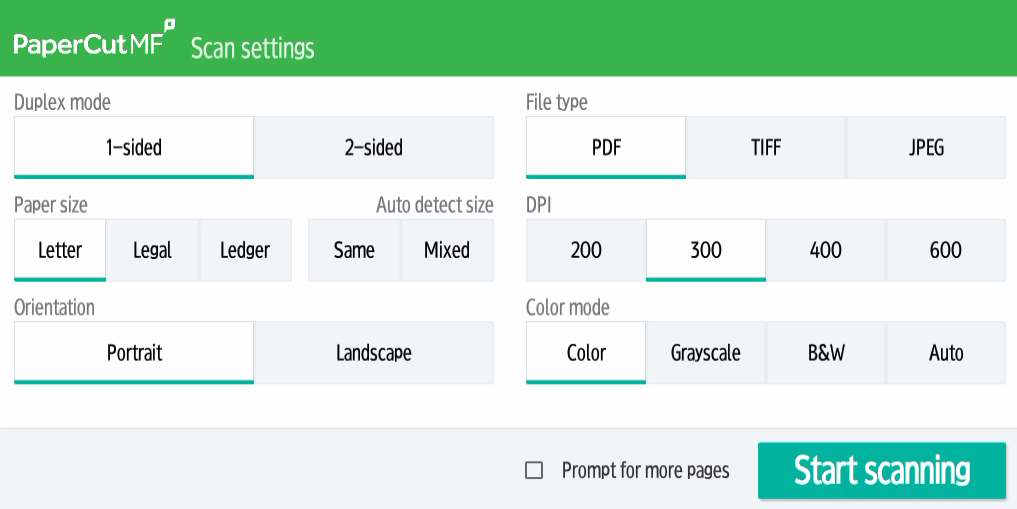 Scanning Options Available
 - At the bottom of this screen there is also the option to prompt for more pages if a multi-page document is being scanned:

-
Once all options are set as desired, place the document(s) to be scanned on the device (either face up in the document feed tray, or face down directly on the glass) and click Start Scanning. You will see messages that the document is Scanning, and then Sending.
-
Once the document is sent you will be returned to the PaperCut home screen.
-
Please be sure to click Logout to finish scanning.
Questions?
Contact: Wharton Computing Student Support