NameCoach is a recording tool in Canvas that provides faculty and students with a simple and effective solution to identify pronouns, phonetically pronounce names and hear how others’ names should be pronounced. Once a user updates their NameCoach profile, that profile will be saved in Canvas. It will then be available for listening in any course after the user clicks on NameCoach in a course’s navigation menu.
Before You Start
NameCoach is currently licensed for Penn Canvas through the Summer 2026 term; it's currently expected that access to that service will end before Fall 2026. Users who would like to show phonetic name pronunciation in their Canvas profile may do so using these steps linked here.
Accessing NameCoach
There are two main ways to access NameCoach once you've logged into Canvas:
- Through the global navigation Account tab
- From within a specific Canvas course
Account Tab Access
For access outside of a specific Canvas site, you have the option to record your name via the Account tab on your global navigation bar (Figure A). Once you click to access the NameCoach Account Profile, you will then see a table containing columns for your name and email address, name recording, and a space to edit your information (Figure B).
- Log into Canvas, and click on the Account icon in the left Global Navigation Pane.
- Select NameCoach Account Profile.
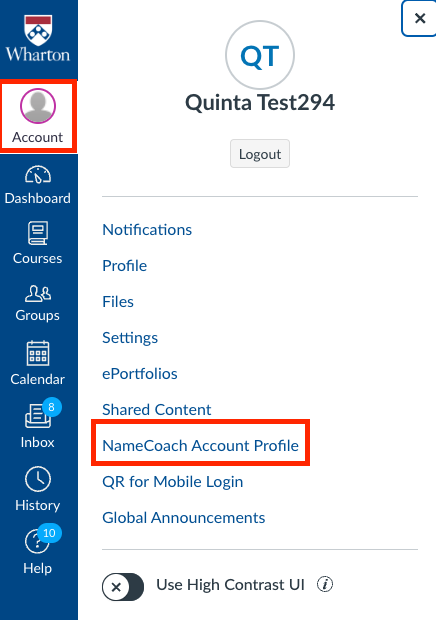 Figure A

 Figure B
Course Access
As an alternative access point, the NameCoach tab also appears as a sidebar item. This tab enables you to record your name and also specify your pronouns and the phonetic spelling of your name (Figure C). Regardless of where you choose to record for the first time, the recording will save and carry over to any Canvas site utilizing NameCoach as well as your Account profile.
- Log into Canvas, click on Courses, and choose a specific Course.
- Once you're in the course, select NameCoach from the sidebar menu.
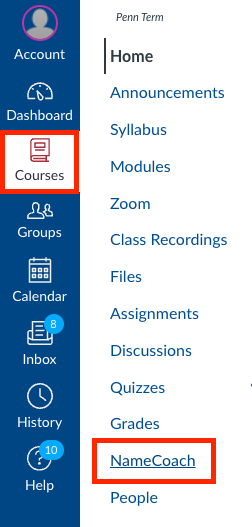 Figure C

Initial Access Confirmation Message
The first time you access NameCoach, you will be prompted to authorize NameCoach to access your account (Figure D).
NameCoach uses email to give permission to view the roster and listen to recordings. No other information is gathered when authorizing, and it is only used to grant access to recordings.
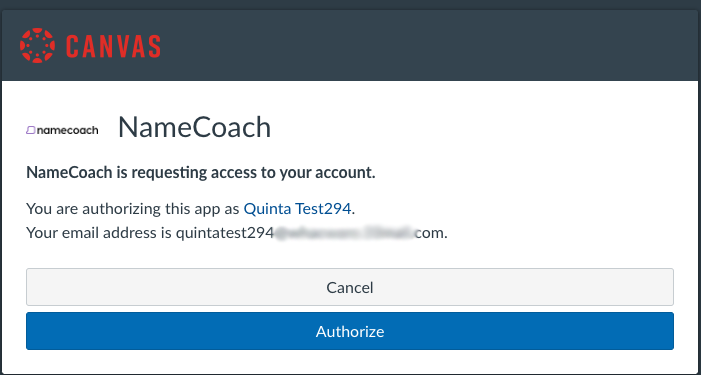 Figure D
Once you click Authorize, this will bring you to the NameCoach page for your course.
Recording a Name
Once you've accessed NameCoach using one of the options listed above, follow these steps to record or re-record your name at any time. You can have someone else record your name if you do not want to use your own voice:
- Click the Record Name button (Figure E.1). The button may show Edit your info (Figure B) or Update (Figure E.2) if re-recording.
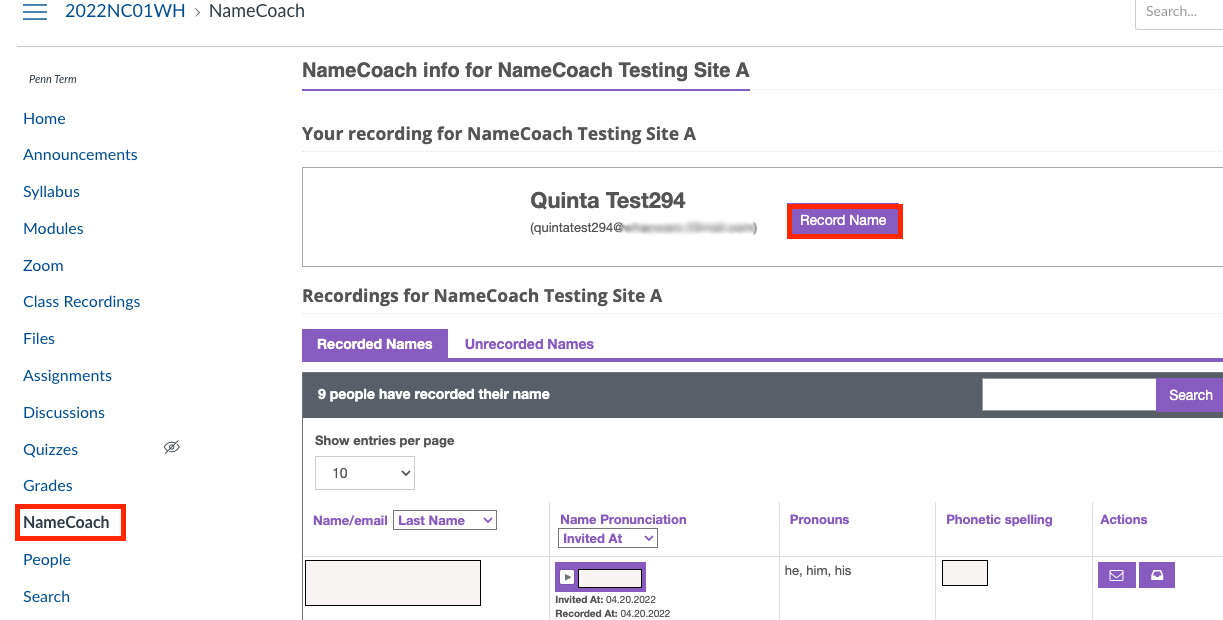 Figure E.1
 Figure E.2
- Enter your pronouns and/or the phonetic spelling of your name (optional) (Figure F).
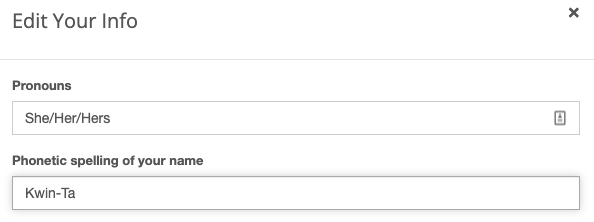 Figure F
- Phonetic spelling (easiest way to explain how to pronounce your name): If your surname is Blue, you can write: Blue like the color. If your name is Quinta, you can type Kwin-Ta.
- Record your Name.
There are three different ways you can record your name. Regardless of which one you choose, the recording will will be saved and available to any Canvas site that is using NameCoach. It will also be available in your Account profile.- By Phone (Figure G):
Enter your phone number and click the Submit and Call Me button. You will get an automated call from NameCoach with instructions. You will be prompted to record. Press the # sign when you are satisfied with the recording. When you are satisfied, click Submit and Finish.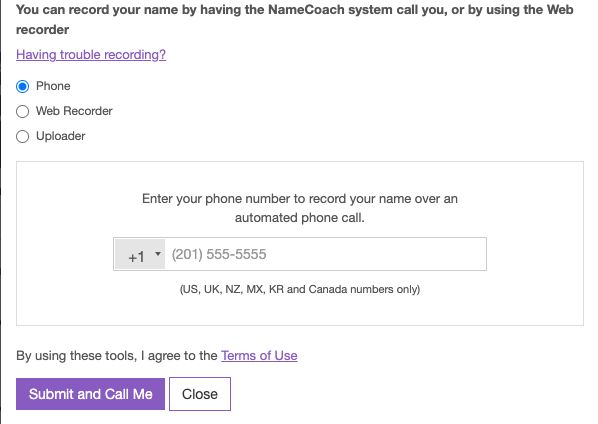 Figure G
- Using the Web Recorder (Figure H):
- Click the Record button. You will be prompted to use your computer's microphone.
- Click Allow. Follow the prompt before speaking.
- Click Stop when done recording.
- Click the Play button to hear the recording or Record Again.
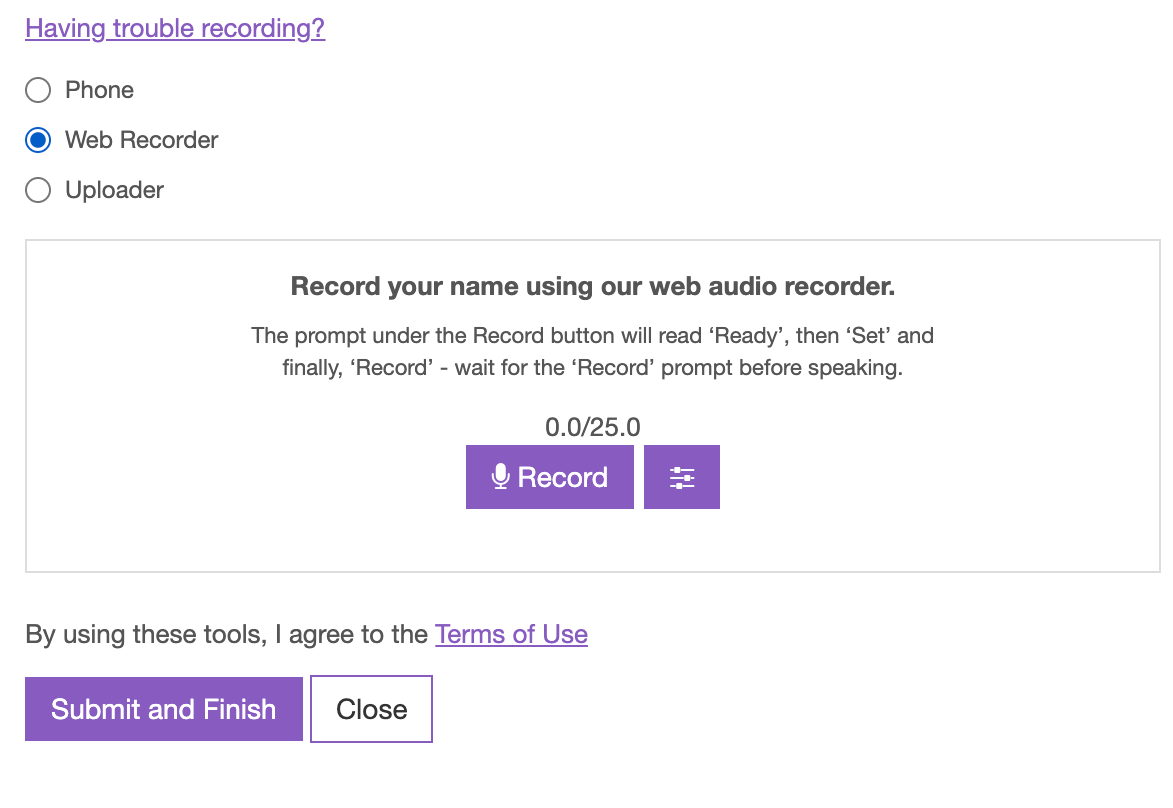 Figure H
- Once you have finished recording, you can adjust the pitch. Click the pitch icon and this will reveal the pitch slider (Figure I). Set the pitch by dragging the button (left and right) on the slider. You can re-record, play back the recorded name, and set a default pitch.
- Click the Save rate button and click Submit and Finish.
 Figure I
- Using the Uploader (Figure J):
Using a tool outside of Canvas, such as Audacity, Camtasia, iMovie, or any other audio recorder, you can record your audio and then drag and drop the file from your computer into the specified space for upload to serve as your recording.- Click your file and Drag it to the box, or use the Browse for file button to upload an mp3 file of your recorded name.
- When you are satisfied, click the Submit and Finish button.
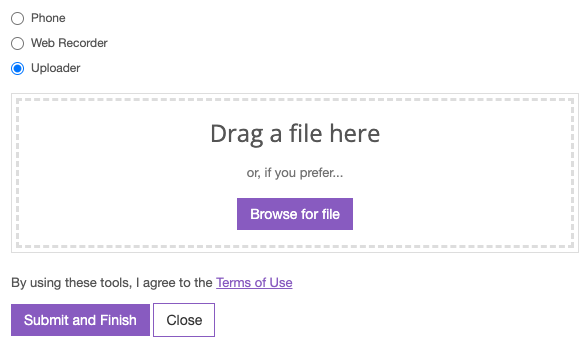 Figure J
- By Phone (Figure G):


Viewing Names in the Class
Students must click on NameCoach in your course menu for their name to appear on the list of unrecorded names and recorded names.
- Scroll down on the NameCoach page and click the Recorded Names tab (Figure K).
- Scroll to the corresponding name and click the Play button.
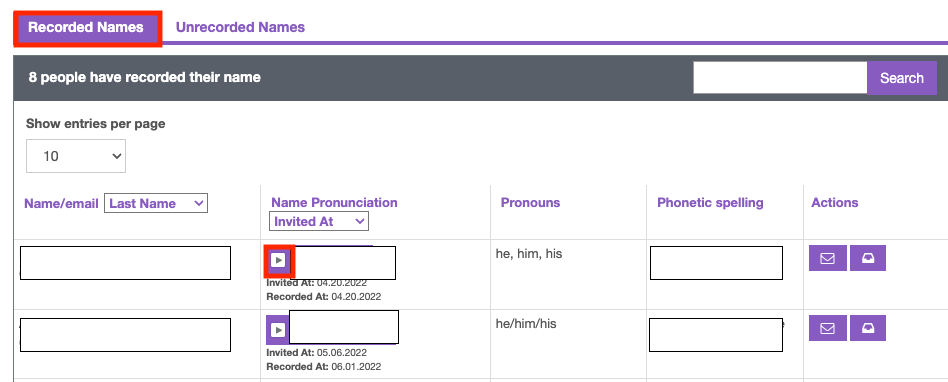 Figure K

Requesting a Re-record
- If you would like for a student to re-record their name, you can send an email reminder through your course's NameCoach page following the steps below:
- Scroll down on the NameCoach page and click the Recorded Names tab (Figure L).
- Scroll to the corresponding name and click the Mailbox icon.
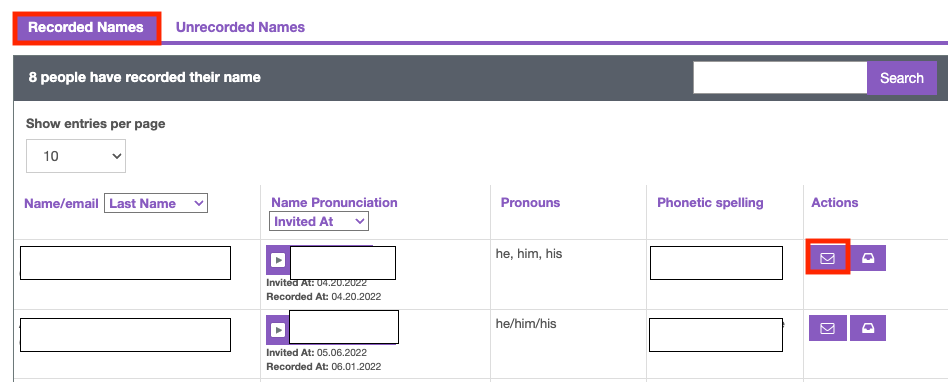 Figure L

Viewing Unrecorded Names
- Scroll down on the NameCoach page and click the Unrecorded Names tab (Figure M).
- To email a student prompting them to record, click the mailbox icon.
- To send a reminder email to all students who have not recorded, click the Remind All button.
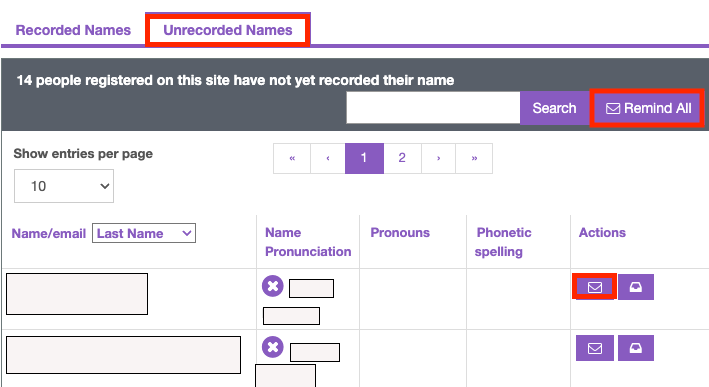 Figure M

Managing Other Features
Integrating NameCoach with an Assignment or Announcements
Add to Assignments
If you plan to provide a deadline for your students to complete their NameCoach profile:
- Create a Canvas assignment through the Assignments tab (Figure N).
- Add the Assignment name and a description in the proper fields.
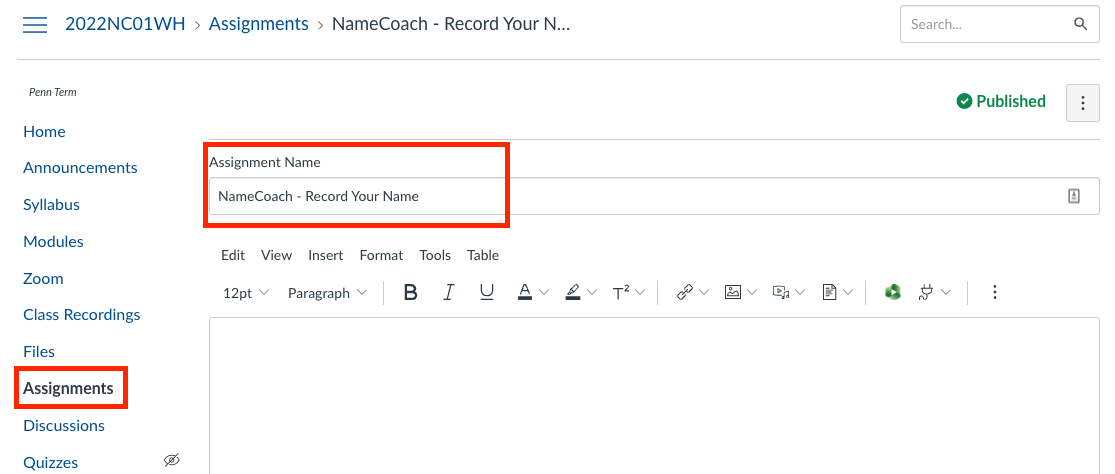 Figure N
- Use the drop-down to change the Submission type to External Tool and click the Find button (Figure O).
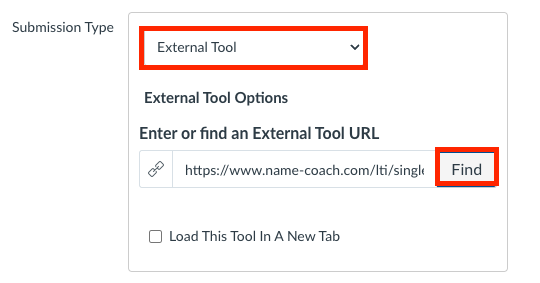 Figure O
- Select NameCoach from the External tool URL and click the Select button (Figure P).
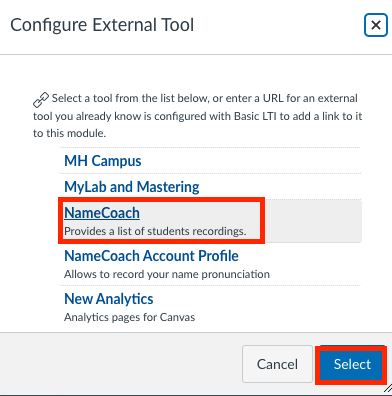 Figure P
- Add a Due date and click the Save button to save the Assignment (Figure Q).
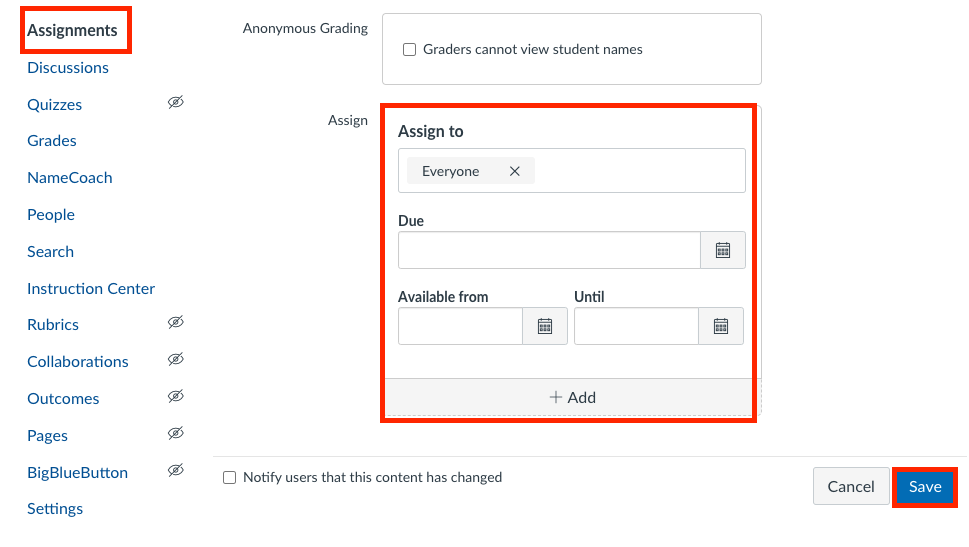 Figure Q
- Once NameCoach is added to Assignments, it can also be linked in Modules.


Add to Announcements with a link to NameCoach
- Click on Announcements on the Navigation Pane and then click on the +Announcement button on the right side of the screen (Figure R).
 Figure R
- Add a Title and a line of text. Click on the Link icon and select Course Links (Figure S).
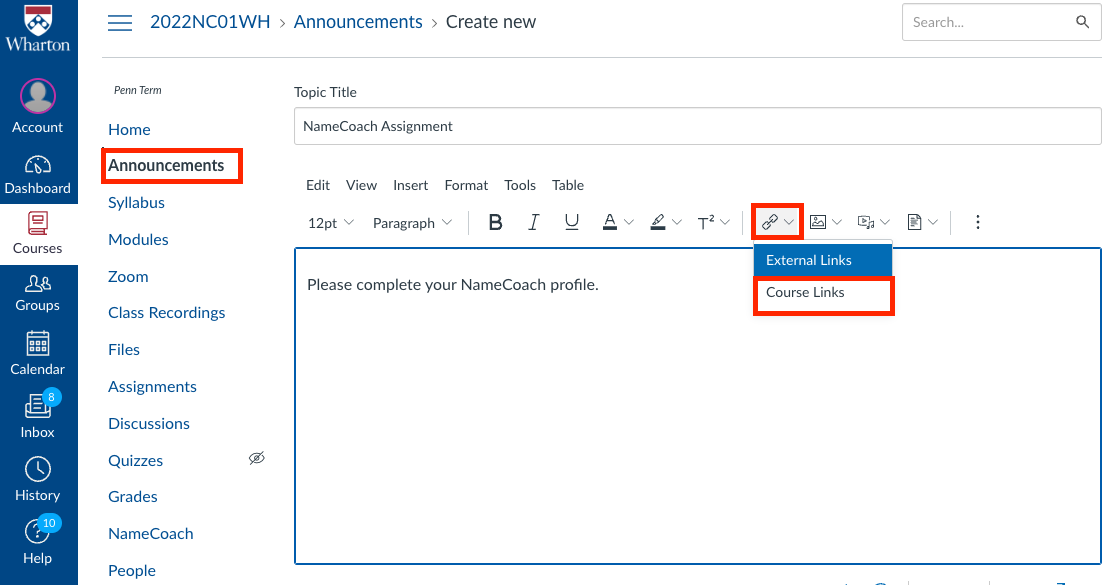 Figure S
- Select NameCoach-Record Your Name under Assignments (Figure T).
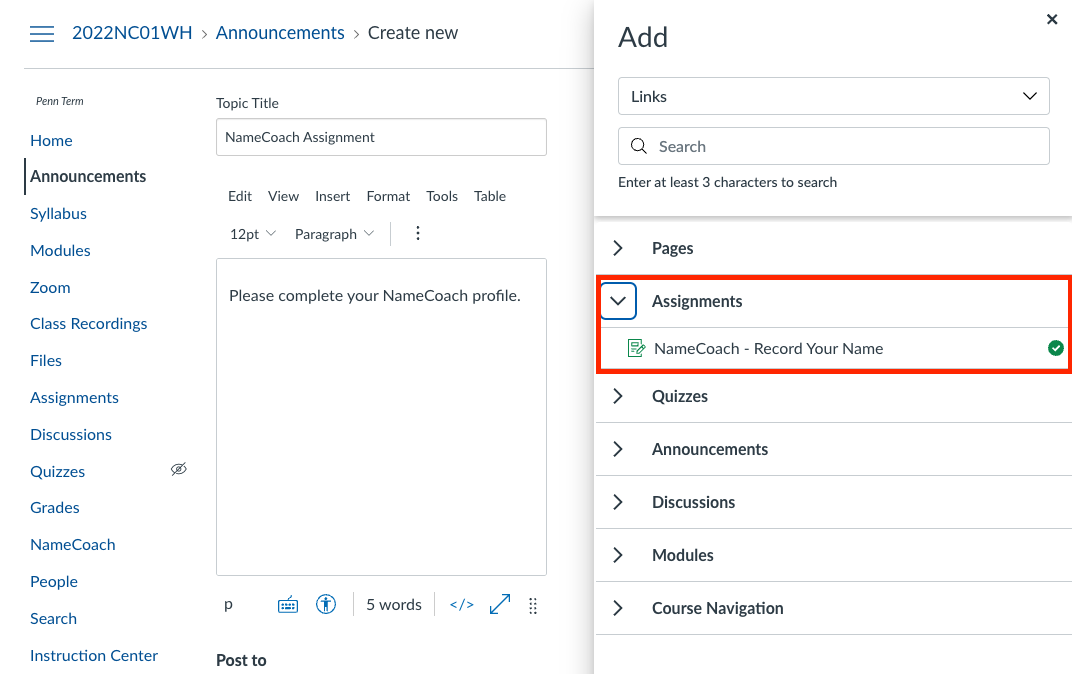 Figure T
- Scroll to the bottom of the page and click the Save button.


Once you have finished updating your information as needed, you can scroll through the list of Recorded and Unrecorded Names within your course.
Troubleshooting tip: If you are using Safari and encounter any access issues, please refer to the guide linked here regarding using Safari with Canvas learning tools. Having trouble in Chrome, try using a different browser, like Firefox.
Questions?
If you need more assistance, please contact courseware@wharton.upenn.edu for support.