aPlus+ Attendance is a tool built into Canvas that helps teaching teams track student check-ins and attendance. Instructors can either mark attendance manually with custom statuses or let students sign in using a code or QR code within a set time.
This article is for faculty; students should see Getting started with aPlus+ in Canvas (Students).
Use this article if you: |
See Setting up aPlus+ Attendance in Canvas (Instructors), if you: |
|
|
|
|
Before You Start
You will need:
- Access to Canvas
- Instructor role in the Wharton course that will use aPlus+ Attendance
For help with either of these, contact your Wharton Computing representative.
aPlus+ Attendance Tab
When you first click on the tab in your Canvas site (as long as aPlus+ has already been accessed and timetables have been configured), you'll see a privacy screen protecting student data from being projected via the in-class projectors:
To turn off the privacy screen, select the blue Turn off privacy screen button shown in the screenshot above.
Once this is turned off, you'll typically be taken to where you left off in the application. In this example, the Sessions tab is open, showing the attendance sessions on the course timetable:

Navigating aPlus+ Attendance
Once the Attendance Setup is complete, you will be brought to the main aPlus+ timetable. You can navigate within a section via the toolbar at the top of the application.

Selecting a Section
You can toggle among the different course timetables via a dropdown menu.
For example, if a course has multiple sections, there will likely be a different timetable for each section, as shown below:

Students Tab
The Students tab is the easiest way to view and manage recent attendance. You can choose a timeframe of up to 12 months and see each session day with the status of every student. 
Statuses show a student’s attendance state (like Attended or Absent). aPlus+ includes several statuses that you can manually set: Attended, Late, Absent - excused, Absent - unexcused, Attended different section, and withdrawn.
To manually change a student's status, navigate to a section and select the dropdown next to their name.

From here, you can also add comments specific to each student or as a general session. Note that students do not see these comments, they are only visible to the teaching team.

You can also bulk apply a status to all students via the dropdown in the top left corner. Don't forget to Save any status changes you make by using the blue button in the top right corner.

If students are checking in via the Canvas student mobile app (most cases) or some other device (including a computer), once the check-in occurs and it is successful, the student's status will change to "Attended - code."
If the check-in window has already passed and a student has failed to check in, once the window is over, the student's status will change to "Absent - code." The "-code" indication after the status is how you will know whether a check-in period has been initiated by the instructor during that class session.
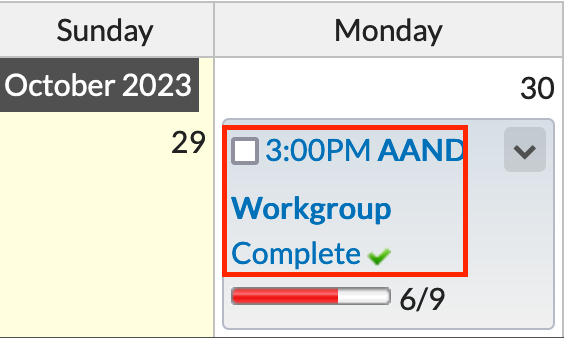
Sessions
You can manage your timetable information in the "Sessions" view.

Within each section you can:
- Enter Attendance: Click directly on the session to return to the same manual attendance entry screen depicted in the "Statuses" section of this article (above):
- Edit Session: Click on the dropdown arrow directly next to the timetable session in order to make any changes to the session date/time, location, duration, label (session name), and attendance weighting:
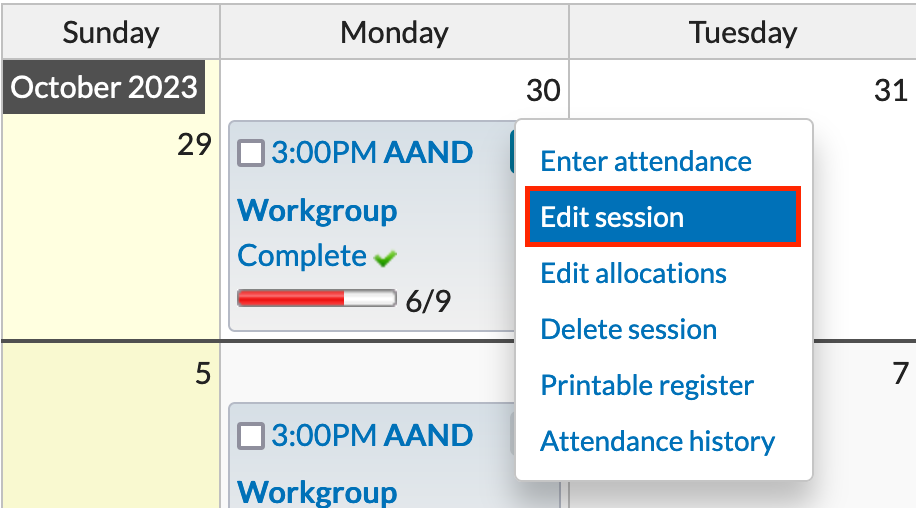


For details about additional options, please view the aPlus+ Canvas instructor guide's Session View article linked here.
Reports
The 'Reports' tab take you to a summary view of attendance reports for your course.
Reports can be exported to .csv or Excel by clicking the export icon at the top right of the data table (scroll all the way to the end of the report).

New reports as of late 2025/early 2026: Absence Requests-Interactive, Absence Requests-Other Only, Absence Requests by Student, and Absence Requests can be used to reference any absence requests submitted by students.
Code Timestamps specifies the exact time when a student successfully checked in with a personal device.
Late Enrollments with Auto Absents can be used to identify any students who have enrolled in the class late and are marked the incorrect status. The report is interactive, making it easy for faculty to change a status to "Absent - excused" in these cases so that a student is not penalized for enrolling late.
For more information about reporting, please read the aPlus+ Canvas instructor guide's Course Attendance Reports article.
Codes
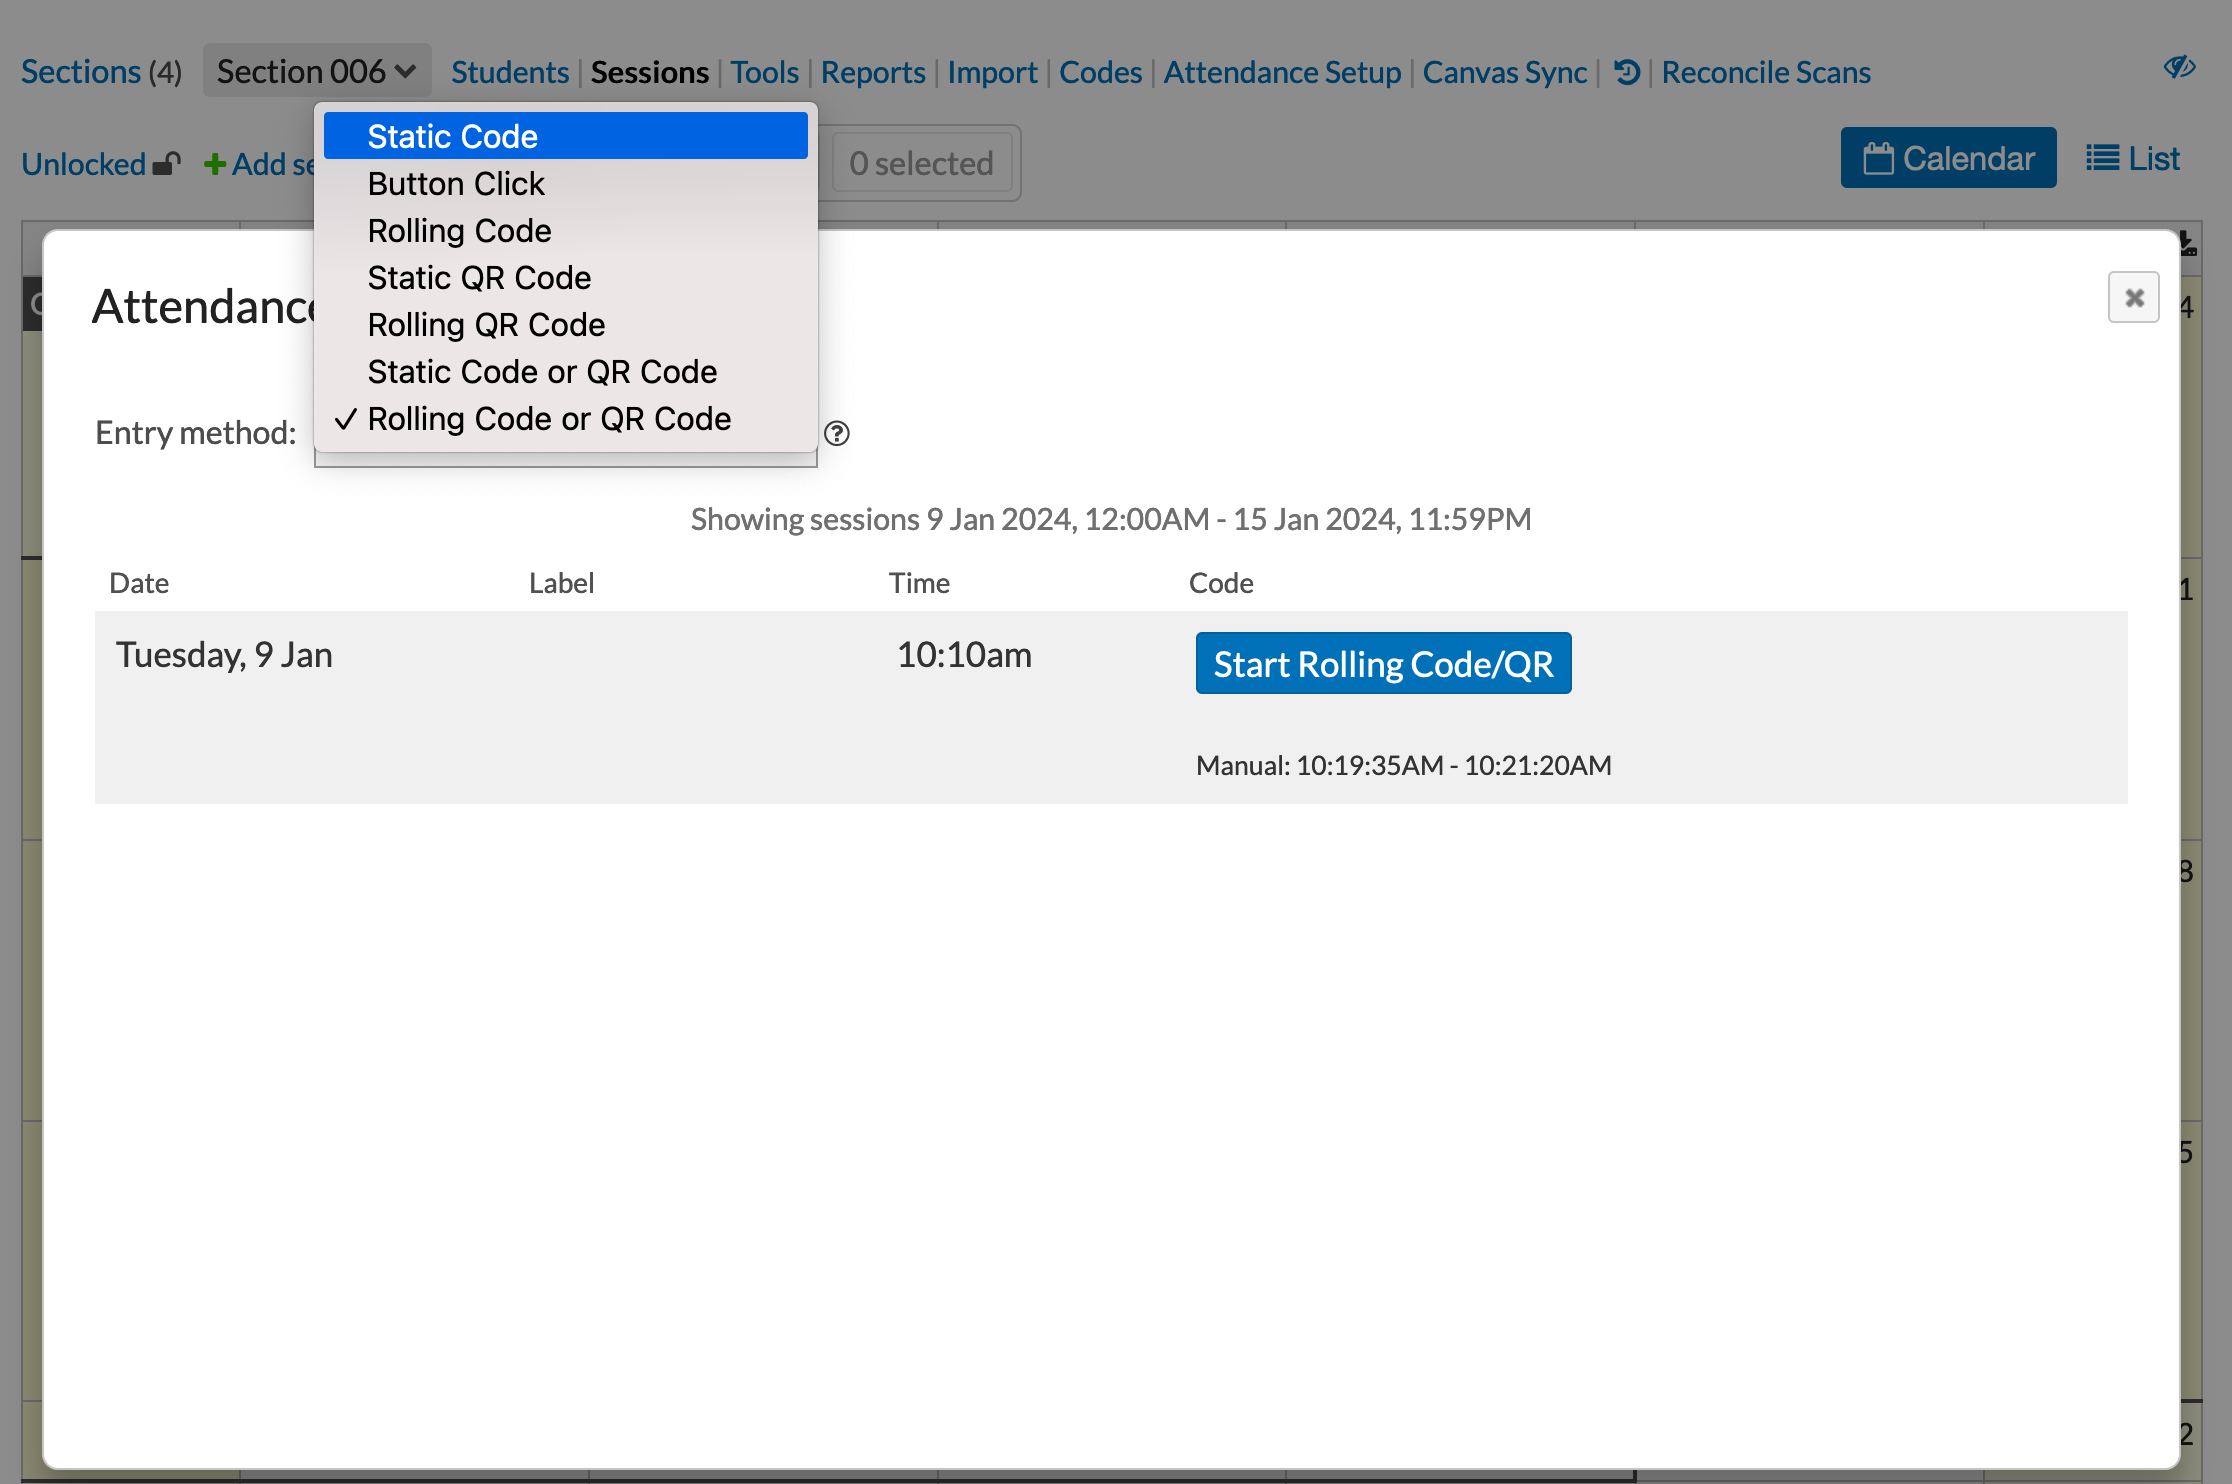
Codes in aPlus+ Attendance allow students to check in to a specific session. Once your sessions are configured and populated on the timetable(s) for any upcoming sessions, you can project either a QR or alphanumerical code that students must scan or enter in the aPlus+ attendance app within a specific time window to check in for class that day.
The available code options are shown below:
| Option | Code Type | Behavior | Notes |
|---|---|---|---|
| Button Click | Button | Students select a submit button in Canvas. There is no code required. | Not Recommended |
| Static Code | Alphanumeric | Students enter a session-specific code. | |
| Rolling Code | Alphanumeric | Students enter an code within an allowed time window. Code changes every few seconds. | |
| Static QR Code | Scannable QR Code | Students use their device camera to scan a static QR code | |
| Rolling QR Code | Scannable QR Code | Students use their device camera to scan a rolling QR code. Code changes every few seconds. | |
| Static Code or QR Code | Alphanumeric or
Scannable QR Code |
Students enter the static code or use their device camera to scan the static QR code. | |
| Rolling Code or QR Code | Alphanumeric or
Scannable QR Code |
Students enter the rolling code or use their device camera to scan the static QR code while the rolling code/QR code is shown. | Recommended Option |
The most commonly used code option is the Rolling Code or QR Code. This way, students can choose one or the other if they encounter any issues with their device camera.
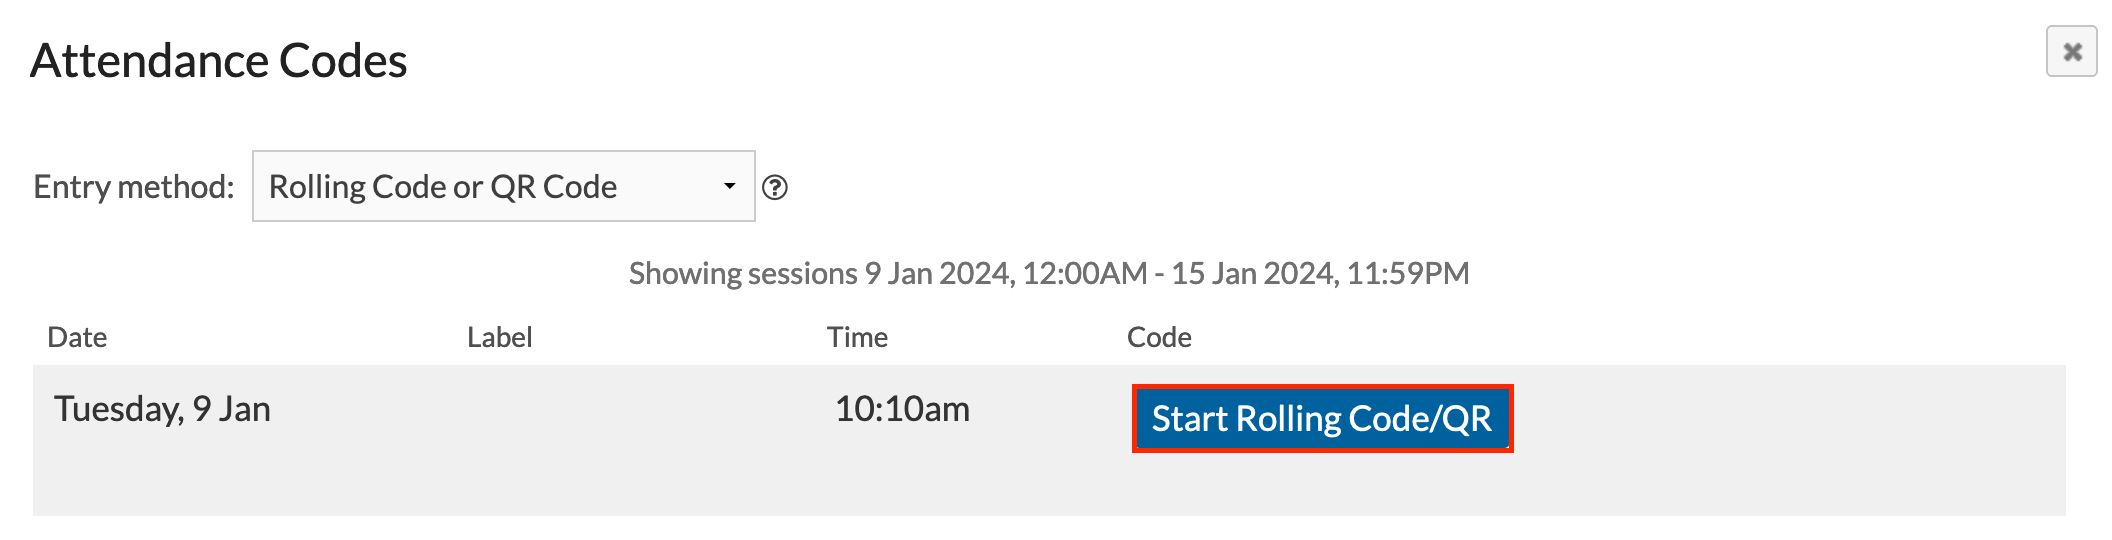
Once the desired code option is chosen, click the blue Start Rolling Code/QR button:
 The rolling code is displayed. This page can be projected in the classroom.
You can also select the number of seconds the present code should remain active until it rotates. The default rolling code time is set to 20 seconds, but you can always change this as depicted in the screenshot:
 |
 |
Select the Stop Rolling Code/QR button in the upper right to stop displaying the code.
Projecting the Code
If you would like to allow students to check in for the first few minutes of class, then you will need to project your course content and the aPlus+ codes at the same time.
- Physically touch the classroom desktop screen to see two virtual desktops
- Touch the screen on the right (PC - EXTENDED)
- Set up your aPlus+ Check-in codes on this screen
- Navigate back to PC - MAIN and set up your class content
- Use the Small Screen - Advanced Options
- Project PC - Extended to your screen of choice
- Project PC - Main to your screen of choice
For more information about Advanced Projection features, please see Using Technology in the Classrooms.
Canvas Sync & History
If changes are made to the timetable or anywhere else within the aPlus+ application (and also within Canvas, if, for example, grades are configured with the app), these changes can be synced to ensure everything is up to date:
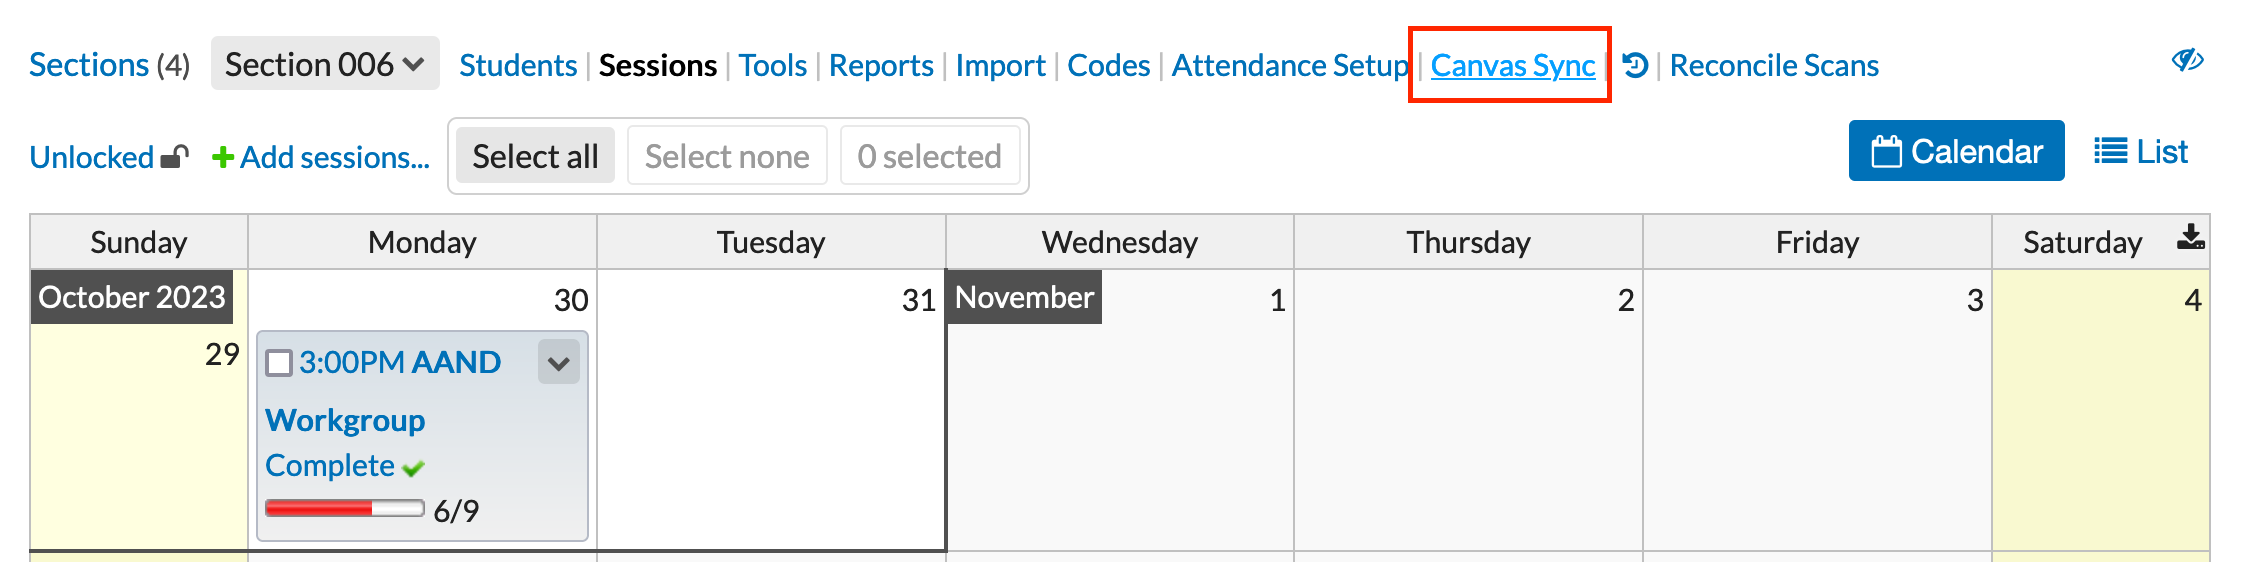
To view the most recent sync history from Canvas and diagnose any issues with the integration, click the icon highlighted in red below:

Additional Resources
- Access attendance data from a previous semester.
- Using aPlus+ in the Classroom (Instructors)
- Managing Student Absence Requests with aPlus+ Attendance in Canvas (Instructors).
- Students' guide to checking in: Accessing aPlus+ in Canvas for Students
Questions?
Troubleshooting tip: If you are using Safari and encounter any access issues, please refer to our Using web browsers with Learning Tools article regarding using Safari with Canvas learning tools. If you have trouble in Chrome, try using a different browser, like Firefox.
Please contact the Courseware Team for support if you need more assistance.