The best way to deal with disruptive behavior in a Zoom meeting is to prevent it from happening in the first place. This article details several ways to secure your Zoom meetings and how you can quickly deal with disruptions in an active Zoom meeting.
You will need:
- An activated Penn Zoom Account before completing any of the tasks in this article.
- Have the host or co-host role in the Zoom meeting.
Best Practices
Zoombombing, wherein participants join Zoom meetings to cause a disruption, can derail any meeting. There are some things that you can do to thwart potential Zoombombers before they even have the chance to enter your meeting.
Don't post meeting information publicly
Only share the Zoom meeting details with attendees. Avoid posting them on a publically accessible website (Canvas sites are only accessible to those people explicitly granted access).
You should also consider not using your Personal Meeting ID. This is a permanent meeting that has set login information. While your PMI is great for sharing with students and co-workers because the login information remains the same, it is less secure since that login information could be shared with others without your knowledge. We recommend setting up individual Zoom meetings for regular work/classes.
Enable Waiting Room
In a Zoom meeting with Waiting Room enabled, the meeting host/co-host has to admit people into the meeting. This allows you to control exactly who can join your meeting.
To enable the Waiting Room for a Zoom meeting as it is taking place (and the host/co-host of):
- Click the Host Tools icon at the bottom of your Zoom meeting window.

- Click Enable Waiting Room on the Security menu.
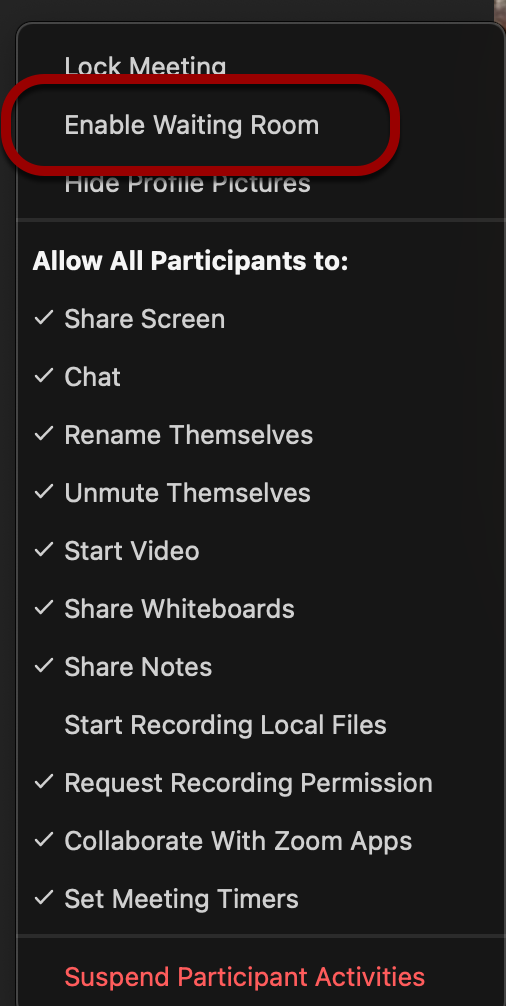
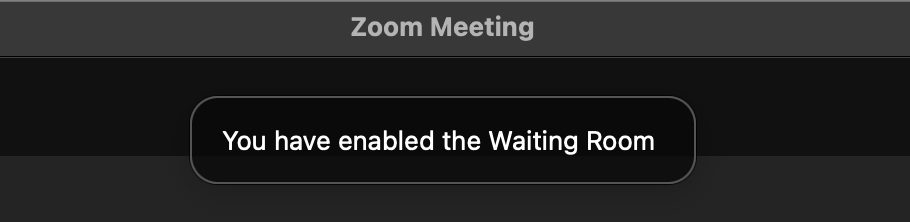
- You'll see an alert that lets you know the waiting room has been enabled for the meeting.


You'll get an alert whenever someone enters the Waiting Room. You can read more about Waiting Rooms in Zoom's documentation.
To enable the Waiting Room for a meeting scheduled in the future:
- Log into https://upenn.zoom.us with your PennKey username and password.
- Click on Meetings in the left sidebar.
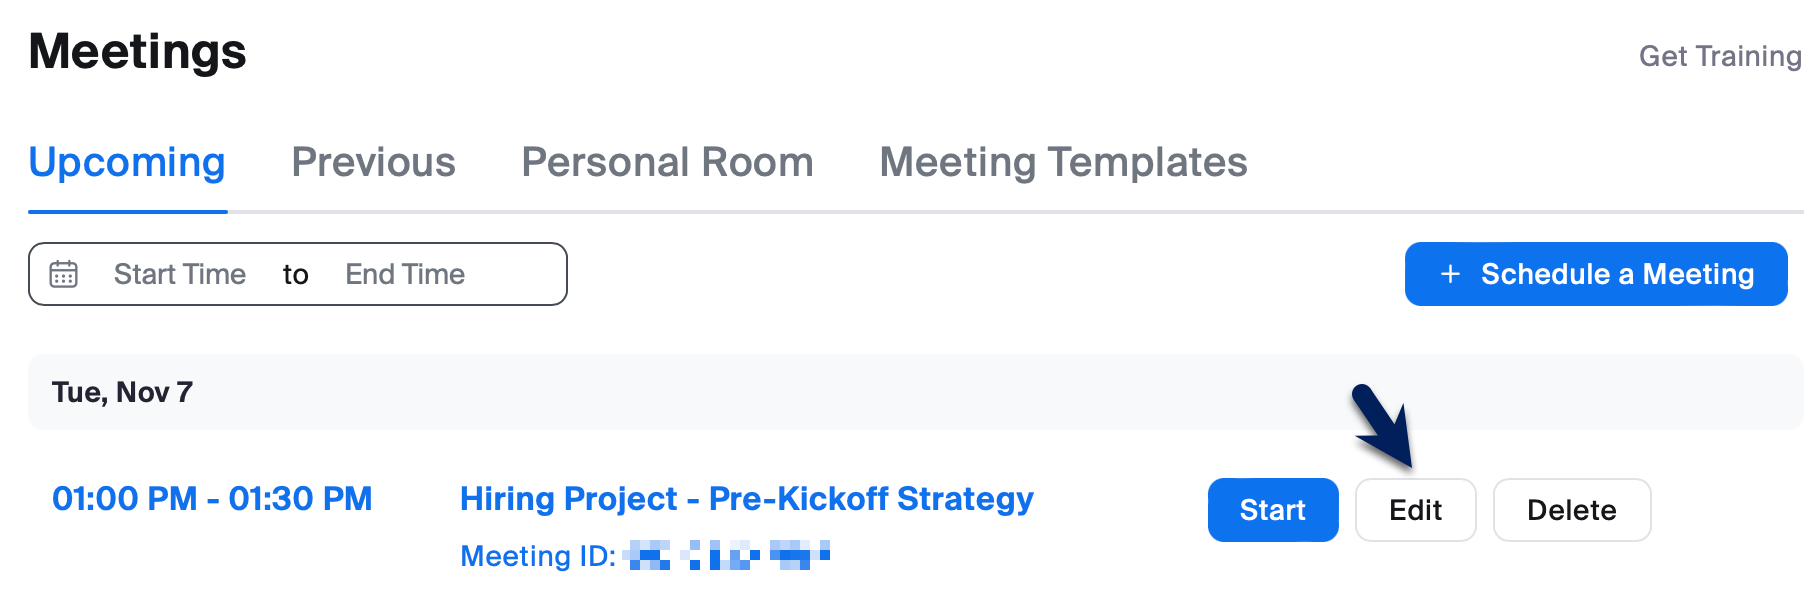
- You will see a list of your upcoming meetings. Hover over the meeting you want to change and click the blue Edit button.
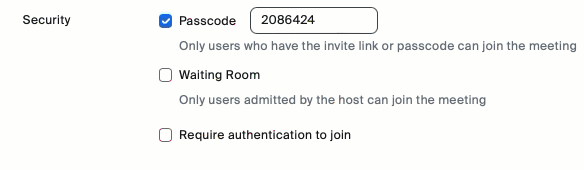
- Scroll down to the Security section and check the box next to Waiting Room.
- Click Save, and your meeting is updated.


To have all of your new Zoom meetings have Waiting Room enabled by default:
- Log into https://upenn.zoom.us with your PennKey username and password.
- Click on Settings on the left sidebar.
- This should open the Meeting settings, with Waiting Room near the top.
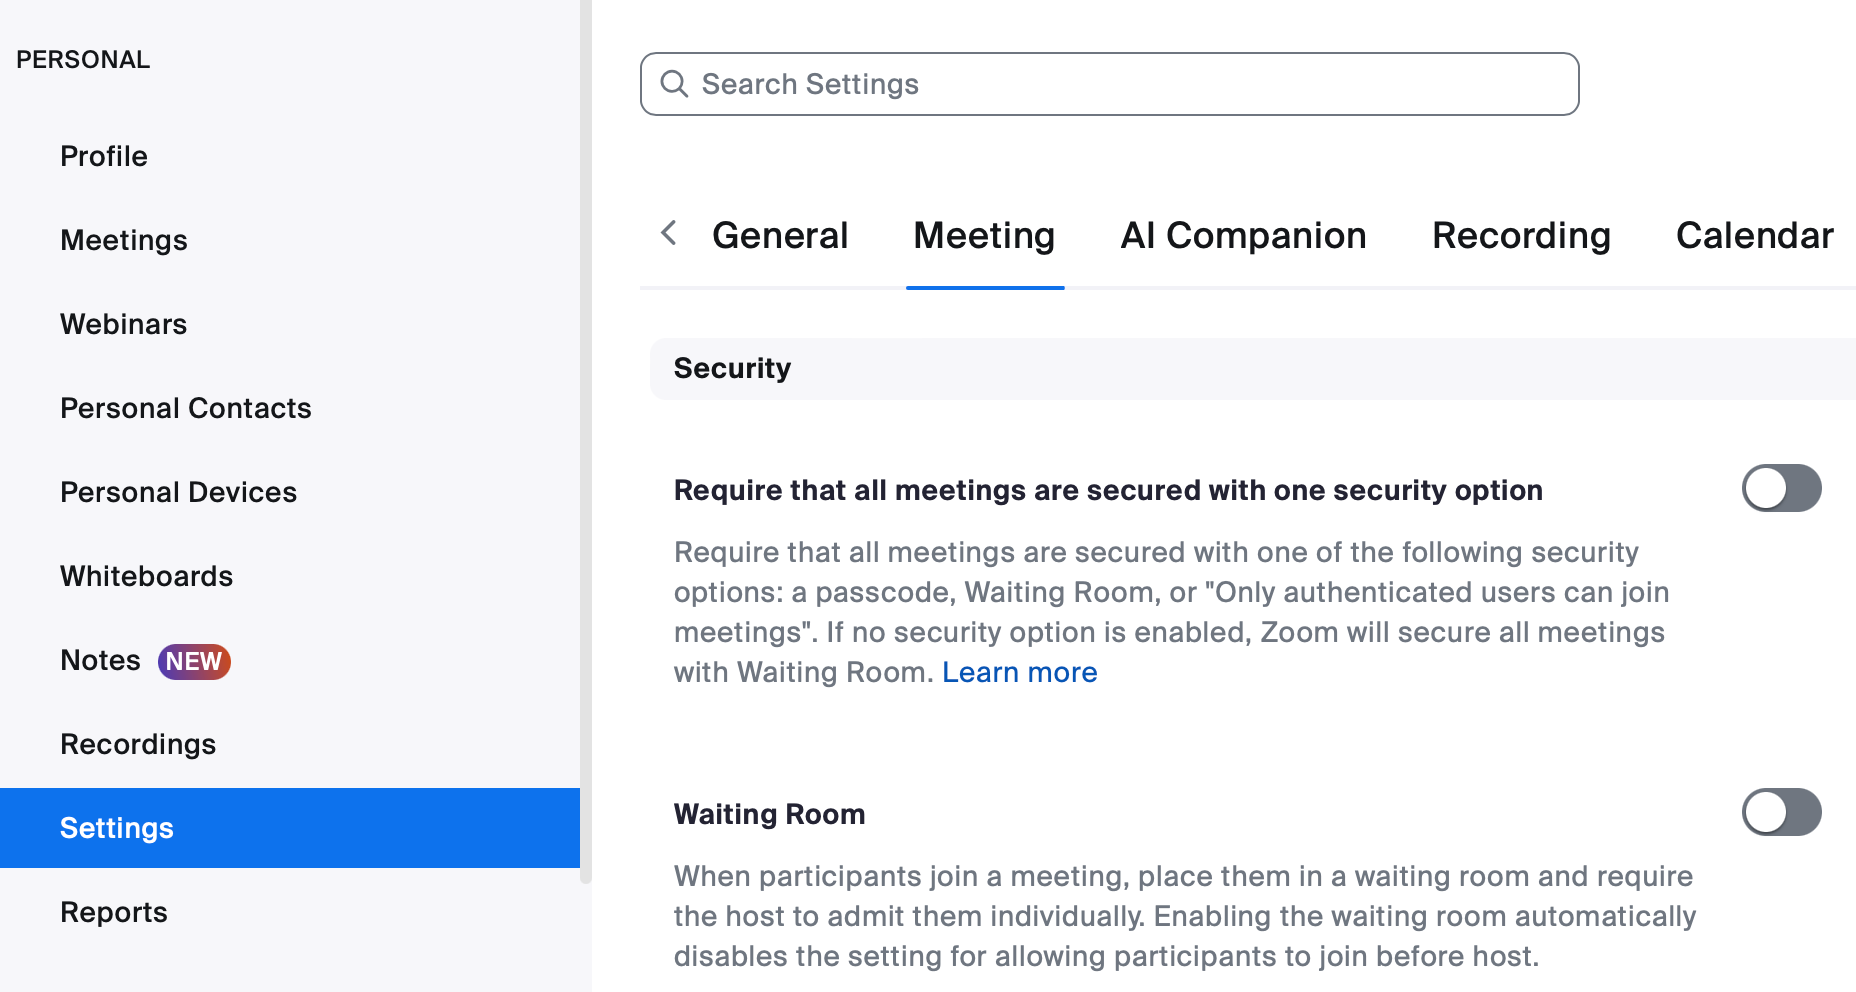
- Toggle Waiting Room on.
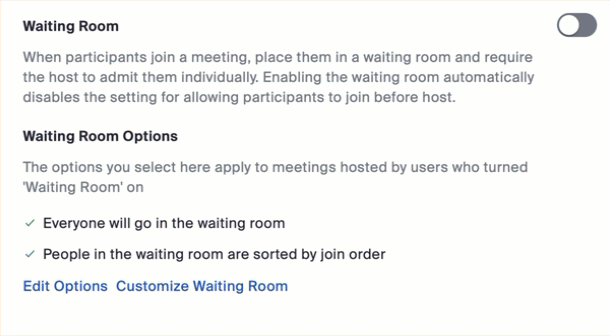
- Click Edit Options if you'd like to change who should go into the waiting room ("users not in your account" means non-Penn users), among other things.
- Changes are saved automatically, so any meetings you create going forward will have a Waiting Room.


If you enable "Allow Authenticated Users Only" (see the next section for more information on this setting), you can allow authenticated users to skip the Waiting Room and be automatically allowed into the meeting by following these directions after logging into https://upenn.zoom.us with your PennKey username and password:
- Click Settings.
- Click Security.
- Under the Waiting Room section, click Edit Options.
- Change "Who should go into the waiting room" to "Users not in your account." This will allow Penn users to skip the Waiting Room whilst, non-Penn users, or unauthenticated Penn users, will need to be allowed into the meeting from the Waiting Room.
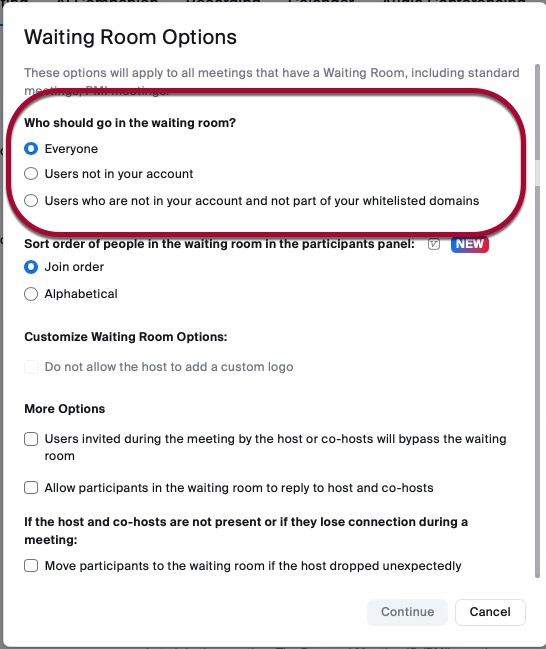
- Click Continue.

Authenticated users only
You can require that all attendees be logged in with their Penn accounts or a Zoom account before they can join your meeting. You can limit it to (the following list goes from least to most inclusive and is additive):
- Penn users only
- Anyone with a Zoom account
- Specific exceptions can be added per meeting (i.e., santa@northpole.com can join without having to authenticate, but everyone else has to since they might be naughty).
You can require authentication on a per-meeting basis or by default for all meetings:
On an individual meeting
New Meeting
- Launch Zoom.
- Schedule a new meeting.
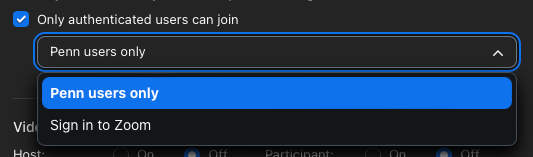
- Scroll through the Schedule Meeting window and check the box next to "Only authenticated users can join."
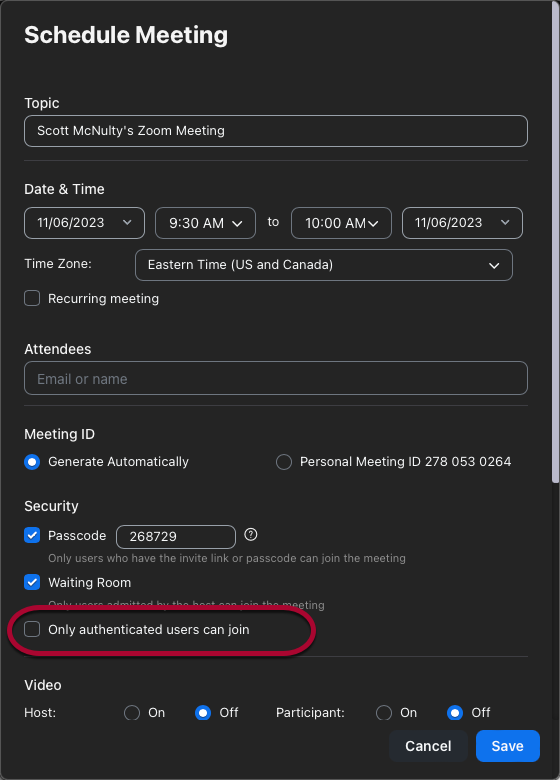
- Select either Penn users only (the default) or Anyone with a Zoom account from the dropdown.
- Continue scheduling your meeting as usual.


Existing Meeting
The best way to force authentication on an existing meeting is to edit the settings via https://upenn.zoom.us:
- Log into https://upenn.zoom.us with your PennKey username and password.
- Hover over the meeting you'd like to edit from your Upcoming Meetings.
- Click the Edit button that appears as you're hovering over the meeting.

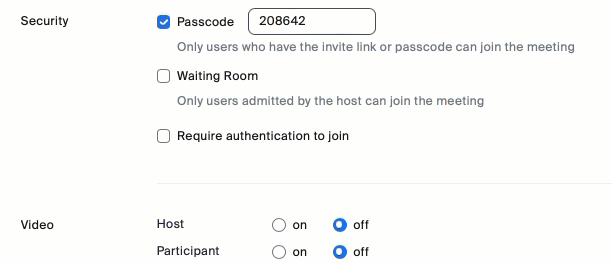
- Check "Require authentication to join" in the Security section.
- Select either Penn users only (the default) or Anyone with a Zoom account from the dropdown.
- Click Save.


Allowing Exceptions
Authentication Exceptions allow you to list people who don't have to authenticate to enter a meeting that requires it. This allows you to limit your attendees to Penn folks (or people with a Zoom account) but include non-Penn guest speakers. Here's how:
- Log into https://upenn.zoom.us with your PennKey username and password.
- Hover over the meeting you'd like to edit from your Upcoming Meetings.
- Click the Edit button that appears as you're hovering over the meeting.
- Click Add next to "Authentication Exception" under "Require authentication to join" in the Security section.

- Type the exception's full name and email address.
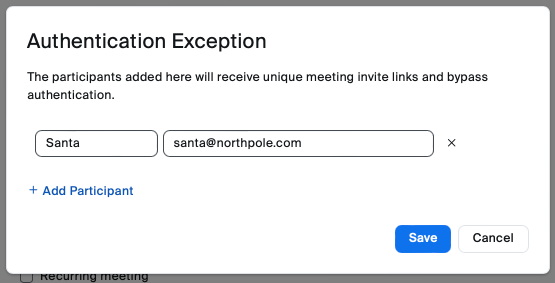
- Click Add Participant to add more exceptions.
- Click Save to save the exceptions.
- Click Save to save the settings for the meeting.


Making this a Default Setting
You can require authentication for all your Zoom meetings going forward by logging into https://upenn.zoom.us with your PennKey username and password and following these directions:
- Click Settings.
- Click Security.
- Scroll down until you see "Only authenticated meeting participants and webinar attendees can join meetings and webinars."
- Click the toggle next to that section to turn it on (the toggle displays blue when a feature is active).
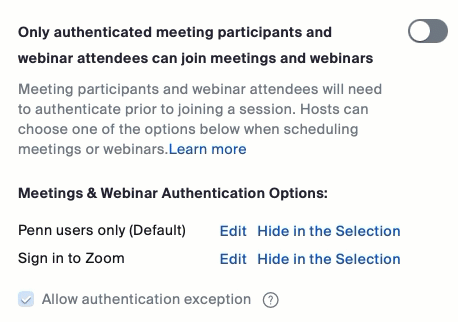
- Your settings are automatically saved, and now, each Zoom meeting you schedule will require attendees to authenticate.

During Your Meeting
Despite following all of our best practices, disruptions could occur in a Zoom meeting in which you're the host (or co-host). There are a few Zoom tools that make it easy to deal with a disruptive participant quickly:
- Remove Participant - Disruptive participants are easy to remove once identified.
- Lock Meeting - Locking your meeting stops any further participants from joining.
- Suspend All Participant Activities - The most severe option of the bunch; this will stop all activity in the meeting so you can gather your thoughts and identify the disruptive participants who should be removed.
The following three sections detail each of these features in turn.
Remove Participant
If you can identify the disruptive participants, you can remove them from your Zoom meeting:
- Click on the Participants icon at the bottom of the Zoom window to show the Participants list if it isn't already showing.

- Find the person you'd like to remove and hover over their name in the list.
- Click on More to reveal a list of options.
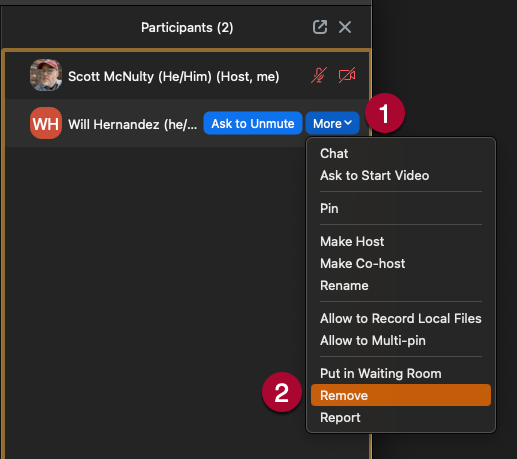
- Click on Remove to remove the selected participant.
- A confirmation popup appears. We recommend unchecking "Report to Zoom."
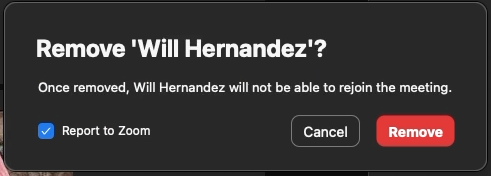
- Click Remove, and the participant is removed from your meeting and will not be able to rejoin.
- Repeat for each participant you'd like to remove.


Lock Meeting
You may want to stop additional people from joining your meeting for some reason. To do this, you need to "Lock" your meeting:
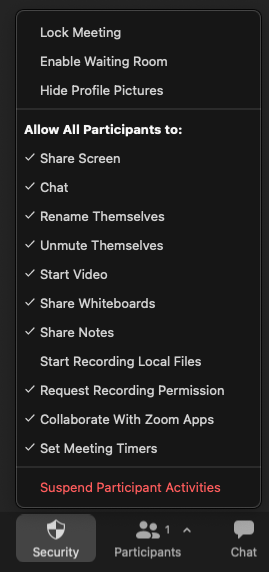
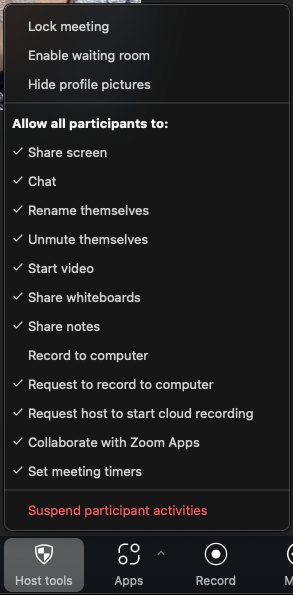
- Click the Shield icon labeled Host Tools at the bottom of your Zoom meeting window.

- A list of all the in-meeting security controls available to you appears. Click Lock Meeting at the top of the list.
- An alert appears, letting you know that no one else can join the meeting.


Suspend All Activities
If there is a significant disruption in your meeting, you can suspend all participant activities with a few clicks. Be warned that this turns off most of the functionality of your Zoom meeting. Suspending all participant activities does all of the following:
- Mutes all video and audio.
- Hides all profile pictures
- Stops all active screenshares and turns off screensharing.
- Closes all breakout rooms.
- Stops the meeting recording if the meeting is being recorded.
- Turns off any Zoom apps active in the meeting.
- Locks the meeting, preventing anyone else from joining.
Once all activity has been suspended, you can use the "Remove Participant" directions above to remove the disruptive participant(s).
To Suspend All Participant Activity in a meeting:
- Click the Shield icon labeled Host Tools at the bottom of your Zoom meeting window.

- Click Suspend Participant Activity at the bottom of the list in red.
- Uncheck "Report to Zoom" in the notification, which also reminds you that you're about to turn off all the functions in your Zoom meeting.
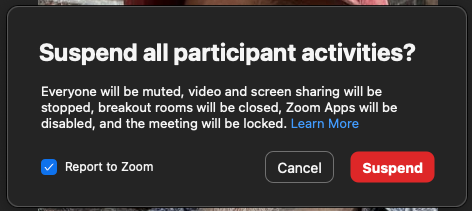
- Click the red Suspend button.
- You'll get a confirmation message that all activity has been suspended in the meeting.


Once you've dealt with the disruption, you can turn on individual features by clicking the Host Tools icon and enabling each feature individually.
After Your Meeting
If any of your Zoom meetings are disrupted besides using the features above, report the incident to the Wharton Information Security Office (security@wharton.upenn.edu). They can engage additional resources, if needed, and offer any help you may require.
Questions?
Contact your Wharton Computing Representative or the Wharton Information Security Office for more information.