All about New Quizzes
Last Modified on 06/23/2021 2:10 pm EDT
Canvas's New Quizzes offers benefits such as printing, one-time accommodation entry per course, and additional re-gradable question types. These benefits improve upon the original feature set of Canvas's Classic Quizzes.
Before You Start
You will need a Canvas site.
Do NOT use New Quizzes if you:
- Prefer to bulk-download all student submissions to file-upload questions
- Have questions with no correct answer, such as for a survey
Please use the legacy Classic Quizzes tool instead if you need either of these features.
Creating a Quiz
To create a new quiz...
1. From the left navigation of your Canvas course, choose Quizzes then click the +Quiz button.
2. Choose New Quizzes unless you need to bulk download file-upload submissions or download a spreadsheet containing all quiz responses (such as a survey). These functions are available only in Classic Quizzes.
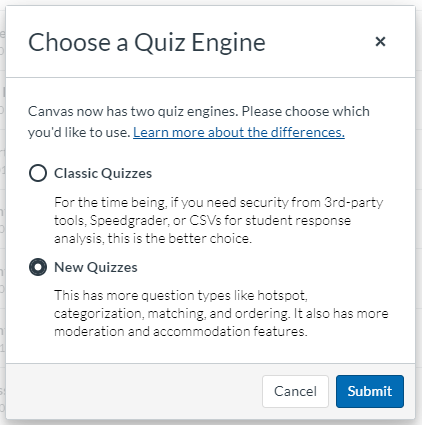
3. Click Submit.
4. On the assignment details page, give the quiz a name, point value, due date, and any availability dates. You'll set the time limit later in the quiz settings. You can edit the availability and due dates later, if necessary, by reopening the quiz.
5. Click Build to launch the New Quizzes quiz builder.

TIP: Use availability dates to allow specific students or sections to take the quiz at alternate times.
Quiz Settings
Open the Settings tab to configure quiz options:
- Shuffle questions to shuffle the order of all questions
- Do not use this option if questions should appear in a certain order or if you have a question about academic integrity as the first question. There is not a way to "lock" a question in place when the question order is shuffled.
- Shuffle answers to individual questions (You can lock an answer choice in place (such as for "All of the above" when editing a specific question).
- Show only one question at time
- Require an access code
- Set a time limit
- Allow calculator (basic or scientific)
- Allow multiple attempts to take the quiz
- Allow clearing selection (Multiple Choice) (If a student selects an answer for a multiple choice question, checking this option allows them to leave the answer blank without selecting a new answer [not recommended for most quizzes].
- Hide results from students (hide student responses, correct/incorrect answers, points possible/award, or feedback).
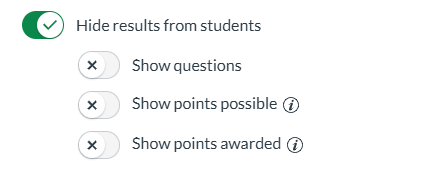
Note: It is now possible to schedule the release of student responses, correct/incorrect answers, and feedback. To do this, toggle ON "Hide results from students" and also toggle ON the buttons below it. This will expand the menu options and allow you to set a date and time when responses, points, and quiz answers are released to students.
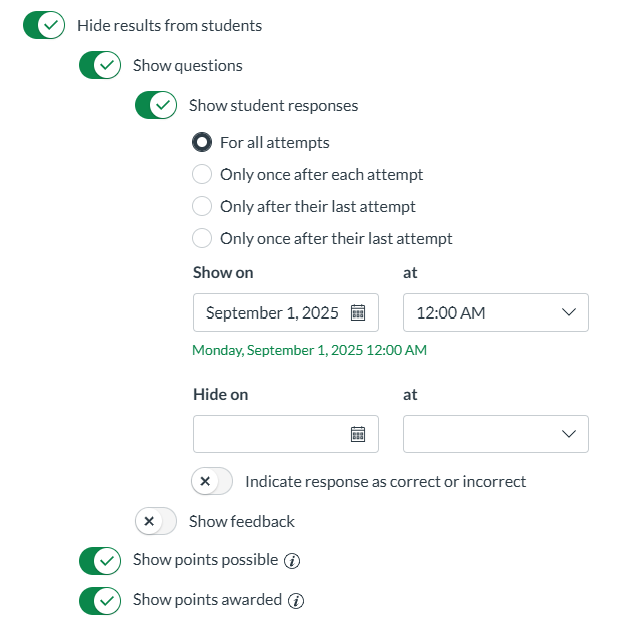
Important:
- To prevent students from seeing their scores or submissions right after they submit the quiz, toggle ON the option to "Hide results from students" and leave all other options below it turned OFF.
- To release scores, open the quiz settings and toggle OFF "Hide results from students."
Adding Instructions and Questions
1. From the Build tab, add the quiz instructions and questions.
2. Use the + icon to add a new question.
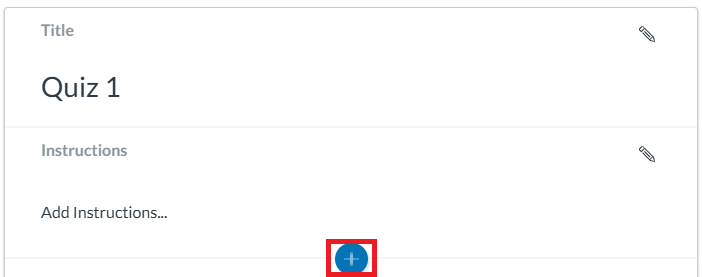
3. This will display a list of question types. (Question types are explained in the next section.)
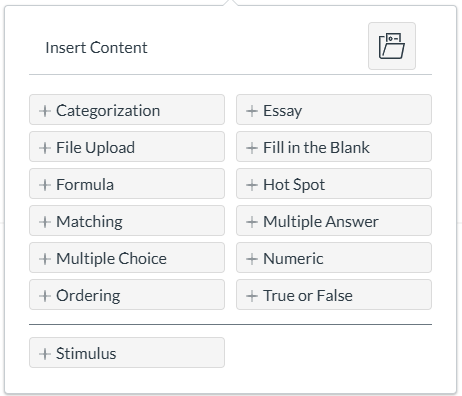
Question Types
Your quiz can include a mix of automatically and manually graded questions.
Automatically Graded Questions
Manually Graded Questions
TIP: Use a File Upload question to allow students to upload a file, or to show their calculations or other work. This works well if the quiz involves a file students must download/print, complete and scan, and submit.
Item Banks
Use Item Banks to pull all questions or a specific number of questions randomly from a pool. This is a good way to add variety to the exam and/or keep similar questions together.
1. To create an Item Bank, open any quiz in New Quizzes and click the 3-dot options menu in the top right corner.
2. Select Manage Item Banks > +Bank.
3. Give the bank a name and click Create Bank.
4. To add questions, click on the name of the newly created bank and click +New. Click Done after creating each question. Your questions will be automatically saved in the Item Bank. Click Return to go back to the quiz builder.
5. To insert banked questions into a quiz, open the quiz and click the + icon to create a new question.
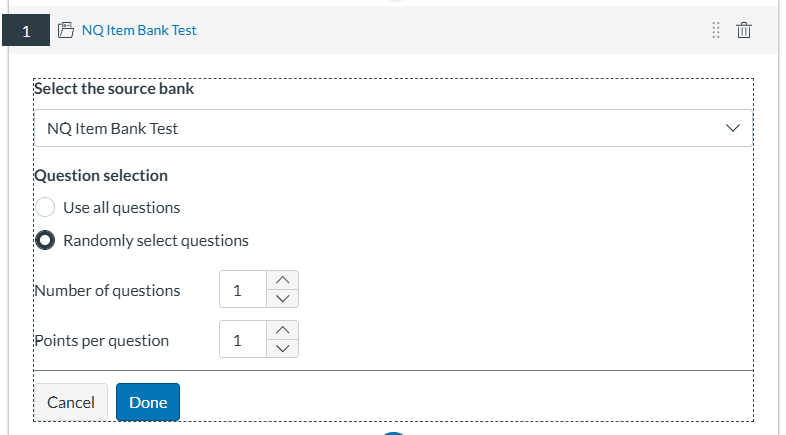
6. Click the item bank icon, then click on the name of a specific Item Bank. Be sure to check that you are opening the correct item bank. The page will default to the last bank you opened.
7. Click the All/Random button (do not click on specific questions unless you only want to add those questions), then close the item bank tab selector by clicking the X in the top left corner of the tab.
8. Return to the quiz, click to Edit the new question, then under the Question selection options, choose whether to Use all questions or Randomly select questions (eg, randomly select 1 out of 3 possible questions). Enter the points per question, and click Done.
Note: Questions pulled from the same Item Bank must have the same number of points.
Exams with File Downloads
Use these instructions if you need to share a link to an exam file that students can access only during the exam.
1. Open Files and create a new folder.
2. Click the Published icon for that folder, change the availability to Only available to students with link, and then click Update.

3. Upload the exam file to the new folder you just created.
4. Open Quizzes, click to open the exam, and navigate to the page where you can edit questions.
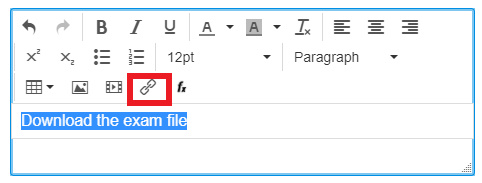
5. Add a new question or click to edit an existing question. In the body of the question, type "Download the exam file" or "Open the exam file in a new tab. "
Please Note: We do not recommend placing the link in the Instructions as these are visible to students before they click Begin.
6. Select the text you entered, and with the text still selected, click the Links icon.
7. Select Course Link, then click the Link dropdown to select Files instead.

8. After selecting Files, select Course Files, the folder you just created, then the file name you want to link. The text will briefly highlight, showing you have an active link.
9. Click Done to save your changes to the question.
Please contact courseware@wharton.upenn.edu if you need assistance with these steps.
Publish the Quiz
Before you publish the quiz, be sure to:
Viewing and Grading Online Quizzes
- Use Moderate to view student submissions, add more time or attempts for individual students, and to reopen a completed quiz.
- Add a score for any manually graded questions in SpeedGrader. (Final quiz scores cannot be directly edited in the Gradebook.)
Regrading Questions
You can regrade any automatically graded question, but this should be done only after all students have finished taking the quiz. When you regrade a question for one student, the change will be applied to all students who received that question.
For courses using Blueprint templates, the regrade will need to be applied in each section/child site, as regrades cannot be applied from the template.
If you are regrading a question contained in an Item Bank, consider editing the question in the bank after regrading in Speedgrader so that the future iterations of the quiz will have the updated version.
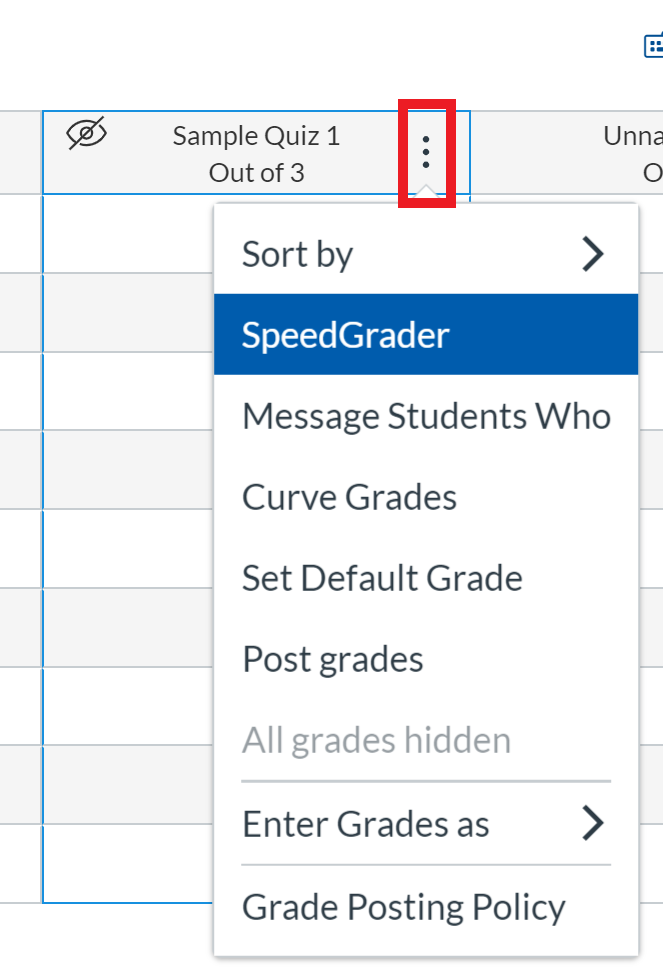
1. To regrade a question, open the Build tab of the quiz, click on the Moderate tab, and select SpeedGrader. Alternatively, you can open SpeedGrader by clicking the 3-dot options menu to the right of the quiz name from the Quizzes page or through the Gradebook.

2. From any student's submission, navigate to the question you need to regrade and click Regrade.
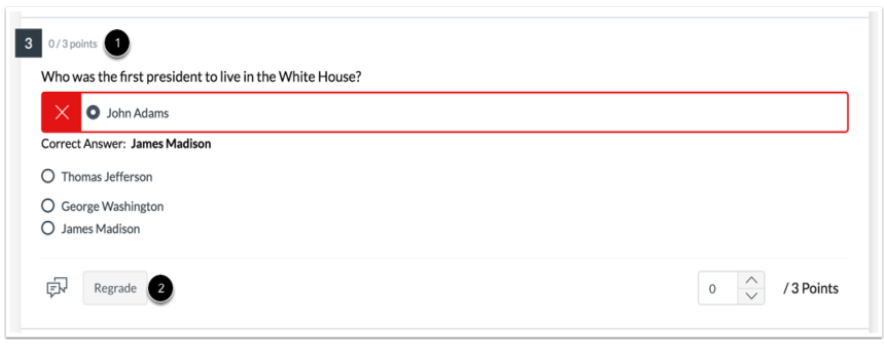
3. You can change the correct answer, add another accepted answer (for numeric and multiple answer questions), and/or change the point value. Click Regrade.
4. Select an option for awarding full points.
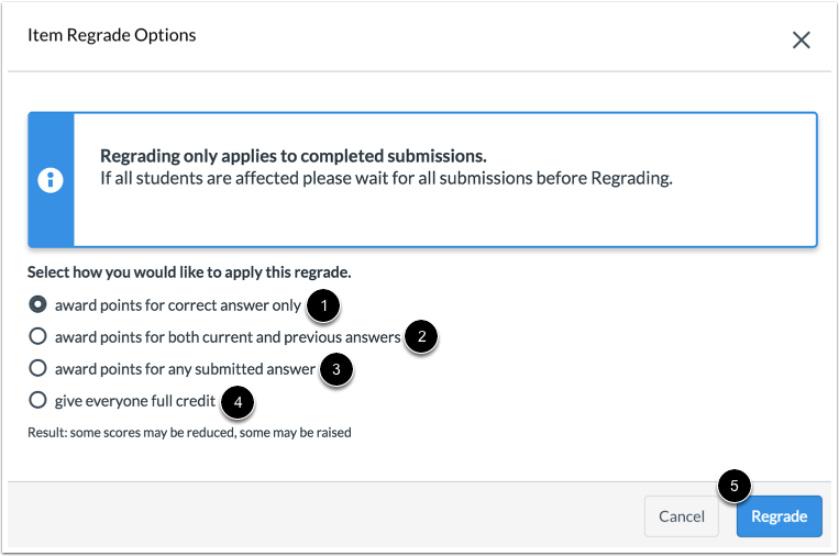
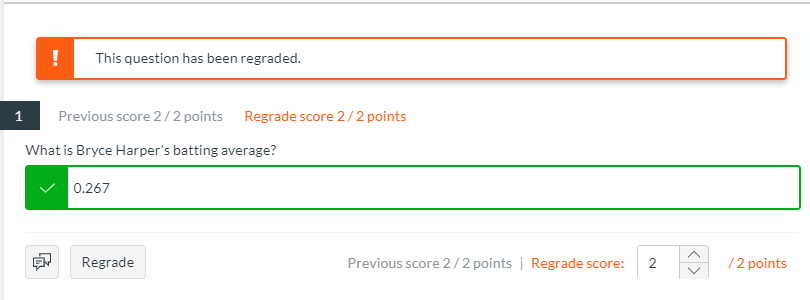
5. Click Regrade again to save your changes. (You may need to refresh the page to see the change.) A message will appear with each question that you regraded. After regrading, you can also open Grades > Gradebook > Gradebook History to see the before/after comparison of scores.
Releasing Scores
When you are ready for students to see their submissions and the correct answers, you should:
1. Open the quiz, scroll down and click Build to access the New Quizzes quiz builder. In the Settings tab, toggle off Restrict student result view.
2. Open the Gradebook, and to the right of the column with the quiz name, click the Options menu to post grades.
Note: Students will only ever see their own scores when grades are posted. They cannot see their classmates' grades.
Enabling Additional Attempts for Students
Occasionally you may want to give a student another attempt at a quiz. Here's how:
- Make sure that the course site is active and not read-only. (If a site is from a previous term, it is likely read-only.)
- Make sure that availability dates allow the student to get to the quiz. If not, open a new availability window for the specific students you want to take the quiz.
- If the quiz allows only one attempt, moderate the quiz to permit the student an additional attempt.
Questions?
Email: courseware@wharton.upenn.edu


