This article describes how to create appointment sign-ups for the faculty-student meals program, office hours, and group presentations.
Before you start, the following information is needed for creating sign-ups:
- Name
- Location
- Calendar for Course
- Have/not have students sign up in groups
- Dates
- Start and End times per slot
- The user limit for each time slot
- Allow/not allow students to see who has signed up for time slots
- The limit for participants to attend appointments
- Any additional details and notes
Creating sign-ups
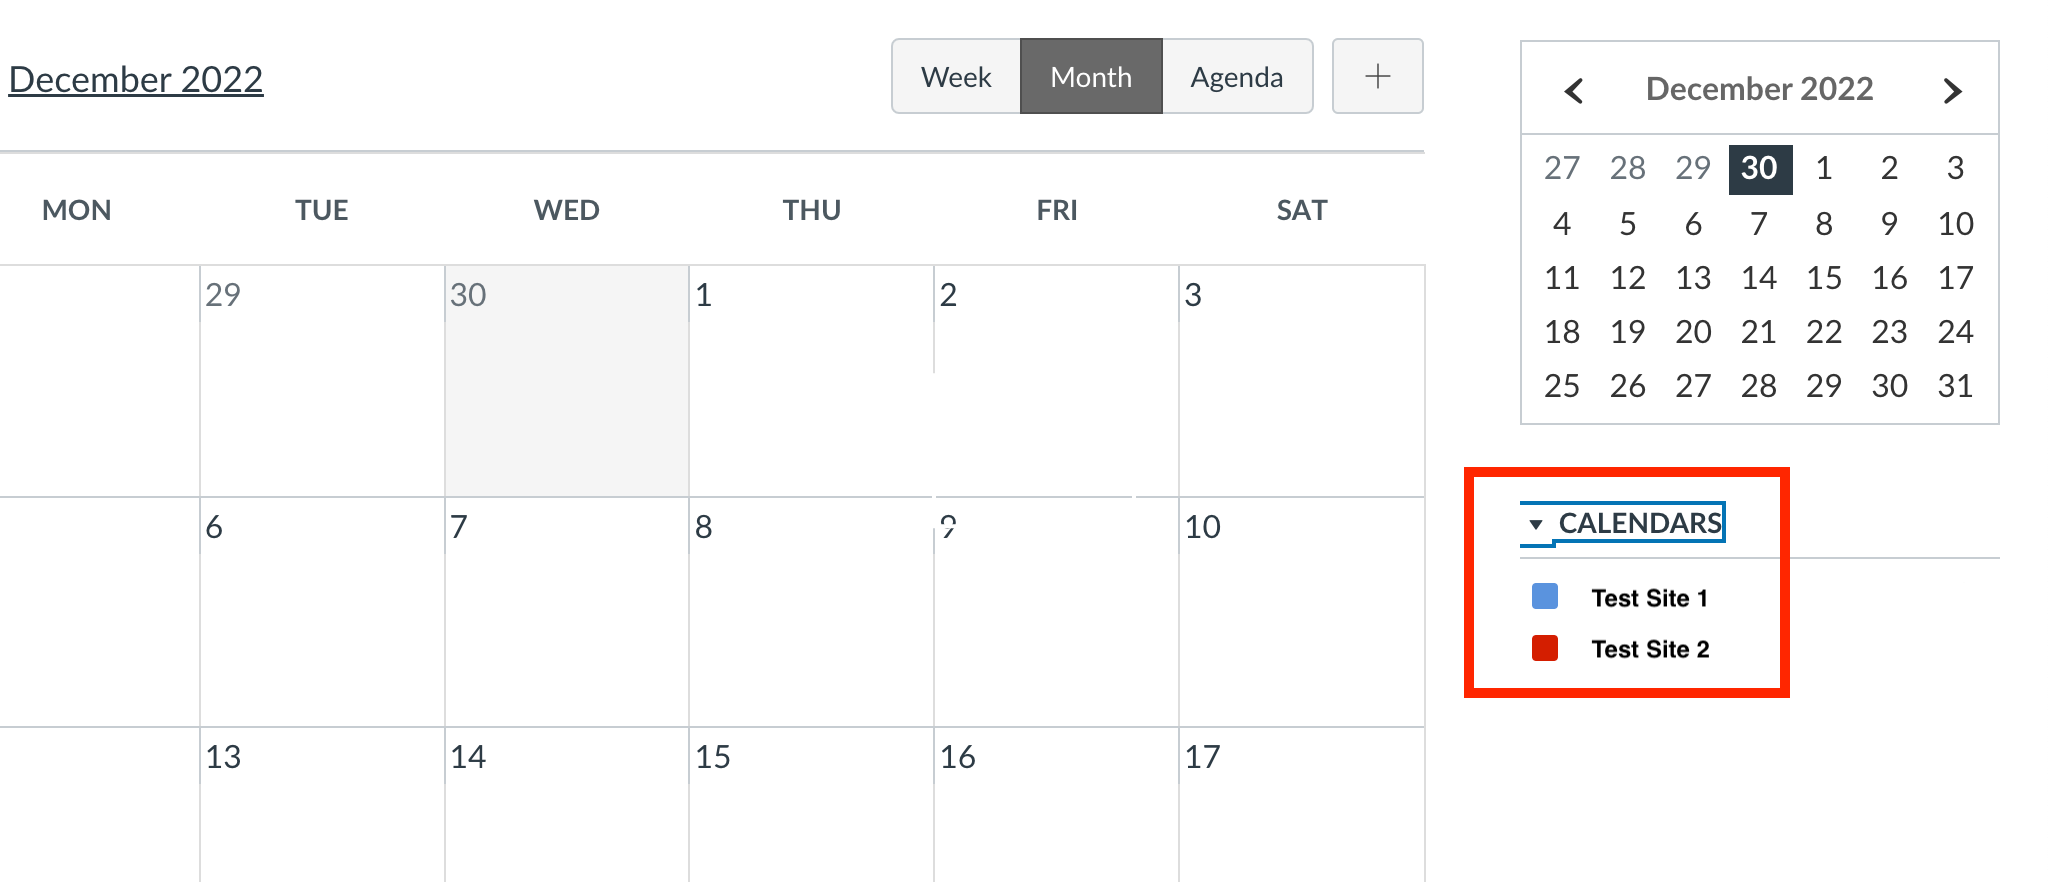
Go to Calendar in Global Navigation pane

- Select the correct course calendar on the right side of the screen. The correct calendar needs to be selected, in order to see the option when creating an appointment group in the next step.
- Select the + button in the upper right or click on a date.
- In the Edit Event pop-up window, select Appointment Group
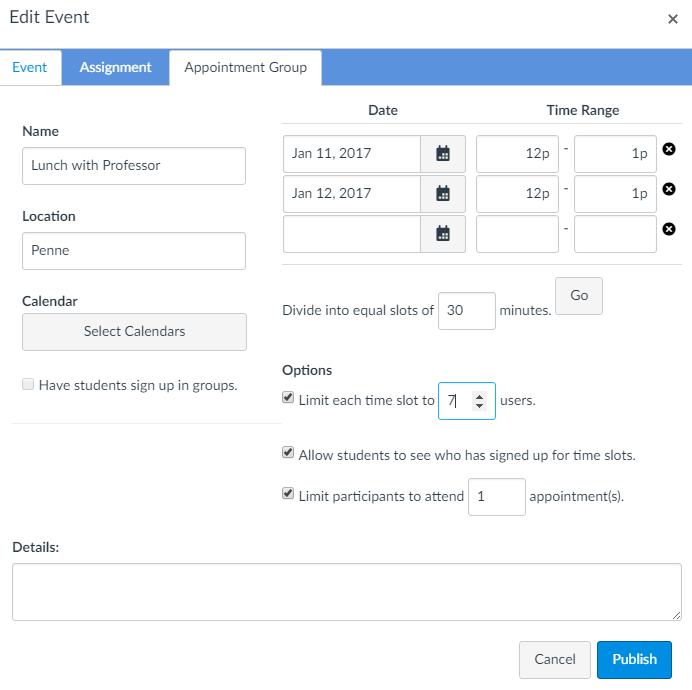
- Every appointment group needs a descriptive name.
- The location can be either a physical place or a virtual one, such as a Zoom meeting link.
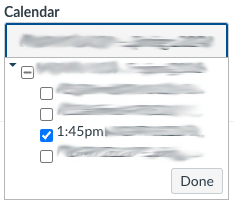
- Use Select Calendars to choose which course(s) for which this appointment group is available. You can limit appointments to certain sections, by expanding the calendar tree and checking off the sections you want to include. (You cannot section-limit group appointments.)
- For group-based appointments, check Have students sign up in groups. If you have more than one set of groups, select the correct group set from the Group Category dropdown that will appear after you check Have students sign up in groups.
- Enter the date and start/end time of each appointment in Date and Time Range boxes . Remove any unwanted slots by pressing X next to the slot you want to remove.
- Divide will allow you to quickly create consecutive appointments within a single time range. After you fill in the date and overall time range, add the desired length of each appointment into into equal slots of ___ minutes. Press Go , and the time range will be split accordingly into separate consecutive appointments.
- Example: If you set an appointment from 9am to 12pm, then divide into equal slots of 30 minutes, Canvas will produce six slots, starting respectively at 9am, 9;30am, 10am, and so forth.

Please check carefully before pressing Publish, because published sign-ups are difficult to change, and because students are notified about them, and can begin using them, right away. You can add a note in the details about the change and message your students.
Adding more time slots or changing settings
You can continue to use a previously-created appointment group, adding additional time slots. Here's how:
- Go to Calendar in the left navigation bar.
- Click an existing time slot.
- In the Edit Event pop-up window, select Group Details.
- Use the Date and Time Range boxes to add the date, start time and end time of any new appointment(s).
- Change the Location or Details to fill in or update the meeting location, Zoom link, or other overall instructions students should see for any time slot.
- Press Save. (Students will be notified of the newly available time slots, based on their notification preferences.)
Viewing, editing or canceling an appointment
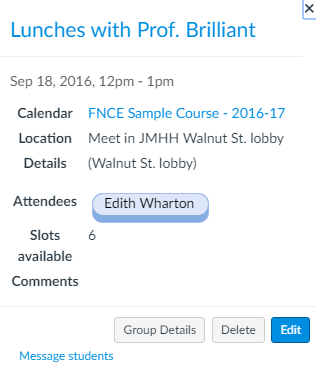
In Calendar, you'll see available appointments as well as the name of students who are already signed up. To edit or delete an appointment, click on an available appointment.
- To cancel this appointment, click Delete. Any attendees listed will be notified and may reserve other available appointments.
- To remove an individual attendee, click the X next to that attendee's name.
- To change the maximum number of students who may reserve an appointment, or to add miscellaneous details, click Edit, make the changes, and then press Update.
- Or to change overall Location, Details, or default maximum, click Group Details. The Group Details page will also provide a summary of signups across all appointments, at the bottom of the page.
Sending a message to signed-up students
To send an Inbox message to users who have signed up for the appointment, click Message Students:
How students can find sign-ups
Here are instructions you can provide students on finding these sign-ups:
- Go to Calendar
- Scroll down the page, press Find Appointment on the far right
- Select from the drop-down list the course to which the appointment belongs and press submit
- Click on the preferred date and in the window that appears select reserve
Students are notified of new appointment groups, and of changes to existing groups, according to their notification preferences.
Reminding students to sign up
Send a message through Canvas to remind students to sign up for an appointment.
- Go to Calendar in the left navigation bar.
- Click an existing time slot.
- In the Edit Event pop-up window, click Group Details.
- Scroll down to locate Message Students.
- A pop-up window will appear with a list of Users who haven't signed up. You can type and Send an Inbox message to them, or you can optionally use the provided drop-down to choose Users who have already signed up or All users. (meaning both those students who have signed up, and those who have not).
Recommended settings
These settings are recommended when creating sign-ups.
- Always use Limit each time slot to ___ users to keep the appointment at the desired maximum attendance.
- Unless the appointments are sensitive (e.g., office hours), it's better to check Allow students to see who has signed up for time slots. (That setting's especially significant for meals signups.)
- Always choose Limit participants to attend ___ appointment(s), normally 1 to ensure each student reserves only a single time slot.
- Use Details to include additional information, e.g.: If fewer than 3 students sign up, the appointment will not take place.
Group appointments
When you use group appointments, only one student per group needs select a time slot for that group. This feature works only if groups, populated with students, already exist on the Canvas page.
- Because groups are open to all members of a course site, you cannot share group appointments across separate Canvas course calendars, or limit them to certain sections.
- Once a group sign-up is published, it cannot later be converted to an individual sign-up, and vice versa.
- Students who have not signed up for a group cannot see team-based appointments.
Note: The calendar shows information based on your currently specified time zone; if appointments are elsewhere, switch your time zone in Settings while making the sign up, then switch back when you are finished.
Students can not manually be entered into a slot.
Questions?
Email: courseware@wharton.upenn.edu