There are two ways to print from a mobile device or laptop:
- Using the PaperCut Portal, which allows you to upload and print documents from your computer, laptop, or mobile device to a Wharton printer via a supported web browser (recent versions of Chrome, Safari, Firefox and Edge).
- Note: The PaperCut Portal is only available from on-campus locations.
- Using Email Printing, which allows you to attach a document to an email for printing. Send that email to the proper address, and then release the document at any of Wharton's printers.
Before You Start
You will need the following before you can complete this task:
- Internet access.
- Your PennKey username (the username before the "@" in your Wharton email address).
- An active PennCard.
- A Wharton printing account with sufficient funds.
PaperCut Portal
PaperCut is the software that runs our printing system. Their "portal" is the place where you can manage your printing needs.
Logging into the PaperCut Portal
You must use your PennKey credentials to log into the PaperCut Portal.
- Go to whr.tn/print in a supported browser (recent versions of Chrome, Safari, Firefox and Edge).
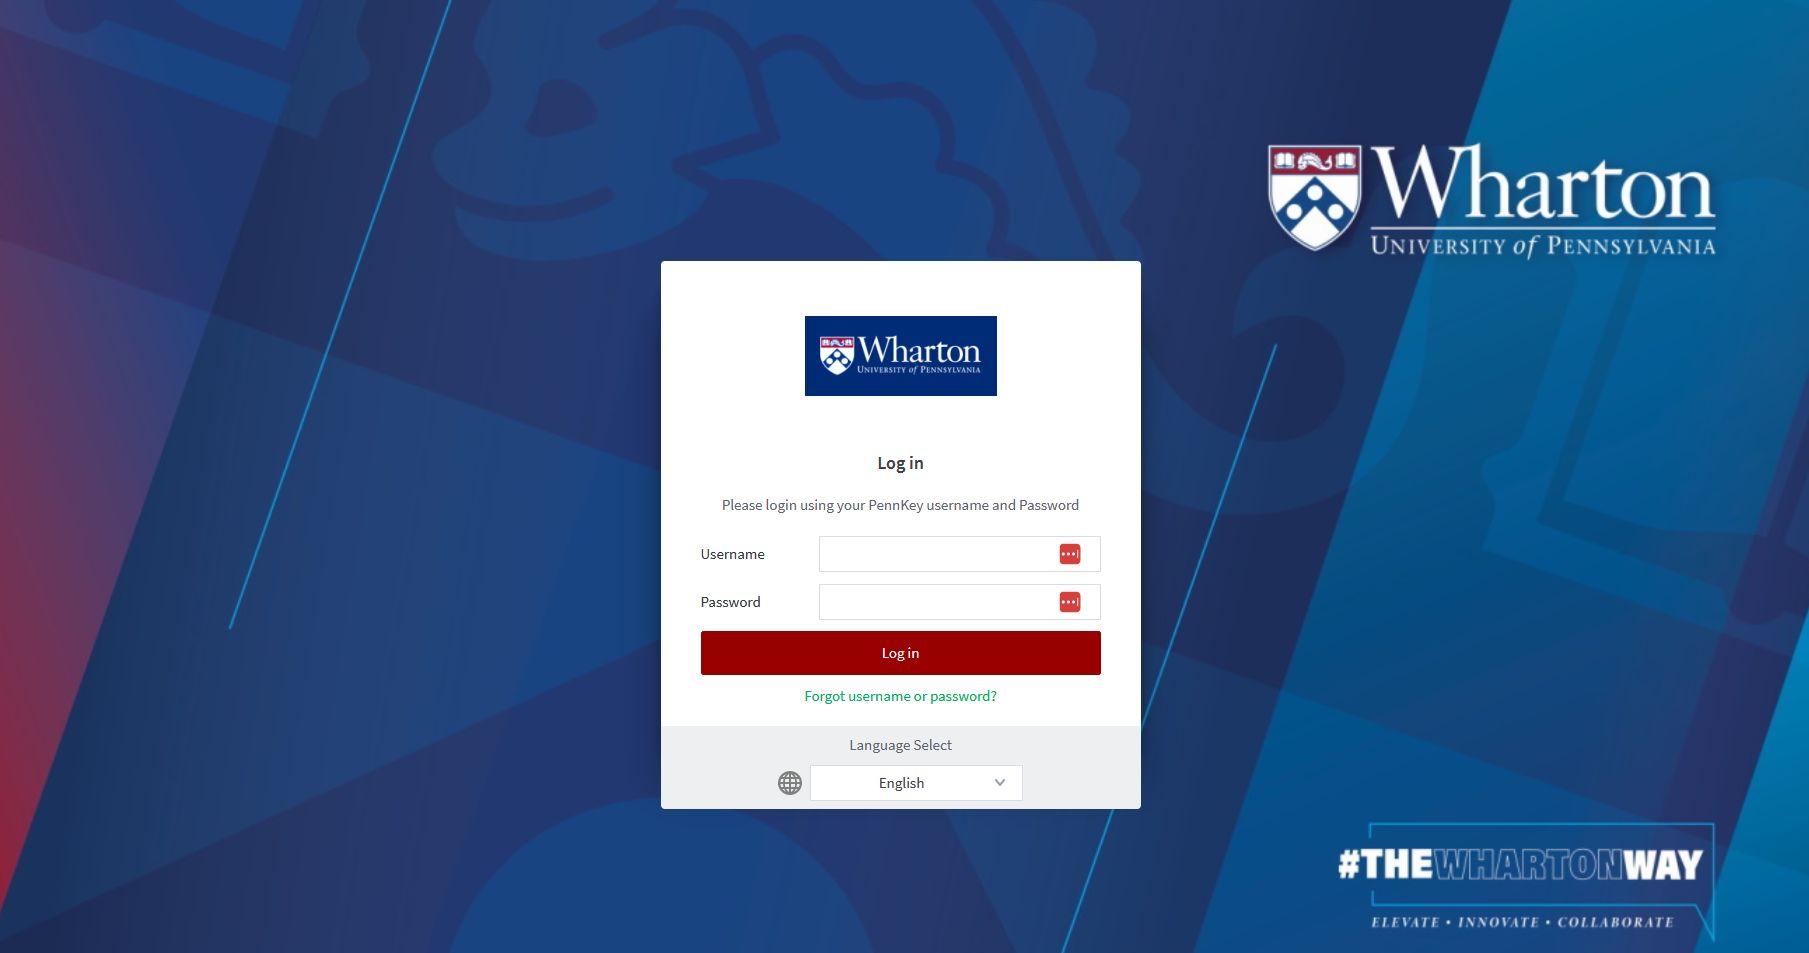 Login Screen for PaperCut Portal
 - Enter your PennKey Username and Password.
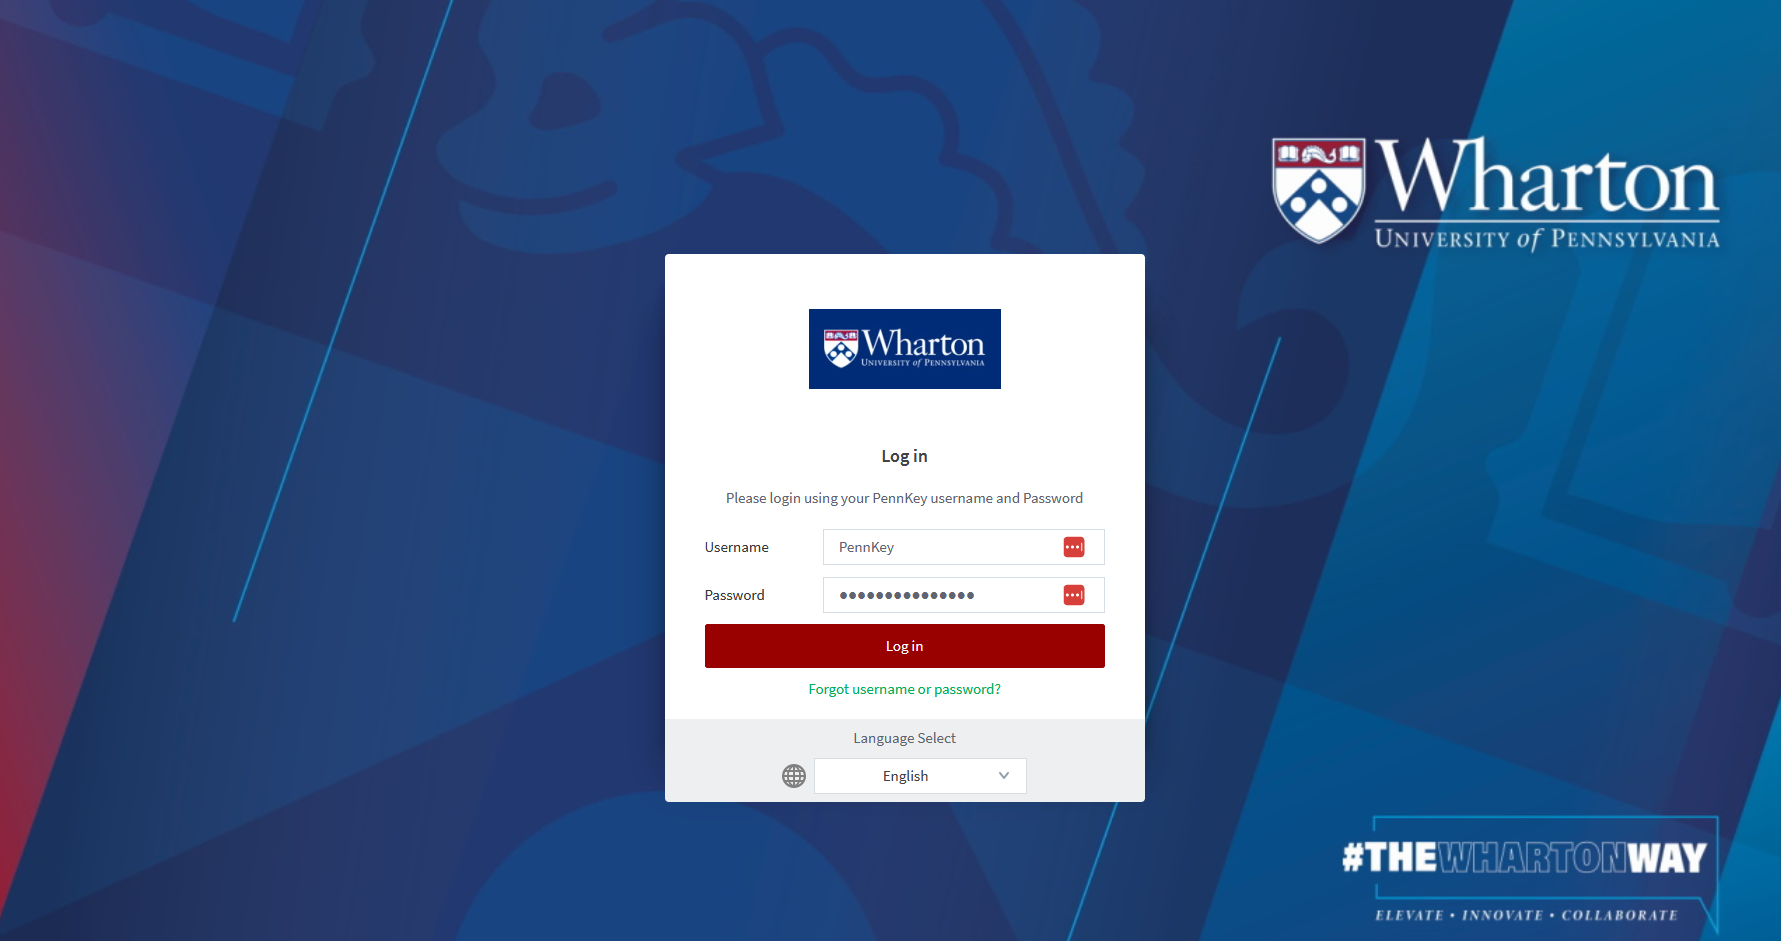
- Click Log In.
- Once logged in you will see information on your account including:
- Your account balance.
- Your print documents and pages activity over time.
- The environmental impact associated with your printing activity.
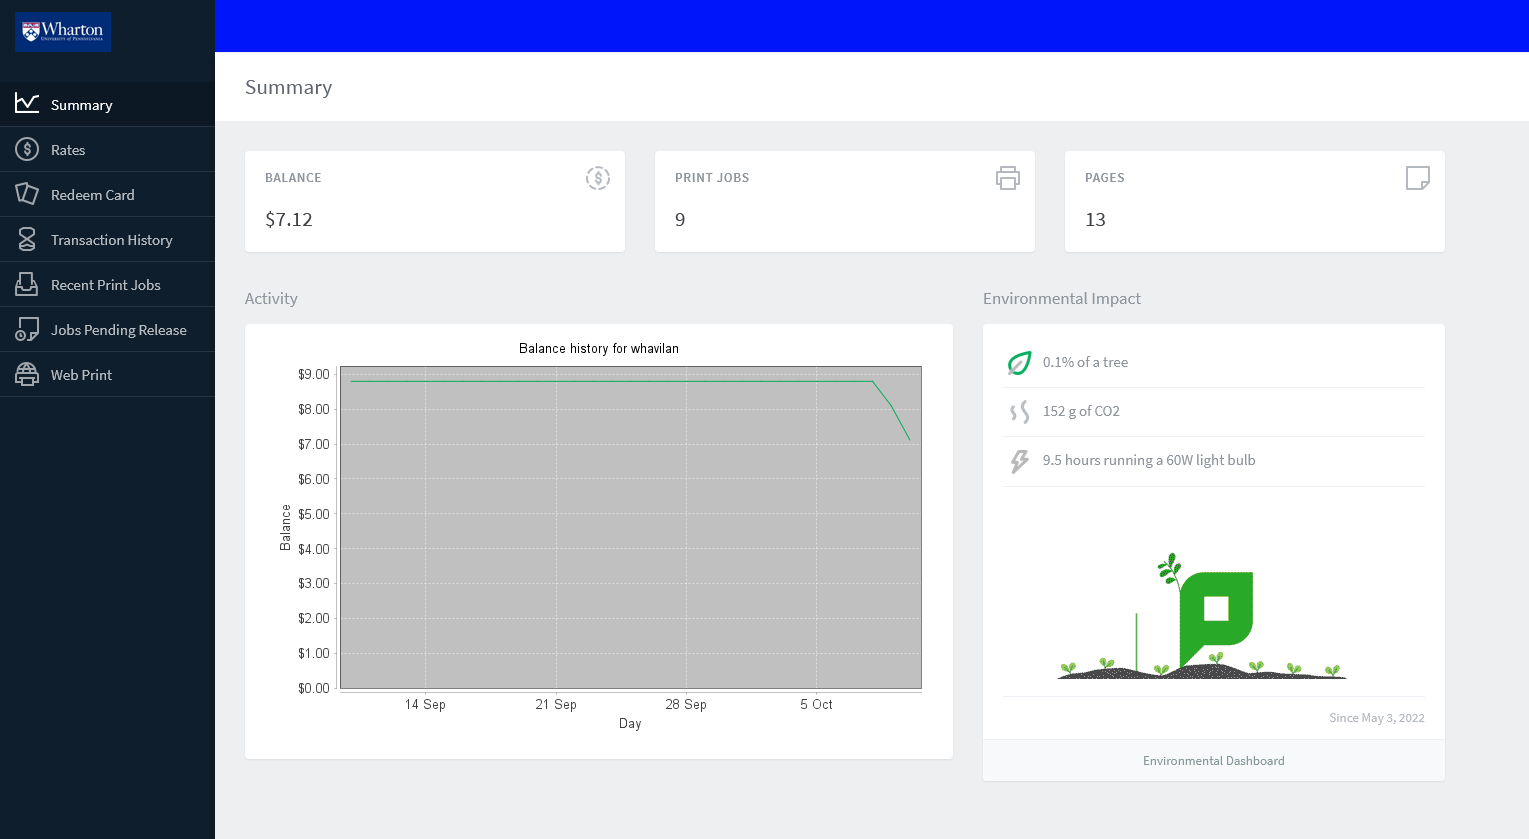 Print Management Dashboard
View additional details on rates associated with different devices, check your own transaction history, and view recent and pending print jobs.
Upload jobs for release via Web Print using the menu on the left.


Printing using the PaperCut Portal
To print a file, you'll first need to upload it to PaperCut:
- Log in to whr.tn/print as described above.
Select Web Print from the menu on the left.
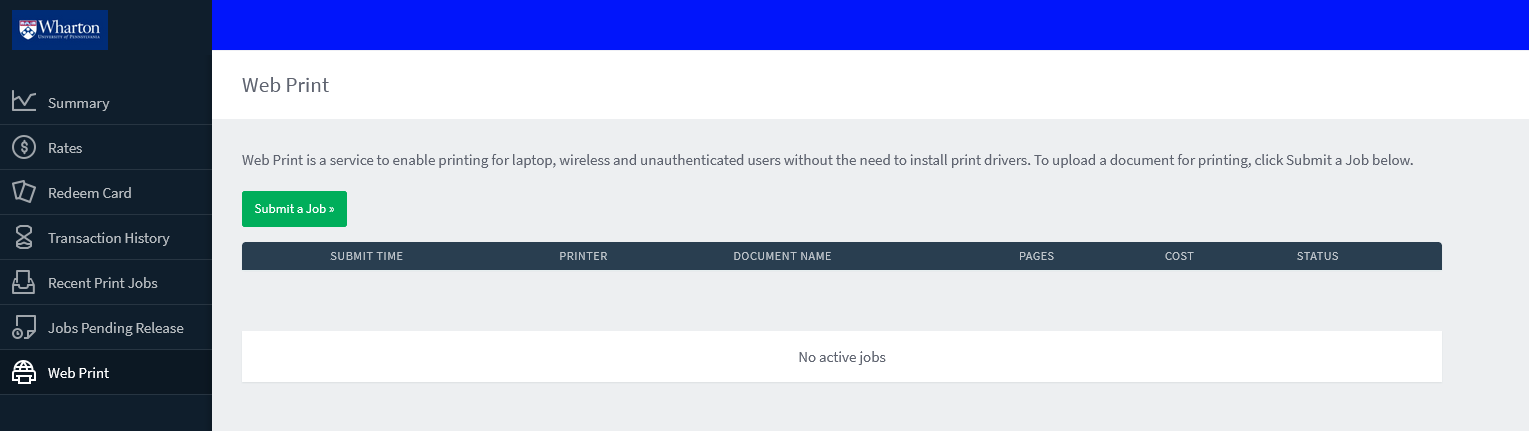
Click Submit a Job.
Click Upload Documents.
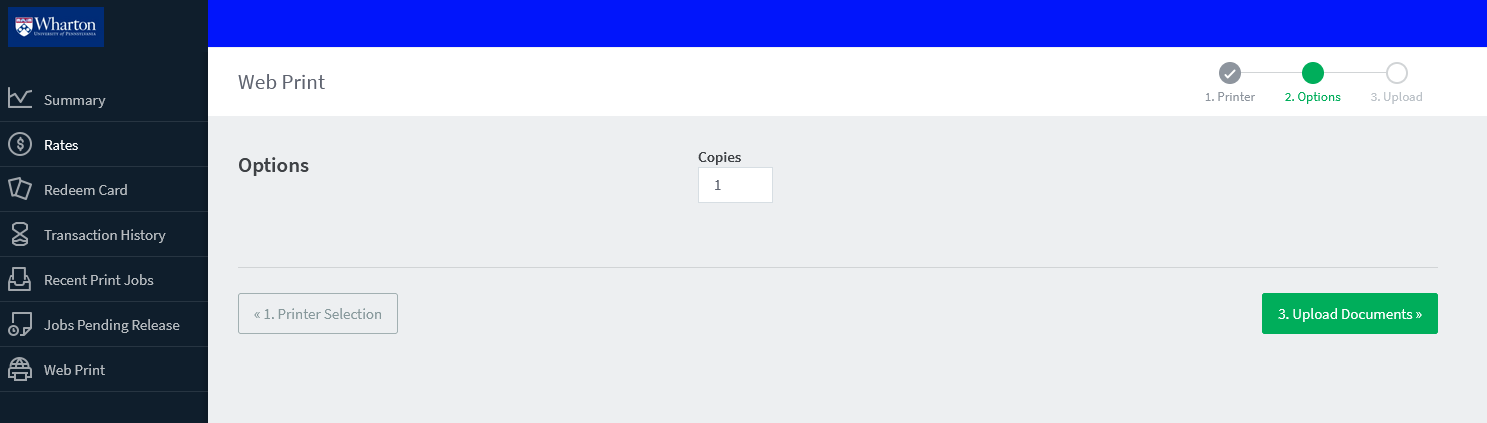
Drag and drop any files you wish to add to the queue into the field provided or click Upload from Computer and select your file(s).
Once all desired files are added, click Upload & Complete.
While the file is uploaded to the queue and rendered, please remain logged in while the document is processed:
 Document being processed
- When the document status shows as Held in queue it will be available to print from a PaperCut device:
 Status of Held in a queue: Ready to Print
 Once your documents have been uploaded and are in the queue, please remember to log out.
- Find the printer where you'd like to print, log in, and release your documents.


Email Printing
There are several stages to printing a document when you send it to print via Email.
Preparing your Document
| Printing a Document
| Color & Duplex Settings
You can adjust Color and Duplex settings either
|


1You must receive this email before going to the printer. The larger the attachment, the longer it will take to render and become available to print.
2The response will include a link you can use to log in (using your PennKey credentials) and view the job details. You can also use the PaperCut Portal to review the details about your job. You do not need to open the link to release the job. Once the email has been received the job should be available in your queue for printing.
Managing your Print Jobs
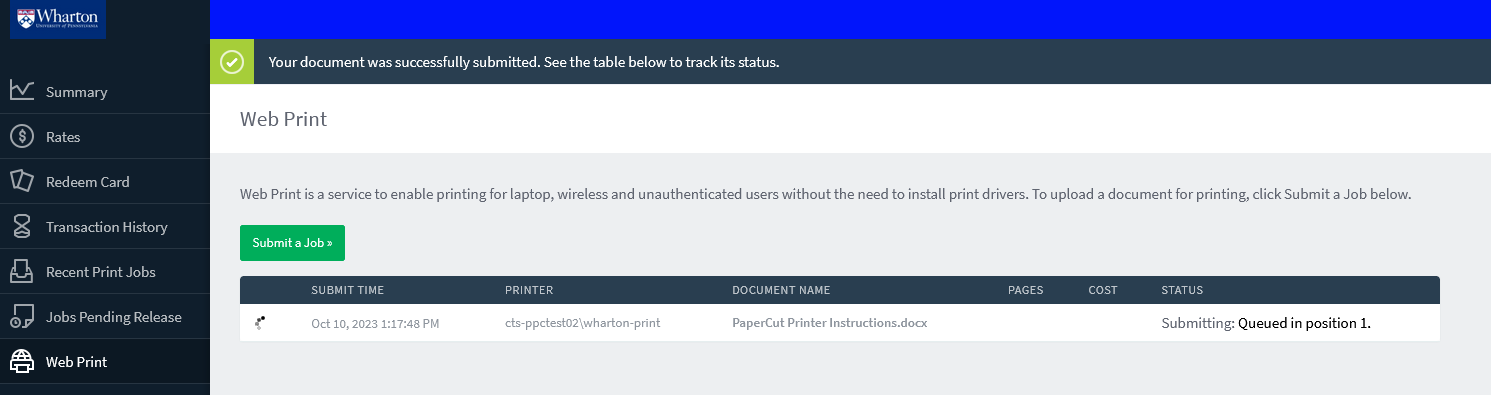
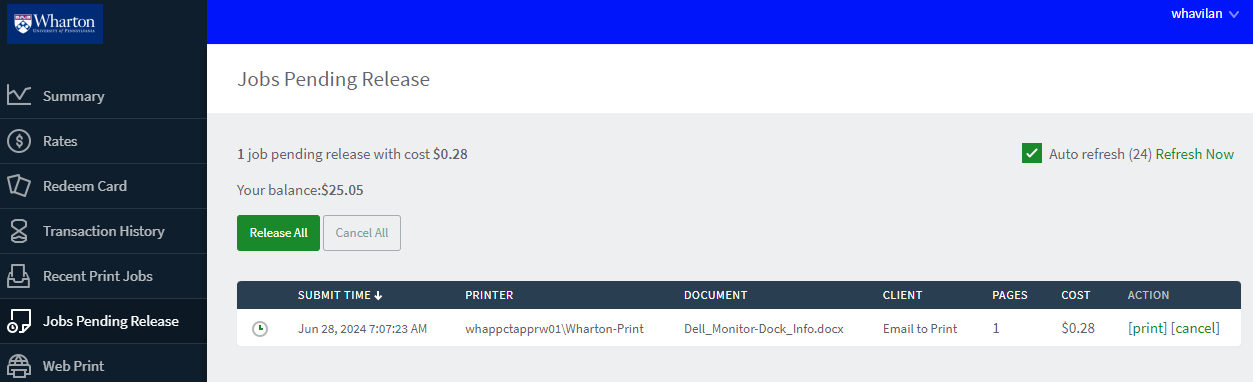
The PaperCut Portal Jobs Pending Release list is your hub for reviewing your print jobs, including those sent via Email Printing. This screen lists all of your pending print jobs (if you don't have any pending jobs, the list will be empty). You can follow the directions above to upload a file to print. In the screenshot below, there is one document that is pending.
 Screen with One Print Job Waiting
Each job will show as a separate line item record; each record will have the following details:
- Submit Time shows the date and time the job was submitted (remember that jobs only remain in the queue for up to 5 hours, after which they are removed).
- Printer is the printer queue to which the job was submitted.
- Document is the document name, including the file type extension (PDF, DOCX, etc.).
- Client is the source from which PaperCut received the print job (Email to Print, Web Print, or a network connection).
- Pages is the number of pages in the document.
- Cost is the price of your print job with the selected Print Options. This cost is deducted from your Print Balance after it has been released at a printer (i.e., you'll only pay for jobs you've successfully printed).
There is also the option to cancel (delete) any or all print jobs held in your queue. (The "print" action can be ignored, as this is handled by releasing a job at the printer.)
Your account balance is also visible on this screen. If you need to add funds, follow these directions.
Questions?
Student Tech Center Support is available via in-person (walk-ins & appointments), phone, chat, and email! Check our KnowledgeBase for list of services, troubleshooting guides, and much more. Contact Us |